 League of Legends
 Teamfight Tactics
 Valorant
 Lost Ark
 Destiny 2
 Diablo 4
 Download APP
Arataki Itto Guide
In this article, I’ll be going over everything you need to know about Arataki Itto, including their playstyle, best artifacts, weapons, teams, and more.
Arataki Itto is a limited 5 star Geo claymore user, who boasts respectable damage within his teams despite having access to no reactions, along with a fairly straightforward playstyle that extracts value at a low barrier of entry.
Active Talents
Normal Attack – Fight Club Legend
Performs 4 strikes with unique properties behind his combos/scalings. Apart from his Standard Normal Attacks, Itto has a special charged attack that allows him to perform consecutive slashes [Arataki Kesagiri] without consuming stamina, provided Itto consumes a stack of Superlative Superstrength. An important thing to note is that when performing Itto’s Normal Attack combo, dodging or using his Elemental Skill does NOT reset his combo, which is a nice addition to his combo execution.
Superlative Superstength: Stacks which are unique to Itto that contribute to performing his Normal Attack combos. When a 2nd hit of your string hits opponents, Itto will gain 1 stack of Superlative Superstrength, and then 2 stacks on the 4th hit. Stack management is very relevant when it comes to Itto’s DMG output and will be covered in the Combos section.
Elemental Skill – Masatsu Zetsugi: Akaushi Burst!
Throws a bull called Ushi in front of him, dealing Geo DMG on hit as well as giving Itto 1 stack of Superlative Superstrength. On-field, Ushi taunts nearby enemies and will give Itto an additional stack of SS when Ushi takes DMG. This skill can be pressed or held, with Ushi also being considered a Geo construct.
Elemental Burst – Royal Descent: Behold, Itto the Evil!
The talent that enables Itto to function as a Geo carry. Upon cast, Itto enters a state that converts his Normal/Charge Attacks to Geo DMG that cannot be overridden. Additionally, his Normal Attack SPD is increased and gains an ATK Bonus based on his DEF.
Character Talent Priority
Here’s a quick talent priority for Arataki Itto.
Normal Attack > Elemental Burst > Elemental Skill
Simply put, the multipliers on his combo slashes/finishers scale with his Normal Attack talent, NOT his burst. Burst talent levels only affect the DEF to ATK conversion. Given that the majority of Itto’s DMG contribution is with his combos, his Normal Attacks should not be neglected whatsoever.
Character Best Combos
Itto combos while in his burst state are quite varied. On one hand you can choose to prestack his Superlative Superstrength stacks in order to maximize his DMG or you can simply opt not to for ease of performance. On top of Itto’s initial rotation, there are also combos to incorporate from the second rotation onwards, in which you are able to get 1-2 prestacks for his maximum DMG, with the tradeoff being harder to pull off. That being said, here are combos for each level of prestacks [0-2].
Notation:
- E – Skill
- Q – Burst
- N – Normal Attack
- # – Number of Attacks
- C – Charge Attack/ Combo Slash
- F – Finisher / Final Slash
Standard Combo 0 prestacks [any rotation/easiest]:
Itto Q, N1, E, N2, C3F, N4, C4F, E, F
1 prestack Combo [1st/2nd rotation onwards]:
Itto N1Q, N1, E, C4F, N4, C4F, E, F
2 prestack Combo [only possible from 2nd rotation onwards/hardest]:
Itto N1Q, N1, E, C3F, N3, E, C3F
These combos are by no means the end-all be-all and you can even improvise depending on the situation. Maybe Ushi gets hit a couple of times or you preemptively consume stacks, whatever the case may be. The main takeaway from his combos are prioritizing Kesagiri slash execution before performing finishers and getting 2 E casts per burst.
Passive Talents
Ascension Stat
As you ascend Arataki Itto, he will gain Crit Rate.
1st Ascension
Arataki Ichiban: When Arataki Itto uses consecutive Arataki Kesagiri, he obtains the following effects:
- Each slash increases the ATK SPD of the next slash by 10%. Max ATK SPD increase is 30%.
- Increases his resistance to interruption.
- These effects will be cleared once he stops performing consecutive slashes.
A nice addition to Itto’s playstyle, giving him ATK SPD with each consecutive Kesagiri Slash, along with resistance to interruption which ensures his DMG output. Note that In order to maximize the ATK SPD buff, you must have max Superlative Superstrength stacks before performing your Kesagiri slashes.
4th Ascension
Bloodline of the Crimson Oni: Arataki Kesagiri DMG is increased by 35% of Arataki Itto’s DEF.
Straightforward DMG increase towards Itto’s Charged Slashes, further incentivizing DEF stats on him.
Utility Passive
Woodchuck Chucked: When a party member uses attacks to obtain wood from a tree, they have a 25% chance to obtain an additional log of wood.
Constellations
As always for constellations, every 5 star unit is completely functional at c0. Constellations in general and what they offer are far from needed. Itto’s constellations – along with other 5 stars – usually translate to unnecessary increases in damage/ clear time or quality of life aspects.
Do keep in mind constellation value takes into account the value you lose going for another copy of the character rather than a completely different character that could impact your account far more than a constellation would.
- C1: Low/ Medium Impact
- C2: Low Impact
- C3: Low Impact
- C4: Low/ Medium Impact
- C5: Low/ Medium Impact
- C6: Medium Impact
Constellation 1: Stay a While and Listen Up
After using Royal Descent: Behold, Itto the Evil!, Arataki Itto gains 2 stacks of Superlative Superstrength. After 1s, Itto will gain 1 stack of Superlative Superstrength every 0.5s for 1.5s.
Essentially, this constellation allows for more combo slashes earlier in your combo due to the stacks you gain. Depending on the buffs available in your team, Itto’s slashes can take advantage of buffs that would usually run out by the time he gets to his combo slashes. Not a major constellation but not particularly bad either.
Constellation 2: Gather ‘Round, It’s a Brawl!
After using Royal Descent: Behold, Itto the Evil!, each party member whose Element is Geo will decrease that skill’s CD by 1.5s and restore 6 Energy to Arataki Itto.
CD can be decreased by up to 4.5s in this manner. Max 18 Energy can be restored in this manner.
A quality of life constellation overall with the most relevant part being the Energy restoration, which can lower ER requirements. The Burst CD decrease is pretty irrelevant, due to his CD already lining up within his rotations anyways.
Constellation 3: Horns Lowered, Coming Through
Increases the Level of Masatsu Zetsugi: Akaushi Burst! by 3.
Maximum upgrade level is 15.
A straightforward increase to his Elemental Skill DMG. Nothing much to be said here as Ushi’s damage isn’t a large portion of Itto’s DMG compared to his combos.
Constellation 4: Jailhouse Bread and Butter
When the Raging Oni King state caused by Royal Descent: Behold, Itto the Evil! ends, all nearby party members gain 20% DEF and 20% ATK for 10s.
While it provides a decent team wide buff, it’s important to note that this constellation is only relevant after your initial rotation, meaning that if you’re already one rotating content, this constellation loses value. That being said, it is a very relevant buff that Itto and his teammates generally appreciate.
Constellation 5: 10 Years of Hanamizaka Fame
Increases the Level of Royal Descent: Behold, Itto the Evil! by 3.
Maximum upgrade level is 15.
An increase to Itto’s Elemental Burst talent level which only affects the ATK bonus he gets. A sizable increase to his damage but straightforward nonetheless.
Constellation 6: Arataki Itto, Present!
Arataki Itto’s Charged Attacks deal +70% Crit DMG. Additionally, when he uses Arataki Kesagiri, he has a 50% chance to not consume stacks of Superlative Superstrength.
A strong constellation overall, however it’s largely RNG dependent. The +70% Crit DMG yo Itto’s Charged Attacks are nice, however the 50/50 chance to not consume his stacks are solely random and unreliable, making this constellation tricky to value. On one hand it can be a significant damage increase, on the other hand, quite literally nothing changes. Overall a significant increase in DMG with optimistic assumptions but there are glaring caveats.
Playstyle
Arataki Itto has a very straightforward playstyle while having a layer of depth to his kit regarding his combos [see combo section]. Overall, once his combos are comfortable to execute, his rotations don’t change much as long as he is played with Gorou.
While he is limited within his team archetypes [basically only mono Geo], the units within that team can be quite flexible in terms of slots [besides Gorou ALWAYS play Gorou please]. Itto teams typically don’t require units that are highly valued in other comps as well, making his teams a fine 2nd half team should you have access to it.
Artifacts
Husk of Opulent Dreams
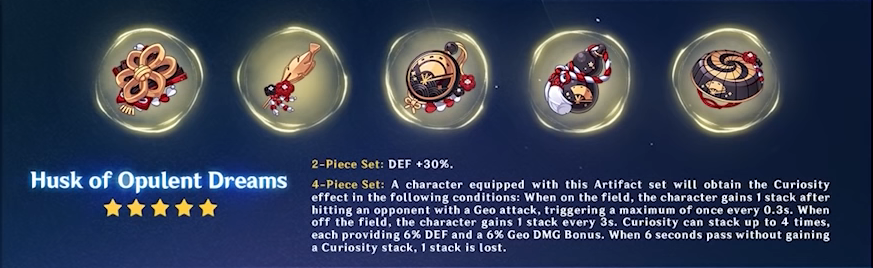
Easily Itto’s best-in-slot artifact set. Simply put, this set gives Itto the most beneficial stats, along with a passive that he can easily stack due to his field time. Every other set falls off significantly compared to this set, with most of them not even being resin efficient over the husk domain.
Main Stats
- Circlet: Crit Rate/DMG
- Sands: DEF%
- Goblet: Geo DMG
Sub Stats
Here’s the order of sub stats to prioritize:
- Energy Recharge [until requirement] = Crit Rate/DMG
- DEF%
Energy Recharge: 130-140%
Weapons
5-Star Weapons
These are the best 5-star weapons for Itto. Other 5-star options are usable, but these are the only ones that are recommended for him.
Redhorn Stonethresher
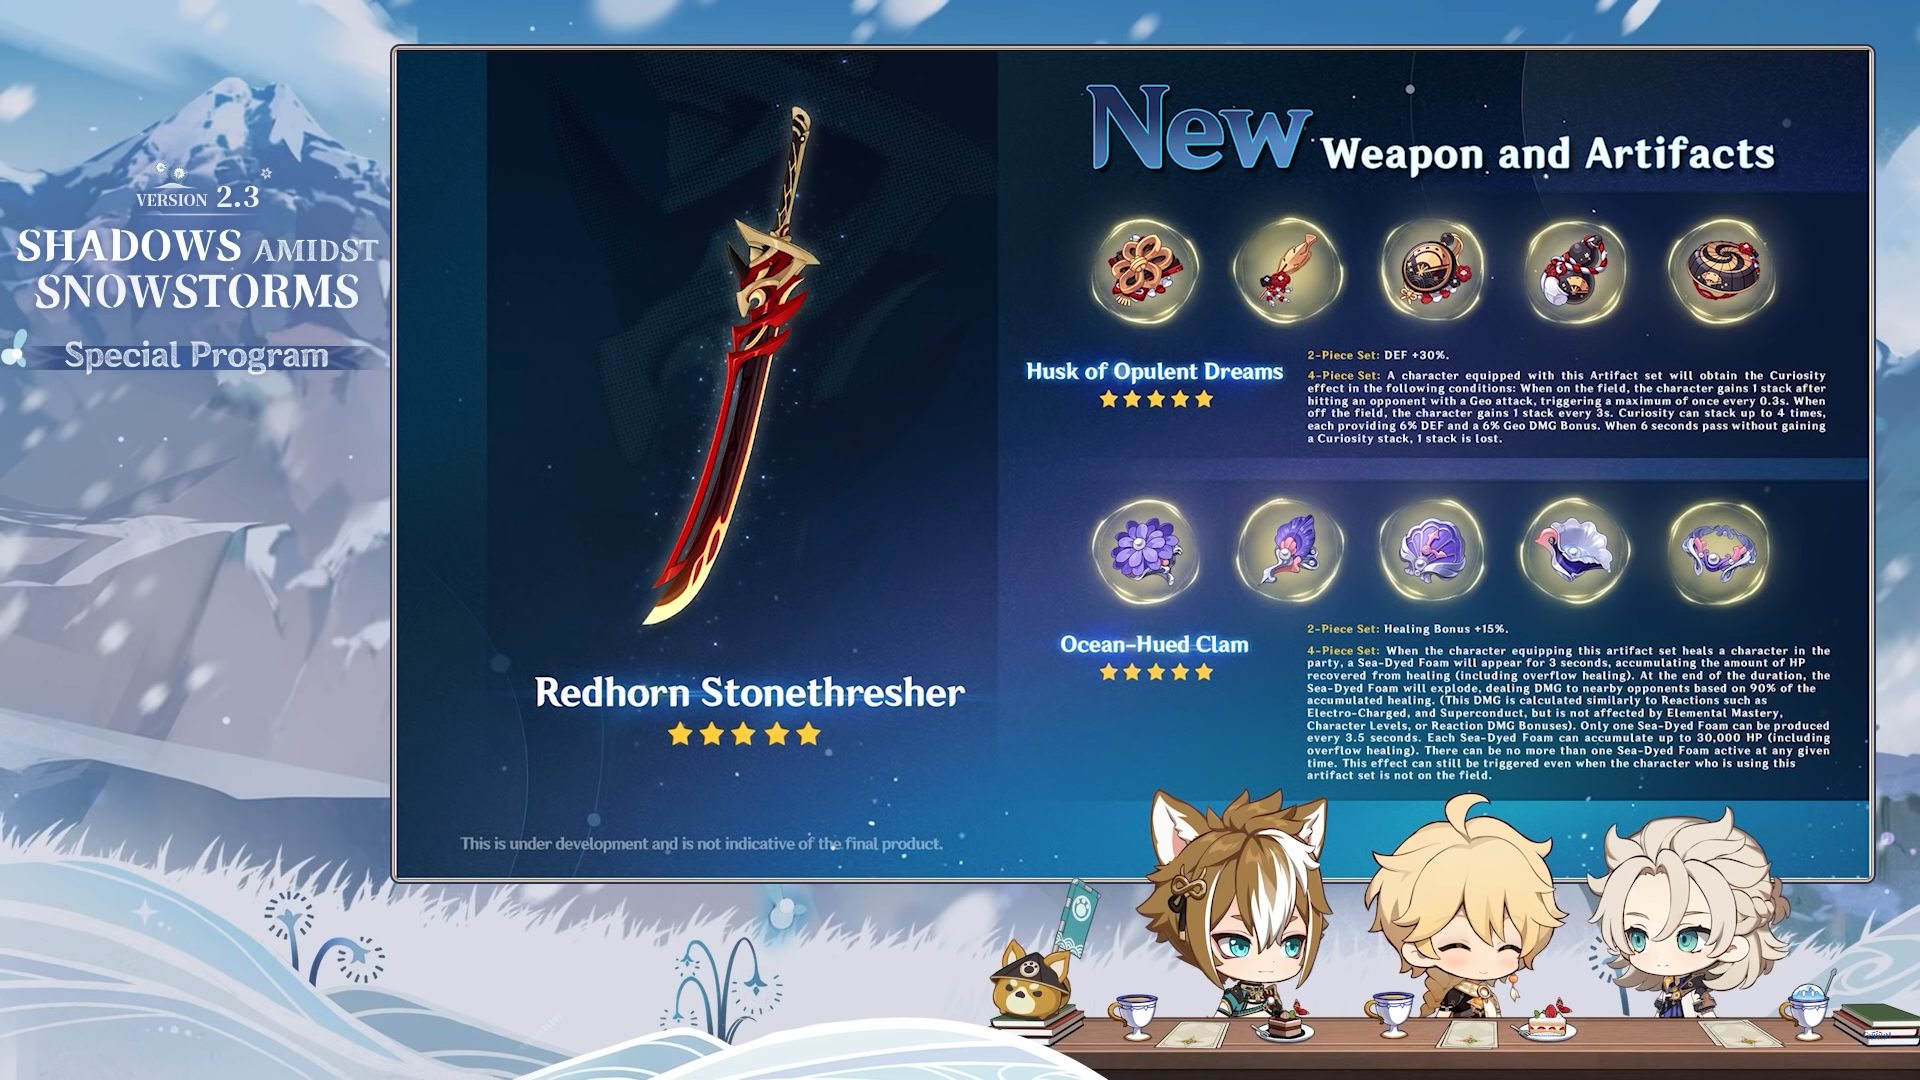
Itto’s signature weapon. This has a huge crit damage value, and a passive that is perfectly suited to Itto’s kit. Definitely use this on Itto if you have it, as it is undoubtedly his best weapon.
4-Star Weapons
Serpent Spine
A strong weapon for Itto and his second best weapon at R1, while being close to R1 Redhorn at R5. Not only does it offer a Crit Rate substat, the passive is fairly easy to fully stack in context of the Spiral Abyss.
As long as Itto is in your 1st slot, you are actually able to fully stack Serpent Spine before you start a chamber [see the stack indicators around your character]. That being said, it is generally recommended to have a shielder with this weapon regardless, in order to maintain the stacks.
Whiteblind
Itto’s go-to F2P option and his baseline weapon. The DEF substat is appreciable on Itto with the passive being much more relevant after your initial rotation.
This is because Itto’s Elemental Burst snapshots his DEF, meaning the subsequent stacks from this weapon post burst will not be converted during your 1st rotation.
That being said, prestack combos do allow for a prestack on this weapon as well. Overall, still a viable baseline weapon, being better or comparable at high refinements to other 5 stars such as Wolf’s Gravestone and The Unforged.
No real reason to stray away from this weapon when it is free, given that you don’t have Serpent Spine/ Redhorn.
Teams
Mono Geo

Itto’s go-to team composition which is usually composed of at least 3 Geo characters and a flex slot. Besides Itto, a mandatory character that occupies a Geo slot on this team would have to be Gorou, for how he greatly buffs Itto along with other Geo characters on the team that would appreciate his buff as well [Albedo].
Your optimal 3rd Geo slot would be Albedo for the off-field damage he provides and the difference he makes towards your team DMG, compared to when you don’t have him. Otherwise, Zhongli or Ningguang do just fine, both being objectively weaker but having supporting capabilities within their kit that synergize with this team.
The options for your flex slot are as flexible as your roster allows it to be, contextual to the content you are facing. It could be a fourth Geo character [not recommended in Abyss floors that require shield-breakers], or some sort of buffing/off-field character like Bennett, Mona, Fischl, etc. Usually you can draft your flex slot after drafting your first team, then assess the options you have available.
Example Rotation [Itto, Gorou, Albedo, Mona]:
Notation:
- E – Skill
- Q – Burst
- N – Normal Attack
- # – Number of Attacks
- C – Charge Attack/ Combo Slash
- F – Finisher / Final Slash
Gorou EQ > Albedo E > Mona EQ > Itto combo string [see combo section]
Summary
Arataki Itto has proven to be quite the balanced character with a respectable performance as a carry. While the teams that he fits in are limiting, he does provide some sort of value in not requiring high value units that can be utilized on the other side of Abyss.
A potential downside for Itto teams is having no access to reactions, making his damage nowhere near comparable to amp reaction/ chain reaction teams, meaning his value is quite low compared to 5 star enablers/supports/carries that are otherwise more impactful.
That being said, he offers a very simple playstyle that can be appealing to players, along with fine damage that is able to clear comfortably. As always, if you like the character and viability/meta does not affect your decision making, you are more than welcome to roll for them.