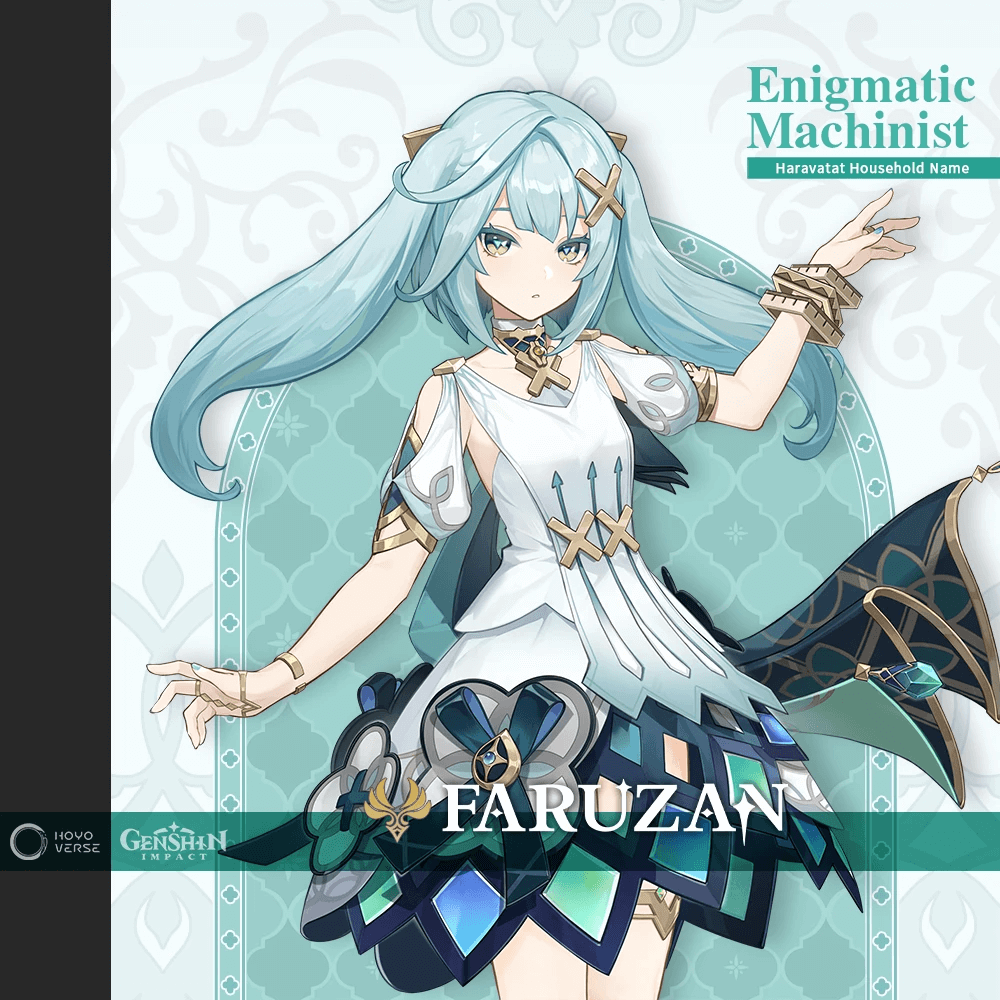
Faruzan Guide
In this article, I’ll be going over everything you need to know about Faruzan, including her playstyle, best artifacts, weapons, teams, and more.
Faruzan is the new 4 star Anemo bow user who functions as a dedicated Anemo buffer, providing Anemo RES shred throughout her kit in order to buff on-field Anemo carries.
Active Talents
Normal Attack – Parthain Shot
While her 4 hit combo is outright negligible for her playstyle, her Charge Shot will be incorporated in her playstyle. That being said, levels on this talent only increase her Charge Shot multiplier, which is insignificant in terms of damage contribution. The value of this Charge Shot mostly comes from its utility, which is made possible by her Elemental Skill and Ascension Passives.
Elemental Skill – Wind Realm of Nasamjnin
Upon cast, this talent deals an instance of AoE Anemo DMG and puts Faruzan in the Manifest Gale state. While in this state, her next fully charged shot will apply Pressurized Collapse and provide slight grouping capabilities on impact. It also provides Anemo RES shred provided her A1 passive is unlocked.
The cast itself does NOT generate particles but the Pressurized Collapse applied by the charged shot does, meaning that you must charge shot in order to gain particles. On top of that, this skill’s particle generation has a fixed cooldown of about 5s, meaning that consecutive charged shots from C1/Sac Bow will not generate particles during that window.
Elemental Burst – The Wind’s Secret Ways
Faruzan’s most relevant talent and one that her kit revolves around. Upon cast, she will apply a Whirlwind Pulse effect that deals initial AoE Anemo DMG and periodically provides nearby teammates with Anemo DMG Bonus and shredding opponent’s Anemo RES. This Whirlwind Pulse will move in a triangular pattern, with each corner applying the Whirlwind Pulse effect.
While this talent provides significant buffing, there are caveats nonetheless. Keep in mind it has a whopping 80 Energy cost, coupled with the fact that her particle generation is quite subpar, which shoots her ER requirements through the roof at times. On top of that, the nature of this Burst requires good placement in order for each Whirlwind Pulse to hit the opponent to apply the buff [especially in mobbing/AoE], making you somewhat reliant on enemy AI to cooperate.
Character Talent Priority
Here’s a quick talent priority for Faruzan.
Elemental Burst >>> Elemental Skill > Normal Attack
Talent levels on her Burst is highly prioritized in order to increase the DMG% buff it offers. Once her Burst reaches respectable levels, you can level the rest if you so please, however they are nowhere near as necessary as her Burst.
Character Best Combos
Faruzan doesn’t have many combos of her own, as she is mainly an off-field support character. Simply using her Burst and Skill during rotations should suffice.
Passive Talents
Ascension Stat
As you ascend Faruzan, she will gain ATK%.
1st Ascension: Impetus Flow
When Faruzan is in the Manifest Gale state created by Wind Realm of Nasamjnin, the amount of time taken to charge a shot is decreased by 60%, and she can apply The Wind’s Secret Ways’ Perfidious Wind’s Bale to opponents who are hit by the vortex created by Pressurized Collapse.
A nice addition to her kit allowing her to apply the RES shred from her Elemental Burst through her charged shot, on top of decreasing her charge shot time in order to apply pressurized collapse quicker.
A very solid quality of life addition that Faruzan takes advantage of due to her role as an Anemo buffer that wants as much buff uptime as possible.
4th Ascension: Lost Widsom of the Seven Caverns
When characters affected by The Wind’s Secret Ways’ Prayerful Wind’s Gift deal Anemo DMG using Normal, Charged, Plunging Attacks, Elemental Skills, or Elemental Bursts to opponents, they will gain the Hurricane Guard effect:
This DMG will be increased based on 32% of Faruzan’s Base ATK. 1 instance of Hurricane Guard can occur once every 0.8s. This DMG Bonus will be cleared after Prayerful Wind’s Benefit expires or after the effect is triggered once.
A fine passive that allows Anemo characters buffed by her Elemental Burst to deal extra damage on-hit, with the damage increase being based on Faruzan’s Base ATK.
While it might seem to incentivize giving her a high base ATK weapon, it is far from game changing and Energy heavy weapons are still much more preferred due to her Energy requirements and 80 cost Burst.
Utility Passive
Gains 25% more rewards when dispatched on a Sumeru Expedition for 20 hours.
Constellations
- C1: Low impact
- C2: Medium impact
- C3: Low impact
- C4: Low/ Medium impact
- C5: Low/Medium impact
- C6: High impact
Constellation 1: Truth by Any Means
Faruzan can fire off a maximum of 2 Hurricane Arrows using fully charged Aimed Shots while under a single Wind Realm of Nasamjnin effect.
While a second charged shot might seem nice, the second charge shot will not generate particles due to the fixed cooldown, meaning that it only generates energy if you miss your first shot. On top of that, utilizing the second charge shot will increase her field time, leading to a DPS loss at times. Mostly a quality of life constellation rather than a notable one.
Constellation 2: Overzealous Intellect
The duration of the Dazzling Polyhedron created by The Wind’s Secret Ways is increased by 6s.
A constellation that provides an extension to her buffing capabilities, giving her burst duration an additional 6s. Overall a solid constellation in general, with certain Anemo carries that take up significant field time appreciating this constellation much more.
Constellation 3: Spirit-Orchard Stroll
Increases the Level of Wind Realm of Nasamjnin by 3.
Maximum upgrade level is 15.
A straightforward talent increase to her Elemental Skill. Nothing much to be said here.
Constellation 4: Divine Comprehension
The vortex created by Pressurized Collapses will restore Energy to Faruzan based on the number of opponents hit: If it hits 1 opponent, it will restore 2 Energy for Faruzan. Each additional opponent hit will restore 0.5 more Energy for Faruzan.
A maximum of 4 Energy can be restored to her per vortex.
A nice quality of life constellation that allows Faruzan to generate flat energy for each enemy hit with a charged shot while in the manifest gale state. You only get about 2-4 flat energy from this constellation, slightly alleviating her ER issues but not completely.
Constellation 5: Wonderland of Rumination
Increases the Level of The Wind’s Secret Ways by 3.
Maximum upgrade level is 15.
A straightforward talent increase to her Elemental Burst. Only increases the initial damage upon cast and the Anemo DMG bonus that it offers which is nice.
Constellation 6: Path of Truth
Characters affected by The Wind’s Secret Ways’ Prayerful Wind’s Benefit have 40% increased CRIT DMG when they deal Anemo DMG. When the active character deals DMG while affected by Prayerful Wind’s Benefit, they will apply Pressurized Collapse to the opponent damaged. This effect can be triggered once every 3s. This CD is shared between all party members.
Faruzan’s strongest constellation by far. Outside of the massive 40% Crit DMG buff this constellation offers, it also allows for Pressurized Collapse to trigger off-field, meaning extra Pressurized Collapses will help with particle generation for your Anemo carry AND Faruzan.
On top of that, her A1 allows these Pressurized Collapses to also shred Anemo RES, therefore increasing DPS. Overall, this constellation elevates her significantly compared to her other ones and it’s not even close.
Playstyle
Faruzan’s playstyle is very straightforward. At a baseline you want to swap, Burst, swap. However, you also want to be fitting in charge shots whenever you are in the Manifest Gale state provided by her Elemental Skill.
These charged shots will generate you Energy at fixed intervals, and provide a form of grouping when facing lighter enemies.
Artifacts
4pc Viridescent Venerer
This set should only be used in order to buff relevant off-field DMG dealers outside of your on-field Anemo carry. If your teammates are more supportive rather than actively contributing to damage, this set is not recommended. Nonetheless, still a strong set that increases team DPS.
2pc Exile + 2pc Emblem
One of the easiest ways to build ER on Faruzan, due to the amount of ER each set bonus gives. If you are struggling on meeting ER requirements on her, this can be a quick way to circumvent those issues. After all, she has glaring ER issues with a very relevant burst, making a combination of ER sets viable.
4pc Noblesse Oblige
A strong generalist support set that works well on Faruzan, due to her Burst centric playstyle. This set provides a team wide ATK buff which is greatly appreciated, regardless of which Anemo carry/ teammates she is paired with.
4pc Tenacity of the Millileth
Only viable on Faruzan with C6, due it allowing her Elemental Skill to proc/refresh off-field therefore working with the set bonus. Provides a similar ATK buff to Noblesse Oblige, just with different conditions in order to reap its benefits.
Main Stats
- Circlet: Crit Rate
- Sands: Energy Recharge
- Goblet: Anemo DMG Bonus
Sub Stats
Here’s the order of sub stats to prioritize:
- Energy Recharge
- Crit Rate [for Fav]
- ATK%
Energy Recharge: Around the range of 220-250+
Lower thresholds assume Favonius procs and higher thresholds assume no Favonius procs. Generally though, you definitely want to assume no Favonius procs for comfort.
Weapons
Regarding high base ATK/non ER weapons, while they can be viable in order to maximize her A4, they are not practical over the following weapons, due to her Energy issues and low damage contribution.
That being said they are functional, but just not worth mentioning over practical weapons due to caveats. However if you are at a point of investment where you are able to comfortably play her without a practical weapon and you want to maximize her A4, then by all means go for it.
5-Star Weapons
Elegy of the End
One of Faruzan’s best 5 star options. The Energy Recharge stat is very much appreciated for Bursting off cooldown, along with providing buffs for your on-field character from the passive when relevant. Overall a strong weapon that allows her to support her team even further.
4-Star Weapons
Favonius Warbow
Faruzan’s baseline weapon and one of her strongest 4 star options. This weapon has a strong passive that lowers her ER requirements along with her teammates. Due to her Energy problems, this weapon proves invaluable in order to ensure smoother rotations/bursting off-cooldown.
Sacrificial Bow
A fine weapon on Faruzan overall. It does not provide as much utility/energy as Favonius Warbow and the passive is quite useless in terms of energy, due to the fixed particle generation cooldown. However, it still offers Energy Recharge from the substat along with a high base ATK, which allows this weapon to benefit Faruzan in multiple ways.
Teams
Due to Faruzan’s role as an Anemo buffer, her teams are pretty straightforward. She’s basically only paired with Anemo carries who are the main focal point of your team. The rest of your team slots can be very flexible, being either utility/off-field damage dealers that support your given on-field carry.
Anemo carry pairs
Due to Faruzan’s kit, pairing her with an Anemo carry goes without saying. Any one of these Anemo DPS units have the playstyles to warrant an Anemo support like Faruzan, with respectable damage output that greatly appreciate her buffing capabilities in order to elevate their damage contribution.
Regarding Xiao, Faruzan at C6 is very significant to where you might run into Energy issues/Burst uptime on Xiao sub C6. This is because Xiao is the most energy hungry out of these 3 carries, and you might not get enough particles/energy in order for Xiao to comfortably Burst off cooldown.
Nonetheless, Faruzan still provides a RES shred for Xiao with her C2 being functional with him, allowing her burst to last the full duration of Xiao’s burst.
Flex slots
Your last two slots can really be anything and are more contextual towards your Anemo carry rather than Faruzan.
For example, with a carry like Wanderer who is vulnerable in air, a form of interruption resistance is quite valuable, which means units like Zhongli or other shielders are preferred. More general supports/buffers such as Bennett/Mona also pair well for any Anemo carry.
If your Anemo carry deals damage through Normal Attacks maybe you’d want a Normal Attack buffer like Yun Jin or an off-field damage dealer like Xingqiu/Yelan that proc off-field through Normal Attacks.
As you can see, you have numerous options when it comes to filling the rest of your team slots and are only limited by your creativity with synergies.
Summary
Faruzan is a refreshing addition to the character roster filling a role that previously was left much to be desired in the Anemo buffer department. While she provides value for those who enjoy playing Anemo carries, her kit does have some caveats that are important to keep in mind when playing her, in order to maximize her output as a support.
 Download APP


