 League of Legends
 Teamfight Tactics
 Valorant
 Lost Ark
 Destiny 2
 Diablo 4
 Download APP
Table of contents
How to Beat Promised Consort Radahn in Elden Ring Shadow of the Erdtree
If you’re looking for a Promised Consort Radahn guide because you’re stuck or having trouble, you’ve come to the right place.
By now, you should have beaten Divine Beast Dancing Lion, Rellana, Twin Moon Knight, Golden Hippopotamus, Messmer, and Romina, Saint of the Bud.
If you need a DLC build instead, check out our Elden Ring build guides.
Location
Promised Consort Radahn can be found in the final section of Enir Ilim just past the Divine Gate Front Staircase site of grace.

Enir Ilim can be found above the Belurat Tower Settlement located in the North-West of the Gravesite Plains and can be accessed after defeating Romina, Saint of the Bud, and burning the shadow tree using Messmer’s Kindling.
Rewards
After killing this boss you will be rewarded with 500,000 runes and the Remembrance of a God and a Lord which can be traded in for one of three things:
The Greatsword of Radahn (Lord)
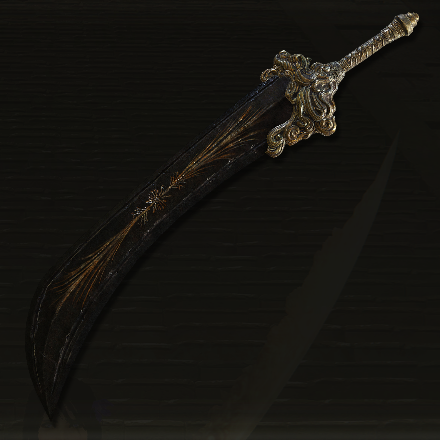
- This weapon is a pair of greatswords that can be dual-wielded when two-handing the weapon.
- It requires 32 Strength, 24 Dexterity, and 15 Intelligence to wield.
- Has a unique Ash of War that imbues the two greatswords with the light of Miquella, then delivers a slashing attack accompanied by columns of light. Additional inputs allow for up to two follow-up attacks.
- This weapon has fairly strong normal attacks as well as a relatively powerful Ash of War that can deal significant damage to larger enemies at the cost of being stuck in a fairly long animation which can leave you vulnerable.
The Greatsword of Radahn (Light)
- This is also a paired weapon and has the exact same requirements and damage as the Lord version but has a different Ash of War.
- The Ash of War on this weapon lets you assume a luminous form and leap forward to deliver a downward slash at the speed of light. This attack will be followed up by an additional light attack. Charge to increase the power of the skill and the number of follow-up attacks.
- This weapon is essentially the same as the Lord version but has a significantly worse Ash of War so I cannot recommend ever choosing this as your reward for the remembrance other than out of pure curiosity.
Light of Miquella
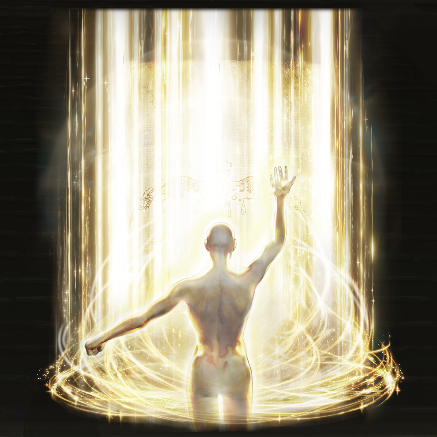
- This is an incantation wielded by Miquella the Kind that annihilates foes with a pillar of light.
- It requires 72 Faith to cast and takes up 2 spell slots.
- This spell has quite a large range as it can be used to accurately target anything you can lock-on to. Still, it has a fairly long cast-time, so it is not recommended to use during boss fights with quicker enemies that can easily get out of the area of effect of this spell.
- This spell can be fairly useful while exploring and clearing out swarms of enemies in one fell swoop.
Recommended Level for Attempt
The recommended level for this boss is level 150.
Regarding the DLC’s leveling system, I recommend being at least Level 14 for your Scadutree Fragments level.
Damage Types
Strong Against
As Radahn is clad in metal armor and imbued with the powers of Kindly Miquella, he is highly resistant to Slash and Holy damage, so it is not recommended to rely on these damage types to defeat this boss.
Weak Against
Here are a few damage types Radahn is weak against:
- Pierce
- Frostbite
- Bleed
- Scarlet Rot
Bleed and Frost will be the best ways of dealing damage to this boss as he has an insane amount of health, so applying these status effects will allow you to deal a significant portion of his health very quickly.
If you do not want to use a status build, pierce damage is also highly effective against this boss as you gain the benefit of being able to counter-hit(striking an enemy with pierce damage as they are in an attack animation) which will give you some significant bonus damage.
Three Phases
Promised Consort Radahn has 3 phases. His second phase begins when he has lost around 35% of his HP and his third phase will begin once he has around 25% of his max HP left.
In his first phase, he will mostly be dealing physical damage and will be very aggressive in melee range while also leaping at you if you are too far from the boss.
In his second phase, this boss becomes extremely difficult, gaining several new moves and imbuing almost all of his old ones with the Light of Miquella, empowering them with holy damage and shooting down light beams from the sky.
His final phase will begin once he has lost around 75% of his health. Radahn will leap into the sky and out of the arena, after a delay, he will strike down at the position he initially jumped from creating a huge shockwave that covers most of the arena. Other than this phase transition, all other aspects of this fight remain the same as in phase two.
Notable Attacks
| Attack Name | Description | Counter |
|
Gravity Leap |
Radahn empowers himself with gravity magic, leaps toward you while spinning, and then lands with a shockwave. | Rolling forward at the last second will give you a window to attack once. |
| Double Horizontal Slashes into Shockwave | Radahn slashes his swords at you one after the other, then he slams the ground and lifts his swords creating a shockwave in a small area.
In phase 2 this attack also rains down beams of light in a much larger area than in phase 1. |
Rolling to the left around him for both of the slashes, then rolling once more in the same direction at a delay to get behind his slam.
In phase 1, this will leave him open to a heavy attack or two light attacks. In phase 2, you will need to roll once more to dodge the beams of light as you are no longer out of its range when you are behind him. |
| Stomp | Radahn lifts his right leg and stomps the ground, creating a trail of spikes in a cone in front of him, similar to Godfrey’s stomp. | Rolling past him to the left as he usually combos this into another move. |
| Overhead Strike | Radahn lifts his sword and strikes down.
He combos this into other attacks. In phase 2, this attack summons a trail of light beams from the sky. |
Roll forward and to the left to dodge the attack.
In phase 2 you may need to roll once more to dodge the light beams. |
| Savage Lions Claw | Radahn holds his swords above him and somersaults forward attempting to hit you.
He follows up with a second somersault sometimes. |
Roll forward to dodge the attack.
If you are using a quicker weapon, you will have a large enough window to get in a light attack even if he does the follow-up. Otherwise, wait a second to see if he will do the second attack and if he does not, you can get in one light attack. If he does, you can attack him after the second attack. |
| Starcaller Cry | Radahn lets out a war cry, pulling in everything in the area with gravity magic.
If he successfully pulls his target, he will slam the ground and create a lingering storm of gravity magic. |
Rolling backward to dodge the pull.
If you are pulled in, immediately run backward and then jump away as he slams the ground. |
| Cross-Slash | Radahn slashes at you from his left, then his right, and then finishes with a cross-slash with both of his swords.
In phase 2, each slash will summon beams of light from the sky. |
Roll to the left once to dodge the first two slashes and then roll forward and left to dodge the final slash. |
| Bloodflame Strike | Radahn stabs forward with a sword imbued with bloodflame, then cuts the air leaving behind a trail of bloodflame that explodes after a delay. | Rolling backward and left for each of the attacks with a slight delay between each roll.
This will put you out of range of any follow-up attack he may do. |
| Spinning Slashes | Radahn swings his right sword, then his left, then swings both of them from the left and does one final slash with both swords.
Sometimes he does a follow-up where he does one final, delayed slash with both his swords from the right. In phase 2 he creates beams of light from the sky in the path his swords took. |
Roll forward and left at a slight delay for each of the slashes to stick close to him.
There will be a window to attack once after he is done. |
| Meteor Strike | Radahn will drag his swords through the ground and leap into the air taking meteors along with him.
After a delay, the meteors will home in toward the player. In phase 2 he follows this up with 4 clones of light into one final devastating slam and shockwave. |
Rolling forward as he jumps into the air to not get hit by him as he rises.
Then, run directly away to create as much distance as possible. Once the meteors get relatively close, run directly to the right and jump to dodge them. In phase 2, you will need to run backward and right and roll twice immediately after the last meteor to dodge the first 4 clones. Then, roll forward and behind him to get behind his real slam and roll toward him once more to dodge the final shockwave at the end. |
| Light of Miquella | Radahn will hold his swords out to the sides and begin levitating.
A large area centered around the player will be covered in light, which will explode after a delay and call down beams of light from the sky. |
Running straight in any direction as soon as he begins floating will get you out of the range of the explosion.
This will also give you enough time to heal or re-apply buffs. |
| Embrace of Miquella | Phase 2+ attack.
Radahn holds out his arms, then leaps towards you attempting to grab you. If this attack lands, you will be charmed. If it lands twice, you will have your heart stolen and lose the fight. |
Rolling forward after he jumps toward you will give you a window to attack.
If you are grabbed, you can remove the charm with Miquella’s Great Rune so the next grab will not kill you. |
| Lightspeed Dash | Radahn holds up his swords and channels Miquella’s Light, then he sends forth a trail of clones and then dashes forth himself, calling down a trail of beams of light behind him. | Stick close to him and then roll forward and left to get behind him.
If you are directly next to him, you can simply walk around his starting position to the right and he will miss. |
| Ring of Light | Radahn quickly raises his sword and imbues it with light, then swings it forward and shoots out a ring of light. | Roll forward as the projectile gets close to you. |
| Radagon’s Rings of Light | Radahn imbues his swords with light and creates a massive ring of light that shoots out from all sides of him. | Roll forward as soon as you see the ring. |
| Promised Consort | Radahn holds up both his swords, imbued with Miquella’s light and delivers a series of slashing attacks that conclude with a final leap and sweeping attack. | Rolling forward and left at a slight delay to dodge each of the slashes and then rolling once more to dodge the final attack. |
| Starscourge’s Descent | Phase 3 move.
Radahn brings his swords together and leaps into the sky. After around 6 seconds he comes back down and slams into the ground, creating 2 arena-wide shockwaves. |
Run directly away as soon as he leaves. This should put you out of range of both shockwaves if you have enough space. Otherwise, wait about a half-second to roll after the whistle you hear when you see his star appear in the sky, then roll again at a slight delay to dodge the second shockwave. There is also currently a bug where you can spam jump in place when he leaps into the air and he will bug out and teleport back down as if nothing had happened, which will give you a window to attack him. |
Phase 1
Radahn is an incredibly aggressive boss with insane amounts of health and damage, accompanied by long combos and quick recovery after most of his attacks. Due to the quick recovery, you will only ever be able to get in 1 or sometimes 2 meaningful attacks depending on the weapon you are using.
He will usually begin this phase by doing the Gravity Leap attack, which is fairly easy to dodge and can give you an opening to attack.
The best way to combat this boss in phase 1 is to roll around his melee attacks to the left and forward, and to try to stick close to him as this will allow you to get behind some parts of his attacks and give you more openings to attack. Never attempt to attack this boss if he is not in a recovery animation unless you are prepared to lose at least half of your health immediately.
Timing Windows
The best openings to attack or heal are after his Gravity Leap and Savage Lions Claw.
These two are the slowest and most telegraphed attacks with the longest recovery in his arsenal which will give you ample time to react and deal some damage or heal.
Some other fairly good windows for attacking come after his Double Horizontal Slashes into Shockwave and Spinning Slashes.
These are both long combos that he does fairly often, which puts him in a fairly long recovery animation. If you are close enough, this can allow you to get two attacks in.
Sticking close to the boss is the best option most of the time as many of his attacks create shockwaves with lingering hitboxes that are more difficult to dodge when rolling away.
Phase 2 (<65% HP)
Once you have done enough damage to the boss, a cutscene will play where Miquella joins the fight with his consort.
Miquella allows Radahn to imbue his attacks with the Light of Miquella and call down beams of light with many of his swings, empowering most of the moves you have seen him perform in phase 1.
He also gains access to 2 new ranged attacks, as well as 4 attacks that allow him to summon clones and dash across the arena extremely quickly.
This phase is where this boss’s real difficulty lies, and it is why he is probably the most difficult boss in FromSoft history.
Even though he alters most of his moves, the best strategy is still to continue rolling past him to the left in order to stick close to him and dodge his attacks.
While many of his attacks do create a trail of beams of light that can deal significant damage to you, rolling past him and sticking close will keep you out of the range of where the beams will fall, while rolling backward can leave you in the lingering hitbox of many of his attacks.
I would recommend continuing to punish the same attacks as in phase 1 as they are still the easiest attacks to react to and punish with his long recovery time.
While this boss is quite difficult, there are a few items you can use that can help lessen the burden, if only slightly.
The Golden Braid is a talisman that can be found within the Scaduview region of the DLC map.
This item will allow you to take 22% less holy damage which will significantly reduce the amount of chip damage you take from those random projectiles in phase 2.
Another item that can be of great help is Miquella’s Great Rune.
This item is acquired after defeating the Scadutree Avatar found at the bottom of Shadow Keep in the Scadutree Base.
This item allows you to remove the charm placed on you after you are grabbed by Miquella’s Embrace so you do not lose your heart during the fight.
Phase 3 (<25% HP)
Phase 3 is more or less the exact same as phase 2, but he will do his Starscourge’s Descent once he has dropped below 25% HP.
He will still have the same openings as in phase 2, so you should continue to stick close to him to dodge his attacks and Miquella’s beams of light.
General Tips
This is likely the most challenging boss in the entire game, so if you are tired of being tossed around and killed repeatedly, there are a few ways to make this boss a lot easier.
Scadutree Fragments
- Although the recommended Scadutree level for this boss is 14, that is the absolute bare minimum that most players should be using if you have an optimized build with many different buffs.
- If your build isn’t very strong or you are still struggling with this boss, then your best bet is to continue to explore the map and collect as many Scadutree Fragments as possible before attempting the boss again.
Defense
- Damage absorption is one of the most important stats for this fight.
- With a good amount of damage absorption, you can make way more mistakes without being punished by the boss nearly as hard.
- If you slightly optimize your build, you can take up to 80% less physical damage without losing your light roll.
- I suggest putting 30 points into faith and then using the Dragoncrest Greatshield Talisman, Pearldrake Talisman +3, the Golden Braid, and Green Turtle Talisman, along with Blessing of the Erdtree, Golden Vow, and Black Flame’s Protection as your buffing spells, and finally, using Braggarts Roar and endure on some power stance bleed straight swords.
- If you pair all of this with Malenia’s Great Rune, you can literally spam 2 buttons and face-tank the boss without ever having to worry about healing or even taking damage.
Shield and Poking Stick
- As an absolute last resort, if you are still unable to defeat the boss or simply want to see him suffer, the Fingerprint Stoneshield, paired with any bleed-infused thrusting weapon, will be enough to make Radahn cry.
- Using this setup essentially eliminates the need to roll in the fight and completely negates any physical damage he may try to do to you if you manage your stamina correctly.
- This is one of the funniest ways to trivialize almost any boss in the game, and it is one of my personal favorite builds: