 League of Legends
 Teamfight Tactics
 Valorant
 Lost Ark
 Destiny 2
 Diablo 4
 Download APP
How to Play a Mage Build in Elden Ring
The Elden Ring Mage build offers an amazing class with a ton of versatile paths.
Whether that be a full-on sorcerer casting spells from a distance or a battlemage weaving in spells between attacks. It has a ton of directions to go into, and a lot of versatility.
In this guide, we will be discussing the best weapons, staves, spells, and everything you need to know to get your Mage the perfect start!
Pros
- Has one of the biggest build varieties from every class.
- Both very good ranged damage and melee damage.
- A lot of Weapons, Spells, and Staves to compliment your build.
Cons
- Requires very heavy investment into Intelligence and some other stats meaning more often than not you will be wielding both low HP and Stamina compared to other builds.
- Some good spells are locked behind heavy stat investments meaning you can only use them later in the game.
Explore our other Elden Ring build guides here.
How to Level Attributes
For this guide, we start as the Astrologer, which is the perfect start for any Mage character. We will only be doing one Leveling guide, if you want to wield spells that either require faith or any other stat, adjust to your liking!
| Starting Stats | Lv25 | Lv50 | Lv100 | Lv150 | |
|---|---|---|---|---|---|
| Vigor | 9 | 14 | 14 | 30 | 40 |
| Endurance | 9 | 9 | 9 | 20 | 30 |
| Strength | 8 | 8 | 8 | 8 | 8 |
| Dexterity | 12 | 12 | 12 | 12 | 12 |
| Mind | 16 | 15 | 20 | 30 | 43 |
| Intelligence | 16 | 30 | 50 | 60 | 80 |
| Faith | 7 | 7 | 7 | 7 | 7 |
| Arcane | 9 | 9 | 9 | 9 | 9 |
We do not need to worry early game too much about our Mind stat since most spells are very cheap at this point, we will upgrade our Vigor a little bit so we have a bit more room for error.
We do, however, upgrade Intelligence to 30 as soon as possible to just power through the early game with raw damage.
At checkpoint 2, LV50, we only really increase our Mind and Intelligence because we want to get to a minimum of 60 Intelligence as soon as possible. You can however invest in Vigor if you feel like you need it.
For checkpoint 3, LV100, we will have reached 60 Intelligence. Before leveling it further we want to increase Vigor and Mind to 30, and Endurance to 20. This will make it a lot less punishing to make a mistake later in the game.
For the last checkpoint, LV150, we will first increase our Intelligence to 80, after which we stop. This is the cap and leveling it past this will almost do nothing for you damage. Instead invest in Vigor, Endurance, and Mind to increase your survivability.
If the spells you like using require either Faith or Arcane, take away from your survivability. You almost always want to keep that 80 Intelligence no matter what.
Best Staffs
Where other guides will be a bit simpler, the Mage guide requires a more in-depth explanation. Staves all give different boosts and extra stats that are very handy, this does mean some Staves are power crept out of usability. Next to that, there are Intelligence weapons that are great but not Staves, which will be mentioned below this segment.
Meteorite Staff

A good starting point in its amazing boost that is much higher than most Staves. The Meteorite Staff boosts Gravity Sorceries by a whopping 30% making it almost necessary for any Gravity spell build. This is most often used together with Rock Sling, one of the best spells in Elden Ring.
- Location: In Caelid found on a corpse in the Street of Sages Ruins.
- Required Stats: 6 Strength, 18 Intelligence.
Gelmir Glintstone Staff
Gelmir’s Staff is a bit more situation in the fact that it boosts Lava Sorceries by 15%. Lava Sordceries however are a lot more scarce in Elden Ring. They still bring great value and can do massive damage in both PVE and PVP.
- Location: Rare drop from the Man-Serpent Sorcerer inside Volcano Manor.
- Required Stats: 6 Strength, 14 Intelligence, 14 Faith.
Staff of Loss
The Staff of Loss only boosts 2 spells, but it boosts those massively with a 30% increase. Those 2 are Night Shard and Night Comet. These spells however are very good which makes it fully worth running a special staff just for them.
- Location: Found in Caelid on a corpse in Selia, Town of Sorcery.
- Required Stats: 6 Strength, 12 Dexterity, 14 Intelligence.
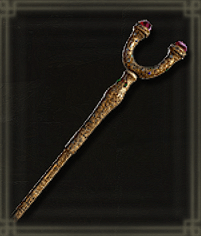
Carian Regal Scepter
If we talking about raw damage potential, the Carian Regal Scepter stands tall above the rest with its S scaling in Intelligence. Next to that, it boosts Full Moon sorceries by 10%. This is the go-to staff for most people.
- Location: Purchased from Enia with Remembrance of The Full Moon Queen’s power.
- Required Stats: 8 Strength, 10 Dexterity, 60 Intelligence.
Carian Glintblade Staff
If you are looking for a more Spellblade build, running both a weapon and sorceries, this staff is perfect for you! It boosts Offensive support spells that generally boost your offensive power, but don’t need you to constantly cast them. Mostly since this staff also boosts the Glintblade Sorceries damage by 15%.
- Location: Found on the top floor of the Highway Lookout Tower in eastern Liurnia.
- Required Stats: 6 Strength, 22 Intelligence, 12 Dexterity.
Carian Glintstone Staff

When you want to purely wield Magic but still be Melee this staff is perfect with it boosting all Carian Sword Sorceries by 15%. One of these is Carian Slicer, one of the best spells in the game.
- Location: Found on a corpse in the Carian Study Hall inside Raya Lukaria.
- Required Stats: 6 Strength, 8 Dexterity, 24 Intelligence.
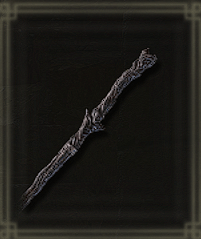
Lusat’s Glintstone Staff
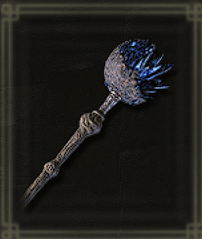
Like the Carian Regal Scepter, it’s one of few Staves with a S scaling in Intelligence. Aside from that it has a very unique passive where it enhances your Sorcery Scaling at the cost of 50% extra FP consumption boosting the overall damage of your spells.
- Location: Found upon defeating the boss of Selia, Town of Sorcery.
- Required Stats: 10 Strength, 52 Intelligence
Prince of Death’s Staff
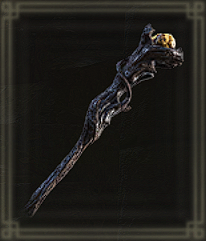
Like the Gelmir staff, this has both Intelligence and Faith scaling making it best to go 80/80 on those stats. It also boosts Death Sorceries which even though limited can be very powerful!
This staff is however found as one of the latest staffs you can find sadly.
- Location: Found on a Tower in the Deeproot Depths, close to The Nameless Eternal City site of grace.
- Required Stats: 6 Strength, 18 Intelligence, 18 Faith
Best Non-Staff Weapons
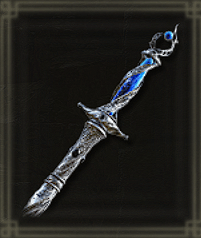
Dark Moon Greatsword
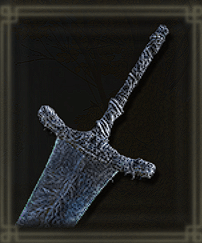
The best Intelligence weapon in Elden Ring is, of course, the Dark Moon Greatsword. Pretty much in every Souls game as the Moonlight Greatsword, it wouldn’t be Fromsoftware if they did not include it in their game. It has amazing scaling, has one of the best Ash of Wars in the game, and generally has insane potential to do massive damage.
- Location: Reward for completing Ranni’s questline.
- Required Stats: 16 Strength, 11 Dexterity, 38 Intelligence.
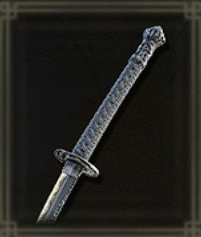
Carien Knight’s Sword
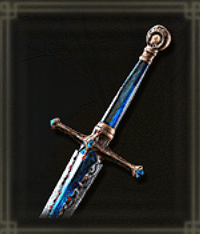
The Carian Knight’s Sword stands out from a lot of weapons due to its very unique heavy attack. This attack can block attacks before its slash comes out making it amazing to counter with. Next to that, it has a good move set being a straight sword. Its Ash of War is also amazing, you can charge it up to deal even more damage making this an overall great asset to a Battle Sorcerer’s build.
- Location: Found in a Carriage being pulled towards Northwest of Liurnia of the Lakes.
- Required Stats: 10 Strength, 10 Dexterity, 18 Intelligence.
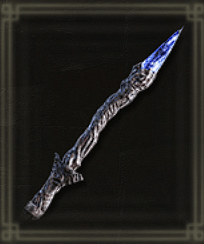
Wing of Astel
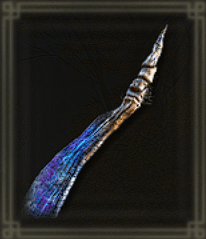
Wing of Astel is a curved sword with a very unique Ash of War that is shared with the Bastard’s Stars. This does an AOE explosion that deals a very good amount of damage.
Aside from that, this weapon has a great moveset and good scaling.
- Location: Found in a chest in the Southern Uhl Palace Ruins only reachable by the Northern section of Ainsel River.
- Required Stats: 7 Strength, 17 Dexterity, 20 Intelligence
Moonveil
We already went more in-depth on the Moonveil in our Samurai guide, but in short: The Moonveil is one of the best weapons in Elden Ring with its amazing scalings, one of the best Ash of Wars, and the katana moveset to complement it.
- Location: Reward for defeating the Magma Wyrm located in the Gael Tunnel inside Caelid
- Required Stats: 12 Strength, 18 Dexterity, 23 Intelligence.
Bastard’s Stars
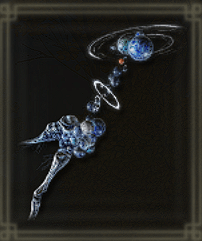
Like the Wing of Astel, it shares the unique Ash of War that does amazing damage. Next to that, it counts as a flail which means it cannot be blocked. This weapon can be especially fun if you are looking for a more unique playthrough even though you obtain this around the midpoint of the game.
- Location: Obtained by giving Remembrance of the Naturalborn to Enia.
- Required Stats: 8 Strength, 22 Dexterity, 22 Intelligence.
Fallingstar Beast Jaw
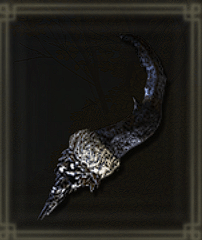
Even though the Fallingstar Beast Jaw leans more to strength than Intelligence, its Ash of War is amazing to use. Intelligence however still buffs the Ash of War more than Dex and STR. This makes it still worth fully upgrading Intelligence for this weapon.
- Location: Dropped by the Full-Grown Fallingstar Beast in Mt. Gelmir as a reward for killing it.
- Required Stats: 34 Strength, 12 Dexterity, 20 Intelligence.
Honorable Mentions
There are a lot of good Intelligence weapons which makes choosing the best hard. Below are some that are still great but either less than the ones above or more situational.
- Glintstone Kris
- Crystal Sword
- Sword of St. Trina
- Alabaster Lord’s Sword
- Helphen’s Steeple
- Onyx Lord’s Greatsword
- Loretta’s War Sickle
Best Spells
There are a lot of Spells so picking out the best is hard, but we will do our best to let you see some of the greatest spells, with their respective spells school, so that this might help you find the perfect staff for you!
Night Comet
This is the best spell in the game, hands down. but only under the correct circumstances. if you powerstance 2 Staves of Loss, the damage this spell can do reaches absurd levels. You can also wield the Staff of Loss in your offhand, and Staff of the Death Prince in your main hand with 80 Intelligence and 80 Faith, and you will do even more damage. you do need to double-wield staves. This spell cannot be dodged, cannot be blocked, cannot be Carrian Retaliation countered in PVP. Overall it’s a powerhouse in any part of the game.
- Spellschool: Night Sorceries
- Location: Selia, Town of Sorcery. Found in a chest in the middle of the town.
- Required Stats: 38 Intelligence
Carian Slicer

Considered the best melee spell in the game. It has Dagger speed of attacking and does absurd damage for only costing 4FP. It deletes anything in seconds because of this while not costing a lot to invest in. This spell becomes available early and never falls off being able to carry you through the whole game.
- Spellschool: Carian Sorceries
- Location: Bought from any sorcery merchant after giving the Royal House Scroll
- Required Stats: 14 Intelligence
Night Shard
This spell is insane. It is undetectable meaning AI won’t be able to dodge it, it has a very good damage output to FP cost ratio. And once you reach NG+ it only gets better by dual-wielding 2 Staves of Loss which buffs the damage even higher.
- Spellschool: Night Sorceries
- Location: Purchased from Gowry after completing his quest line.
- Required Stats: 18 Intelligence
Meteorite of Astel
This spell is a demolisher of any big enemy. This works very well in combination with Terra Magica if you can set it up. It cannot be avoided by enemies and does insane amounts of damage. Even the high FP cost can be circumvented by using the Cerulean Hidden Tear inside your flask of Wonderous Physick.
- Spellschool: Gravity Sorceries
- Location: Consecrated Snowfield, dropped by Astel, Stars of
- Darkness in the Yelough Anix Tunnel
Required Stats: 55 Intelligence
Switt Glintstone Shard
This spell is an absolute joke. It
is super cheap to get and requires almost no stats becoming available from the get-go. It does absurd damage for its cost, stuns with every shot in PVP or against humanoid enemies, and in general has no right to be this good.
- Spellschool: Glintstone Sorceries
- Location: Can be purchased from any sorcery vendor once given the Academy Scroll
- Required Stats: 12 Intelligence.
Carian Piercer
One of the most broken spells in Elden Ring as it destroys most enemies. Even though it says Piercer in the name, it does no piercing damage making it shit on Black Knife enemies, It completely obliterates Crucible Knights and to top it all off has a lingering hitbox which makes it super infuriating in PVP as well.
- Spellschool: Carian Sorceries
- Location: Caria Manor in Liurnia of the Lakes, dropped by a Teardrop Scarab in an area behind the gardens.
- Required Stats: 27 Intelligence.
Great Oracular Bubble
This spell is very slow, but that is not a downside at all. Enemies AI won’t dodge this spell often. Because of the slow speed, you can cast multiple at an enemy before they will agro, meaning they will run into these spells as well. It has Insane damage, a decent FP cost, and overall is a very good spell.
- Spellschool: Clayman Sorceries
- Location: Near the Dragonkin Soldier arena in the Siofra River, found by killing a Teardrop Beetle in a room full of Clayman.
- Required Stats: 25 Intelligence, 18 Arcane
Rock Sling
A very unique spell because it deals Physical damage, making this one of the only spells you can wield properly in Raya Lucaria since everyone there has high magic resistance. This spell also has very high damage, and insane stance break potential, making this one of the very best spells in the game.
- Spellschool: Gravity Sorceries
- Location: Caelid, Street of Sages Ruin, found in a chest in an underground cellar.
- Required Stats: 18 Intelligence.
Rykards Rancor
Fire damage is one of the most underrated damage types in the game, destroying a lot of common bosses especially once reaching the Mountaintops of the Giants. It is a very good zoning tool, dealing constant AOE Fire damage which makes this a very underrated spell. you do however need to invest some into faith to get the damage to the max!
- Spellschool: Magma Sorceries
- Location: Obtained by giving Remembrance of the Blasphemous to Enia
- Required Stats: 40 Intelligence, 18 Faith
Honorable Mentions
With 70 spells in Elden Ring, some are just better than others. Below are some that are still great!
- Shard Spiral
- Magical Glintblade
- Cannon of Haima
- Zamor Ice Storm
- Glintstone Cometshard
- Great Glintstone Cometshard
- Loretta’s Greatbow
- Adula’s Moonblade.
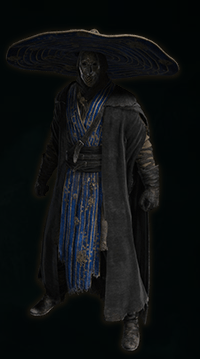
Armor
Where for most classes Armor does little to nothing to make the build better, for Mages this is very different. Most Mage armor sets have small but noticeable buffs towards specific stats or bonuses which can just give that edge.
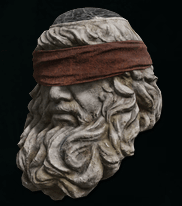
Noble’s Set
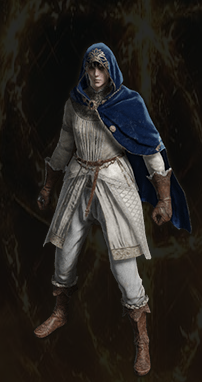
- Buffs: Navy Hood increases Mind by 1, Crimson Hood increases Vigor by 1.
- Location: Altus Plateau, East Windmill Pasture in the middle of the dancing Celebrants Circle.
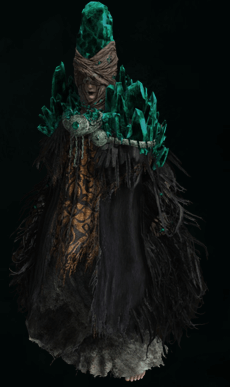
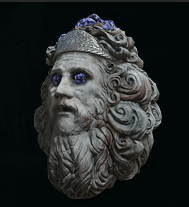
Queen of the Full Moon Set
- Buffs: Queen’s Crescent Crown increases your Intelligence by 3.
- Location: Purchased from Enia after defeating Rennala, Queen of the Full Moon.
Battle Mage Set
- Buffs: Hood Increases Strength and Intelligence by 2, but decreases your maximum FP by 10%
- Location: Dropped by a Battlemage east of West Windmill Pasture.
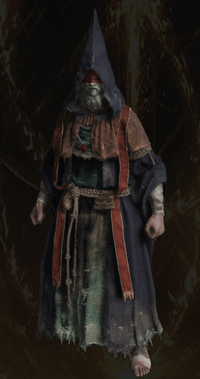
Azur’s Glintstone Set
- Buffs: Crown increases the damage of Comet Azur by 15%, the damage of Glintstone Cometshard and Comet by 10%, but also increases the FP cost of all Sorceries by 15%.
- Location: After siding with Sorceress Sellen and completing her questline, go back to Primeval Sorcerer Azur’s location to find his armor.
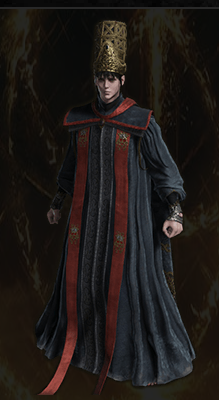
Preceptor’s Set
- Buffs: Hood increases Mind by 3 but you suffer a detriment of -9% on your stamina.
- Location: Looted of Seluvis’s corpse after finishing Ranni’s questline.
Every Glintstone Crown
Hierodas Glintstone Crown
- Buffs: Increases Intelligence and Endurance by 2, but reduces your FP by 10%
- Location: Mt.Gelmir, Hermit Village, found on a corpse behind a house in the south.
Karalos Glintstone Crown
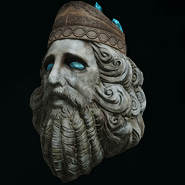
- Buffs: Increases Intelligence by 3, but reduces Stamina by 9%
- Location: Raya Lucaria Academy, Looted of a Crystalized Crab near the Debate Parlor site of Grace.
Lazuli Glintstone Crown
- Buffs: Increases Intelligence and Dexterity by 3, but reduces HP by 18%
- Location: Raya Lucaria Academy, Found on the rooftops.
Olivinus Glintstone Crown
- Buffs: Increases Intelligence by 3, but reduces HP by 10%
- Location: Raya Lucaria Academy, found behind an illusory wall near the Schoolhouse Classroom site of Grace.
Twinsage Glintstone Crown
- Buffs: Increases Intelligence by 6, but reduces HP and Stamina by 9%
- Location: Raya Lucaria Academy, found from a Crystallized Crab on the rooftops.
Witch’s Glintstone Crown
- Buffs: Increases Intelligence and Arcane by 3, but reduces Stamina by 18%
- Location: Reward for completing Sorceress Sellen’s questline.
Best Talismans
Here are some of the best talismans for playing an Elden Ring mage.
Cerulean Amber Medallion
- Buffs: Increases your FP
- Location: Lakeside Crystal Cave from the boss
- Location +1: Found on a Corpse inside Castle Sol
- Location +2: Found inside the Lunar Estate Ruins in a treasure chest behind a Stonesword Key door.
Martika’s Soreseal

- Buffs: Increases Mind, Intelligence, Faith, and Arcane, but also increases damage taken by 15%.
- Location: Elphael, Brace of the Haligtree, found on an altar in a sealed room which requires a Stonesword Key.
Stargazer Heirloom
- Buffs: Increases Intelligence by 5
- Location: Found on a body at the top of the Divine Tower of Liurnia
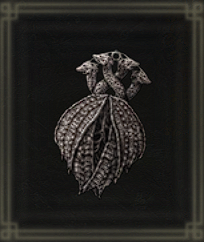
Graven-Mass Talisman
- Buffs: Increases the potency of all sorceries by 8%
- Location: Found in a chest atop ALbinauric rise, in the east of Consecrated Snowfield.
Moon of Nokstella
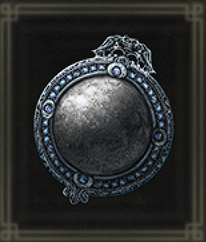
- Buffs: Increases Memory Slots by 2
- Location: Find in a chest underneath a massive throne in Nokstella, Eternal City
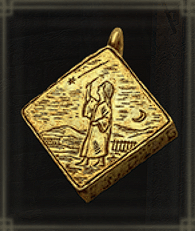
Radagon Icon
![]()
- Buffs: Shortens the casting time of Spells
- Location: Raya Lucaria Academy, found on top of the Debate Parlor
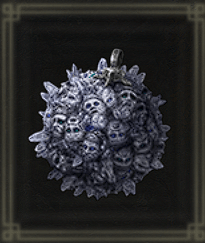
Godfrey Icon
![]()
- Buffs: Raises the power of charged spells and skills by 15%
- Location: Drops from Godefroy the Grafted in the Golden Lineage Evergaol on Altus Plateau.
Old Lord’s Talisman
- Buffs: Extend the duration of spells by 30%
- Location: Found behind Recusant Bernahl on Crumbling Farum Azula.
Consumables and Flask Distribution
Flask Distribution is up to personal preference. I usually tend to go 50/50 on HP and FP flasks, but you can also go 40/60. This fully depends on your playstyle.
Summons
As a mage, you are the most vulnerable class, which means if you want to use summons, it needs to be beefy and melee to keep the boss away from you.
Ancient Dragon Knight Kristoff
Kristoff is a defensive powerhouse who can tank the boss for a long time while dishing out some decent damage.
- Location: Dropped by Ancient Hero of Zamor inside the Sainted Hero’s Grave west of Leyndell
Black Knife Tiche
He is unique in that he has the Deatflame weapon art. This is a max HP scaling burn that also lowers the enemy’s HP. Next to that, he is very aggressive with a decent amount of HP. He is considered the best summon in the game.
- Location: Dropped from Alecto, Black Knife Ringleader upon defeating him inside the Ringleader Evergaol. This can only be accessed upon completing Ranni’s quest in the south of Liurnia.
Banished Knight Oleg
If you run a build that breaks guards easily, Oleg will only increase that strength. Oleg is a dual-wielding Banished Knight who can easily demolish any low-health boss.
- Location: Found on a corpse inside the Fringe folk Hero’s Grave
Lhutel the Headless
Lhutel is pretty unique due to the fact she can teleport around making her avoid large groups of enemies and easily dodge attacks. She also is a powerhouse in tanking due to her heavy armor and greatshield. Overall a solid defensive option.
- Location: Dropped by the Cemetery Shade at the Tombsward Catacombs.