In this Diablo 4 Tempering and Masterworking guide, we will cover everything you need to know to make the most out of this powerful crafting system that gives players full control over their gear.
Not ready to masterwork yet? Check out our Leveling Builds so you can be ready to masterwork the best gear possible
Introduction to Tempering
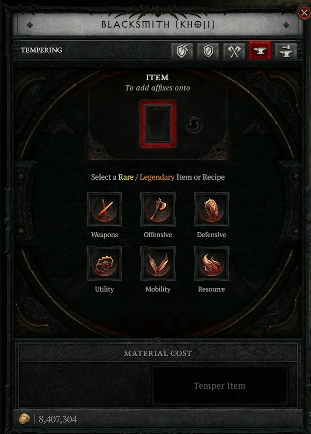
What is Tempering?
After finding powerful Tempering Manuals that are dropped randomly throughout the overworld, you can take any piece of equipment to a Blacksmith to imbue that piece of gear with a large selection of Tempers of different types depending on the piece of gear selected.
Applying Your Temper
After you've selected your piece of equipment and selected what type of Temper you want to use, you'll be given a selection screen where you can pick a single Temper to add to your gear. And as a special perk, there's a small chance that the Temper applied to your item will be rolled at 50% higher values than normal.
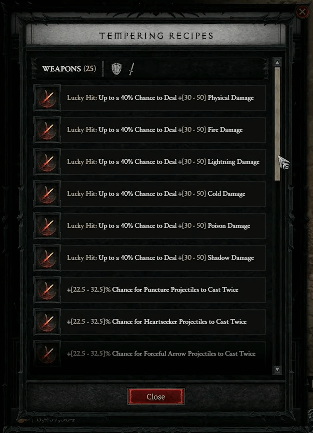
Tempers may be infinitely rerolled to use different Tempers by using a Scroll of Restoration, which are found in Hordes. This allows you to grind for the perfect Temper through getting a Greater Affix on it.
Introduction to Masterworking
What is Masterworking?
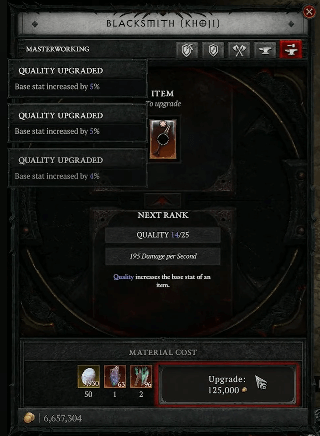
Masterworking is the act of putting Quality on a piece of gear. Each point ofQuality increases all affixes of the item by 1%, up to a maximum Quality of 25.
Adding Masterwork
To successfully Masterwork an item you will need Obduciteto upgrade your item to maximum Quality.
Not sure the best method for farming Obducite? Check our guide for the best information (coming soon)
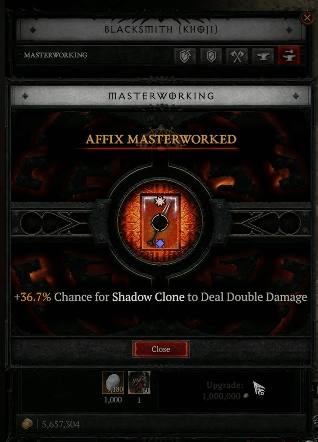
After successfully applying 25 Quality to an item, one last upgrade option will be given to apply a Capstone Bonus. This Bonus will increase the stats of a randomly selected Affix by 50%. And this Capstone Bonus will also be applied on top of the bonus from having a Greater Affix, so you should aim to stack both bonuses where you can.
This Capstone Bonuscan be rerolled by using Neathironwithout resetting the Qualitywhich will make it easier to grind for the perfect Capstone Bonus to complete your build.
Looking for the best builds to farm materials? Try checking our Build Guides.