King’s Fall: Golgoroth Guide
Golgoroth is the second boss fight of King’s Fall, and is fairly light on mechanics.
Loadouts will be curated towards dealing damage and withstanding damage while shooting Golgoroth.
In this guide, we’ll cover all the tips and tricks you need to know.
The Final Shape has launched in Destiny 2, bringing a game-changing Prismatic Subclass. Get an edge in the meta with our top Prismatic builds for Hunters, Warlocks, and Titans.
The Mechanics

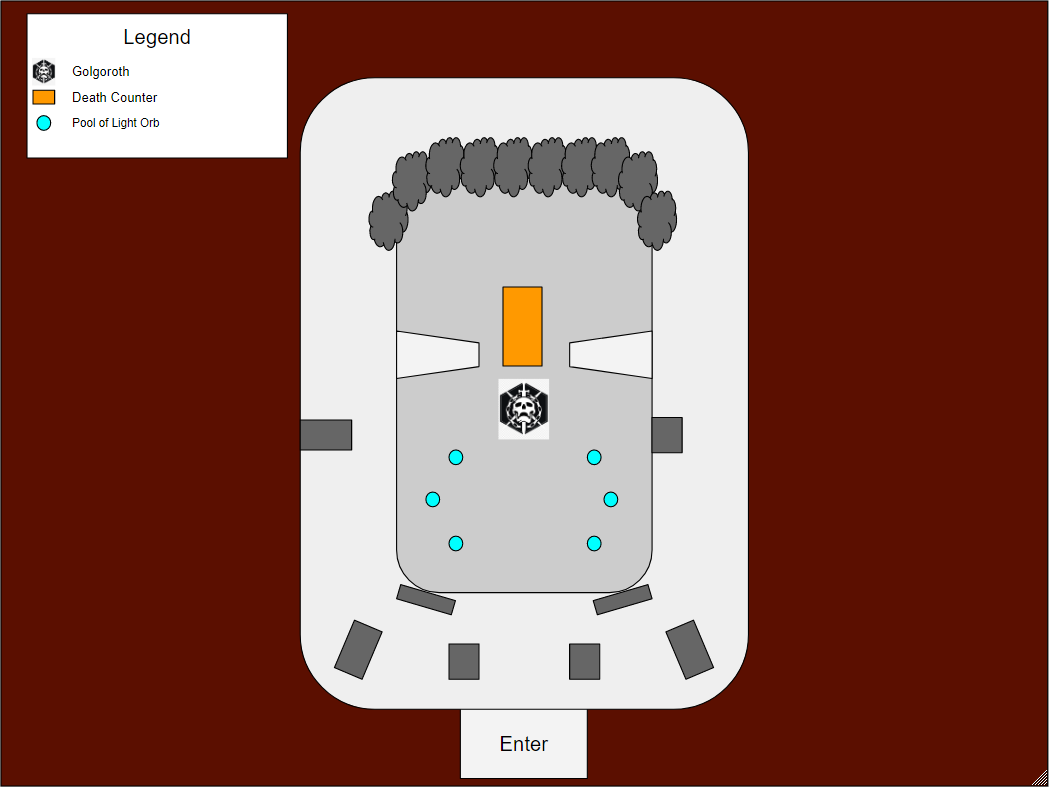
There are only two mechanics to keep track of during this fight, the Pools of Light and Golgoroth’s Gaze. The Death Counter on the map is a glorified scoreboard that counts your team’s deaths, and isn’t something that needs to be utilized to complete the encounter.
The team should divide itself into a group of 4 and a group of 2. The group of 4 will be shooting the Pool of Light Orbs and dealing damage. The group of 2 will be trading Golgoroth’s Gaze back and forth.
The encounter starts once the orb hanging from the center of the room is shot, and then ads will spawn on the outer ring of the arena. Clear these enemies to be able to take Golgoroth’s Gaze.
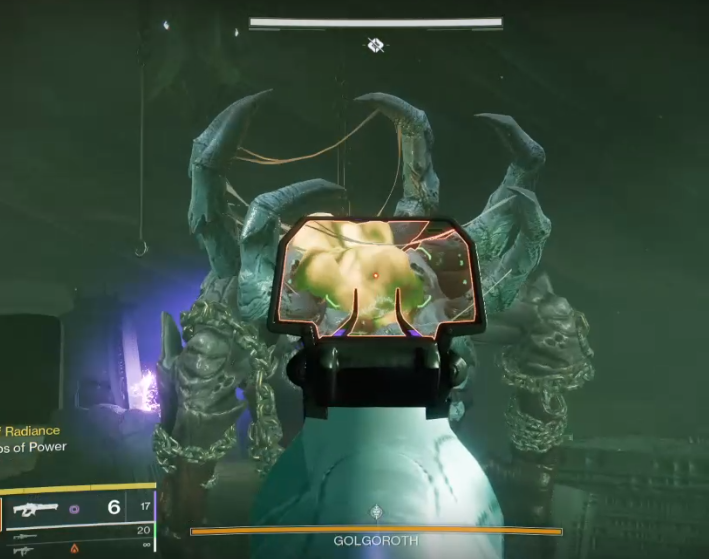
First let’s go over Golgoroth’s Gaze. To obtain Golgoroth’s Gaze you will need to shoot the massive yellow spot on Golgoroth’s upper back. This crit spot has a damage threshold that must be met in order to successfully steal his gaze.

A Linear Fusion Rifle or higher impact Sniper Rifle shot is enough to meet the damage threshold in 1 shot, and is recommended to take the gaze. Once a player acquires Golgoroth’s Gaze, Golgoroth will face and target that player by shooting purple orbs that track to the player with the gaze.
On top of this a crit spot in Golgoroth’s stomach is now visible which players can shoot at to deal damage if they have a particular buff. The gaze lasts for 20 seconds. If the 20 seconds pass without another player stealing the gaze the damage phase ends and Golgoroth’s front crit spot closes.
To steal the gaze, another player will shoot the same yellow crit spot on Golgoroth’s back. The 2 players who are designated to trade Golgoroth’s Gaze will continue to trade the gaze back and forth, and attempt to steal the gaze just as the other player’s timer is about to expire.
Golgoroth’s Gaze can be acquired 6 times, and then he “grows tired”, and is no longer able to be damaged. Once this happens the encounter repeats itself.
Now that we know how to open up the damage phase, we’ll go over the role of the other 4 players who will be dealing most of the damage to Golgoroth. Once a player has the gaze the crit spot on Golgoroth’s front will be open, but damage only counts if a player shooting that crit spot is standing in a Pool of Reclaimed Light.
To create a Pool of Reclaimed Light, a Pool of Light Orb on the ceiling needs to be shot down just as the encounter was started. The 4 primary damage dealers will need to shoot down a new orb as the pool expires and jump from pool to pool as the pools have limited time before they expire.
The final thing of importance to note is the Unstable Light Buff/Debuff. A player in the Pool of Reclaimed Light can randomly be assigned this Buff/Debuff. This player will emit an explosion that will kill teammates they are next to and damage Golgoroth.
When dealing damage, be sure to look at your buffs and debuff on the left side of the screen and take note of green effects on your screen for Unstable Light, and if you have it, run towards Golgoroth and then rejoin your team once the explosion goes off.
To summarize, the order of actions the team will perform are:
- Shoot orb in the center on the ceiling to begin the encounter
- Clear all of the enemies that spawn on the outer ring.
- 4 primary damage dealers begin to damage the orb.
- The first gaze stealer shoots the yellow crit spot on Golgoroth’s back to begin damage.
- The damage dealers drop the Pool of Light Orb and deal damage.
- The player who has Golgoroth’s Gaze positions himself near the entry of the room so the damage dealers have a view of Golgoroth’s stomach crit spot.
- The 2nd gaze stealer shoots Golgoroth’s yellow crit spot to take the gaze as the other gaze stealer’s 20 second timer is nearly up.
- Once the Pool of Reclaimed Light expires, the damage dealers shoot a new orb, and deal damage in the new pool.
- Continue to swap the gaze and shoot down all available orbs until Golgoroth grows tired.
- The encounter repeats from step 2.
Tips and Tricks
- Golgoroth directly faces the player with the gaze. If holding the gaze, be sure to be standing in a spot that allows the players in the Pool of Reclaimed Light to have an angle to shoot Golgoroth’s crit spot.
- Once again Divinity is a strong option for debuffing the boss. If a player is using Divinity, they should be in the group of 4 main damage dealers.
- The 1 Gaze Stealers can assist with damage too. Once the other Gaze stealer takes the gaze the player who no longer has the gaze can drop down into the pit to deal some damage. This works very well with Izinagi’s Burden by shooting one very high burst damage weapon in the short window you’ll have to deal this supplemental damage.
- Gaze Stealers can also help shoot the Pool of Light Orbs. These orbs have a lot of health and having an extra player shoot them helps the team swap damage locations more easily.
- Pool of Light Orbs regenerate health. If they are not damaged for a few seconds they will return to full health. Players can drop the orb to low health and then shoot a primary weapon at the orb intermittently to keep the orb at low health so it can be quickly broken.
Loadouts
Here is a list of recommended options:
- Primary:
- Any short-range primary ammo weapon will be fine in this encounter
- Secondary
- One player uses Divinity.
- Izinagi’s Burden
- Legendary Sniper Rifle
- Power
- Linear Fusion Rifle for primary damage dealing
- Subclasses
- Golden Gun with Celestial Nighthawk
- Blade Barrage does not work well on this boss, Golden Gun is the bet.
- Well of Radiance
- Helps with survivability in the Pool of Reclaimed Light from all of the ads that spawn in the pit.
- Ward of Dawn
- Can be used for a damage buff if there is no Well of Radiance currently up, and a player can quickly dip into the bubble if they are low on health.
- Loreley Splendor Solar Titan
- This exotic is great for Gaze Stealers as the orbs Golgoroth shoots at the person with the gaze deal a lot of damage. Loreley Splendor lets this player tank those orbs to ensure they stay alive while holding the gaze.
- Golden Gun with Celestial Nighthawk
Challenge Mode
The challenge for this encounter only has one stipulation. The player who takes Golgoroth’s Gaze must do so while the player who is currently holding Golgoroth’s Gaze is in a Pool of Reclaimed Light. If the gaze is swapped when the player with the gaze is outside of a pool, the challenge is failed. Here are some tips to complete the challenge.
- There are two ways to approach this mechanic:
- Do the encounter normally, and as Golgoroth’s Gaze is about to expire, have the player with the gaze drop down into the Pool of Reclaimed Light, and then have the other gaze stealer take the gaze once the other player is in the pool.
- Have the player with Golgoroth’s Gaze join the damage dealers for the entirety of the time in the pool. If this is done, the players with the gaze should use a Machine Gun to quickly shoot the orbs with no need of reloading.
- Do not worry about maximizing the timer for a full damage phase, if you think a pool is about to expire roughly when the gaze is about to expire, have the other gaze stealer take the gaze earlier to avoid the situation in which there is no pool to stand in as the gaze timer is about to expire.
Loot Table
- Zaouli’s Bane
- Solar Hand Cannon
- Midha’s Reckoning
- Arc Fusion Rifle
- Quilim’s Terminus
- Stasis Machine Gun
- Helmet Armor
- Leg Armor

Thanks for reading! Check out our other Destiny 2 raid and dungeon guides.
 Download APP
 Collapse