Introduction
In raids and dungeons DPS (Damage Per Second) is a facet that loadouts are based around. Typically encounters have a damage phase which is a window of time in which a boss can be damaged after performing a set of mechanics.
DPS is important because the faster the boss is killed, the less likely extra mechanics will be performed and fewer mistakes can be made resulting in a wipe.
This guide will contain weapons, mods, and perks that are highly recommended for increasing your damage output, but will be more than “equip gun X and use mod Y, then shoot boss”.
Not everyone has access to the best DPS weapon and mod options, but there are tricks and techniques to increase DPS no matter what loadout is being used that this guide will dive into as well.
With The Final Shape now live in Destiny 2, there’s a new Prismatic Subclass to explore. Dive into the best Prismatic builds for Hunters, Warlocks, and Titans for an edge
Raise your Weapon
First, we will go over what equipment is most recommended for high damage output. There is a little more nuance to what equipment is best than having everyone equip the same weapons that have the best output due to team damage buffs, boss debuffs, using supers for damage, ease of use, and general access to certain weapons and mods.
Below is a list of top options and a short description of recommendations and their roles during a damage phase.
Exotic Weapons
Izanagi’s Burden
This sniper has such high damage output from its exotic perk that stores the damage of 4 shots into 1 when holding down the reload button. Ease of use is not quite there as there is precision and technique required to get the most out of this weapon. But if you are able to use it as efficiently as possible, it is the best option for damage. It is recommended to have most of your team using this weapon if possible when in a team of 6, and all players can run this if in a team of 3.
Divinity
This is a unique trace rifle that applies a debuff to the target which not only has your teammates deal 30% more damage, but also creates an easy to hit critical damage hit box on the target. This makes using Izanagi’s Burden easier for teammates as there is less precision required for its use.
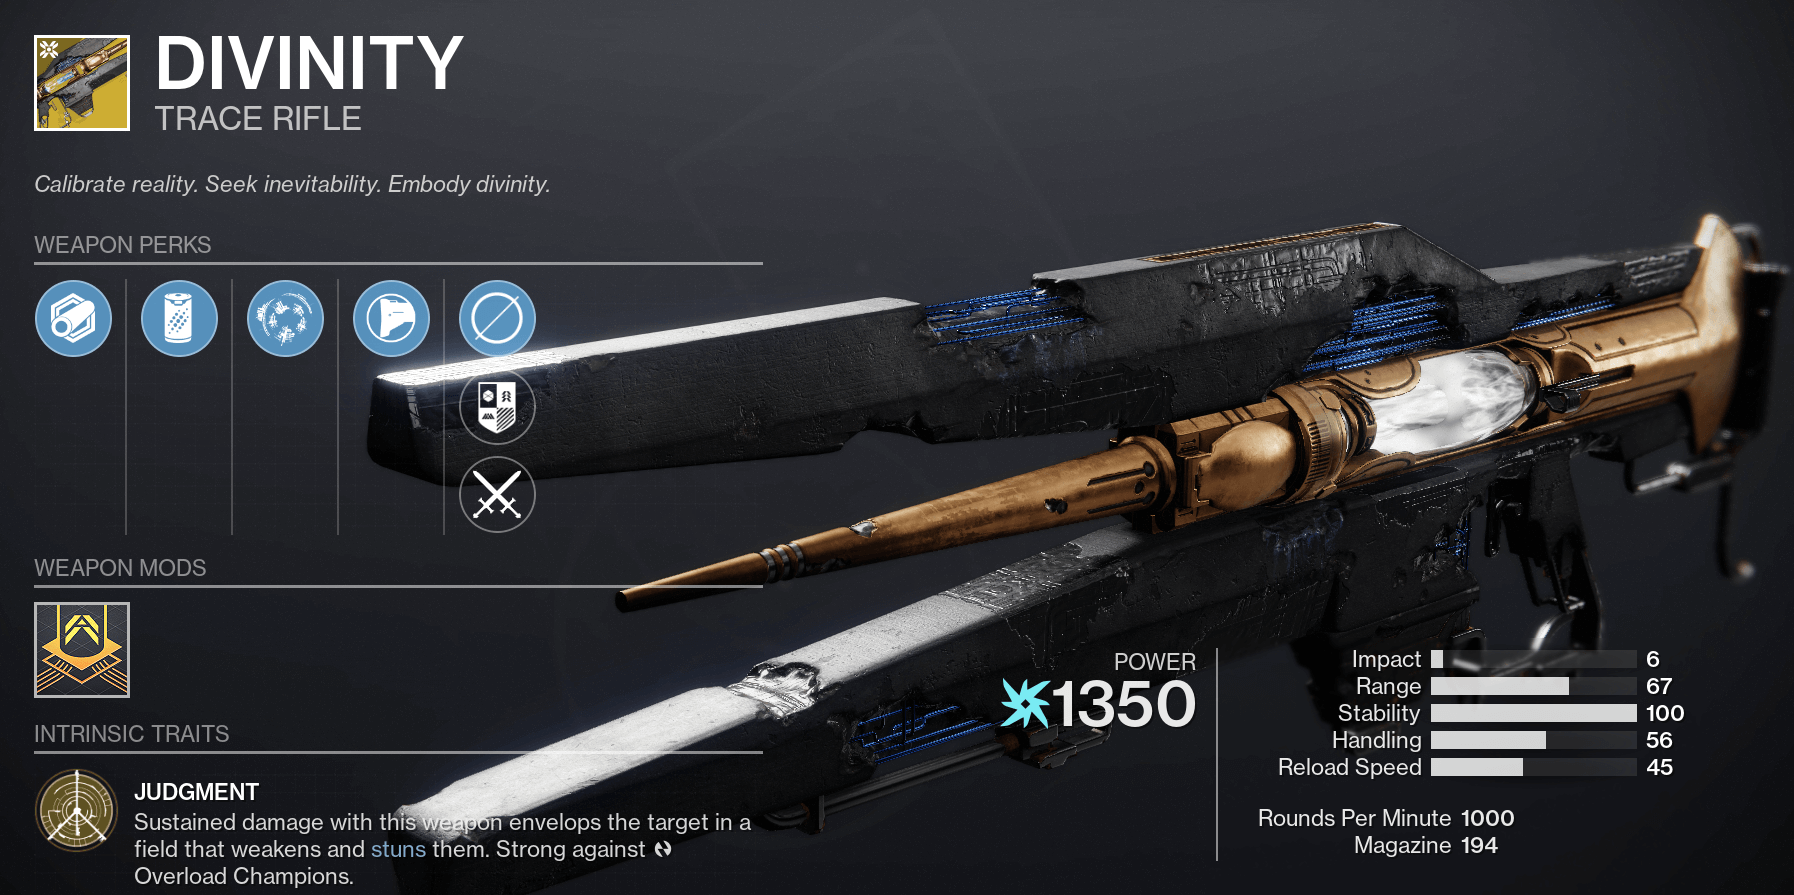
It is recommended to have 1 player in your team using this for 6 person activities and is not necessary to use during 3 person activities as the percent debuff isn’t worth having one third of your damage being heavily diminished to increase the damage of the other two.
Witherhoard
Another unique option as this grenade launcher gets most of its value from tick damage of an AoE pool left under the target. With the catalyst this gun gets access to auto loading holster, a top tier perk for DPS. Due to some interactions it is recommended only one person in your group utilizes this weapon as the impact and tick damage may not be counted if multiple of this weapon are being used.
Gjallarhorn
The exotic perk rework of this famed weapon was fantastic as in the olden days of Destiny 1, 6 Gjallarhorns were the best means of DPS, no questions asked. The new perk adds Wolfpack rounds to teammates’ rocket launchers which gives a huge buff to teammates who are using a legendary rocket with Auto-Loading Holster as they get the damage benefits of wolfpack rounds, and the reload benefits of auto-loading holster.
Xenophage
With the recent buff and Solar 3.0 overhaul, this weapon is now a good and very easy option for damage. It has a slow fire rate and generous aim assist allowing for easy damage. This can be supplemented by Actium War Rig on titans to reload the weapon while it is used, or a hunter Marksman’s Dodge to reload the weapon, skipping the long reload animation.
Legendary Weapon and Perk Combinations
Linear Fusion Rifle with Triple Tap and Firing Line
Reed’s Regret is the main weapon that can be acquired with this perk combination. The efficacy of this combination is due to damage being increased when being next to teammates which is common during a damage phase and Triple Tap circumventing some of the lost time from reloading. This pairs very well with Witherhoard and Izanagi’s Burden.
Rocket Launcher with Auto-Loading Holster and Explosive Light or Lasting Impression
Palmyra-B is the easiest weapon to acquire this roll on due to it being a craftable weapon. Auto-Loading Holster circumvents reload and the other potential perks increase damage.
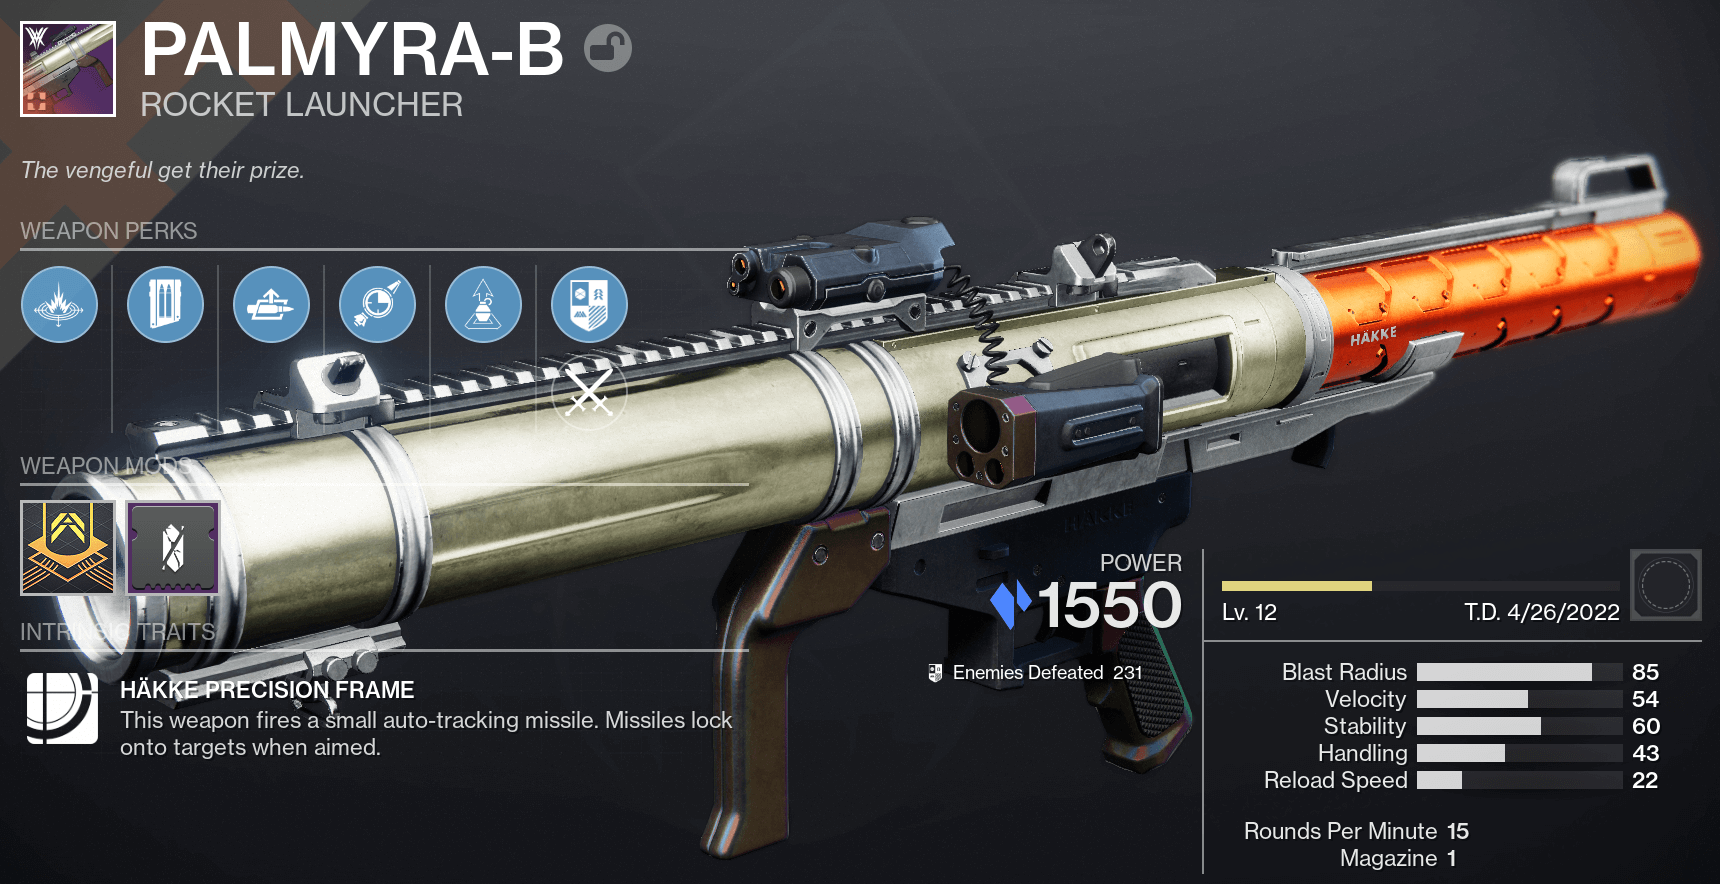
This weapon pairs well with any exotic mentioned above, especially Divinity which we will cover in the techniques section below. If using Divinity this option is highly recommended and is still recommended for all members of a fireteam to use because of ease of use.
Linear Fusion Rifle with Bait and Switch and Fourth Times the Charm or Triple Tap
The Vow of Disciple raid linear fusion rifle Cataclysmic is the main weapon that can have this roll. Bait and Switch is getting a large buff in season 17 to 35% bonus damage and plays well with Witherhoard and Izanagi’s Burden due to both those options only holding 1 shot.
Sniper Rifle with Triple Tap and Firing Line
This option is not quite as good as the others because it would end up with you not having a primary ammo using weapon, but if you do not have access to any of the exotics or other legendary options is a pretty good replacement that can deal some damage.
Supers and Abilities
Well of Radiance
This solar warlock super is a top DPS option as it gives a 25% damage buff to teammates and heals everyone in it. Depending on the encounter, 1 to 3 players using this super is recommended, and the rest of the team utilizing the other supers listed below. Lunafaction Boots is a recommended Exotic Armor Piece with this super.
Golden Gun – Marksman
The DPS of this super is fantastic and with the Celestial Nighthawk, an almost mandatory exotic helmet to use with this super, is a great way for a quick burst of damage and means of reload canceling which will be covered in techniques. This super is recommended for any player outside of Well of Radiance using warlocks.
Thundercrash
Like golden gun this super deals a large chunk of damage.
Crest of the Fallen Star is a highly recommended exotic armor piece to pair with this super as it gives a straight damage buff and can be obtained through solo legendary lost sectors
Nova Bomb
Either option of Nova Bomb works as they deal roughly the same damage depending on the boss’ movements and surrounding enemies. This is the warlock’s version of a quick damage dealing super. There are no specific recommendations for an exotic as no exotic directly buffs this super, so an exotic armor piece should be selected that addresses other aspects of play.
Blade Barrage + Knock ‘em Down
This super got a massive buff with solar 3.0, and the Knock ‘em Down aspect adds knives to the Blade Barrage super increasing its damage even more. This is a simple point and click super with a fairly fast animation. Star-Eater Scales are the go to exotic to overcharge your super for extra damage.
Shadowshot – Moebius Quiver
This super deals a good amount of damage, but not quite as much as the other options mentioned. The damage is made up with the utility of debuffing the target making them take 30% more damage from you and teammates. Orpheus Rig is a good exotic with this super, but is not as strongly recommended as the other exotic armor pieces mentioned for other classes due to the exotic dragging out the length of time the super is used.
Echo of Undermining Fragment
This allows grenades to weaken targets for a and applies a weaker version of the debuff that divinity and mobius quiver apply to enemies at 15%. With this, grenades are a good means of dealing supplemental damage, reload canceling, and increasing total damage for you and teammates if there is no Divinity or Tether active. This is best paired with Vortex Grenade due the duration in which it lasts.
Mods
Boss Spec
This weapon mod is a must use for any legendary weapon you are planning on using for boss damage, it gives a flat damage bonus with no drawbacks.
Radiant Light
This mod makes teammates become charged with light when you cast your super. This is great for a warlock who is using Well of Radiance to get your teammates charged with light to utilize some of the mods below.
High-Energy Fire
This gives a weapon a 20% bonus and consumes a stack of charged with light for every enemy defeated. For example, if your warlock uses Well of Radiance and is using Radiant Light, they will give your first shot with your weapon a damage bonus.
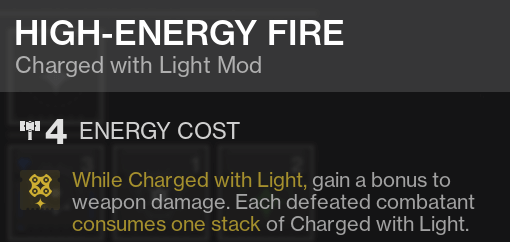
Say you are using Izanagi’s Burden, the weapon depends on 1 very strong shot which will get 20% bonus damage from this mod and a 25% bonus damage buff while you are in the Well of Radiance.
Taking Charge
Another mod to become charged with light, this time the condition is picking up an orb of power. This can be easily achieved by grabbing the orbs from a teammate’s super at the start of a damage phase.
Supreme Wellmaker
This mod gets a shoutout for those using Reed’s Regret and spawns stasis wells for the use of our next mod, Font of Might.
Font of Might
When picking up an elemental well that matches your subclass elemental type, your damage with a weapon with a matching element gets increased damage. Great for certain high damage options such as Reed’s Regret and a stasis class. In season 17, combos to look out for are the new Solar subclasses with Xenophage and Cataclysmic as they are solar weapons and will pair very well with a Celestial Nighthawk Golden Gun user.
Holster Mods
These are a weaker version of Auto-Loading holster as they progressively load a holstered weapon over a longer period of time, but are still extremely useful for snipers, linear fusion rifles, and other weapons without auto-loading holster.
Technical Prowess
Now that we got equipment out of the way let’s get into how to use this equipment as efficiently as possible to maximize DPS. This information will be useful if you have all of the recommended weapons, mods, and exotic armor pieces or if you only have a few or none of them as some of these techniques are universally applicable.
Buff Stacking
Damage buffs do in fact stack. If you are in a Well of Radiance and have a weapon with Firing line, both damage percentage bonuses will apply and increase damage.
Debuff Stacking
Debuffs work differently than buffs and it is important to know that a target can only have one active debuff applied to them. If your group is using a Divinity and a Tether, the target is only receiving damage for one of those debuffs. So if you are using two of these simultaneously there is wasted damage output as the debuffs can be spaced out such that one player is utilizing higher damage output options rather than applying a redundant debuff. If using Tether and a weakling grenade it is best to space these out as much as possible to spread out the debuff timer, and an added bonus if you are able to use these abilities to reload cancel which is covered next.
Reload Canceling
This is a very useful skill that can be used with any weapon, but is extremely useful with Izanagi’s Burden, snipers, and Linear Fusion Rifles. When reloading there is an animation in which the clip is reloaded and ammo shows as being populated in the lower-left corner, but you are unable to shoot the gun during this animation.
Reload canceling is swapping weapons, using an ability, using a super, or sprinting the moment the new ammo shows as being populated such that the new action is being performed when this animation is occurring and the weapon cannot be fired. Once the other action is performed that weapon can be used once again given that the timing window of that animation is completed.
For example if you reload cancel and then quickly sprint, your weapon will ready once again and the animation will not be performed, but the weapon still can NOT be fired during the timing window in which the animation would have otherwise occurred. The primary strategy with this technique if you are using one weapon for DPS is when you reload a weapon to reload cancel with an ability or super such as shooting Izanagi’s Burden, reload cancel by throwing a grenade, and repeat as seen in the clip in which a reload cancel is performed both with a weapon swap and grenade throw.
When using multiple weapons and/or bait and switch reload canceling is performed by weapon swapping and the occasional ability use. An example of this is shoot Izanagi’s Burden, reload cancel by swapping to a rocket launcher, shoot the rocket, then reload cancel the rocket by swapping back to Izanagi’s Burden (or don’t reload cancel if using Auto-Loading Holster).
To break it down in a more clear manner, here is an order of inputs and a flowchart if you are using an Izanagi’s Burden and Auto-Loading Holster Rocket Launcher:
- Shoot Izanagi’s Burden and Reload for single charge shot
- Reload cancel the moment the magazine is put in by:
- Using an ability/super
- Swapping weapons to rocket launcher
- If you used an ability repeat the
cycle by shooting Izanagi’s Burden
again - If swapping weapons to the rocket
launcher repeat the cycle by swapping
to Izanagi’s Burden once more
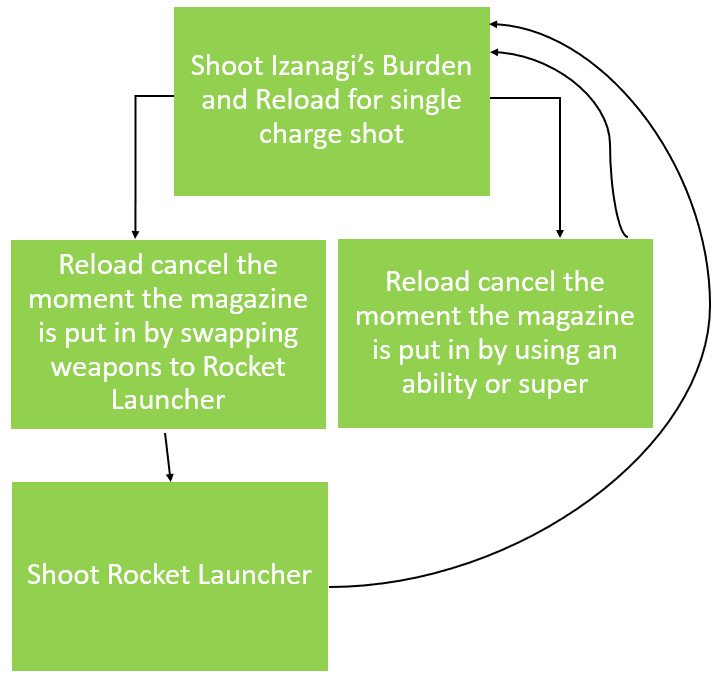
As you can see in these clips below, you can shoot 2 Izanagi’s Burden shots in just under 5 seconds, but in the second clip , reload canceling was used to shoot a rocket in between the two shots with no delay whatsoever!
Clip 1
Clip 2
Bait and Switch Swapping
This technique is specific to usage of the bait and switch perk. It is best paired with Witherhoard or Izanagi’s Burden due to them only having 1 shot per use.
It starts with shooting one of these two exotics, reload canceling if using Izanagi’s by swapping to secondary weapon, shoot that weapon once, swap to Heavy Weapon with Bait and Switch, use the entirety of that magazine, reload cancel the heavy weapon, and then repeating the cycle.
To maximize this just a bit more you can use a weapon with good handling like an SMG in the energy slot and mods that increase weapon ready and stow times.
Here is the order of inputs when using Bait and Switch:
- Shoot 1 shot of high burst weapon in Kinetic Slot (Izanagi’s Burden, Witherhoard, etc.)
- If kinetic does not have Auto-Loading holster, reload cancel the weapon by swapping to energy weapon.
- Shoot 1 shot from energy weapon
- Swap to Heavy weapon with Bait and Switch
- Shoot all shots in the Bait and Switch Weapon
- Reload cancel Bait and Switch weapon by swapping to kinetic slot weapon
- Repeat
Auto-Loading Holster
This perk is such a great option for DPS as it allows you to use other weapons for damage rather than performing a reload. To get the most out of this perk, use the entire magazine of a gun and practice adjusting to the timer of the perk activating as the noise indicating the perk activating will be covered up by the hectic nature and flood of sound from an encounter.
It is important to note that Witherhoard gets this perk if the catalyst is obtained and has a specific quest for it.
Divinity Rocket Swap
If you are the member of your team who is so kindly using Divinity, you can increase your DPS by using a rocket launcher with Auto-Loading Holster. When using Divinity you can swap to a rocket, quickly shoot it, and let the rocket reload itself using the perk. This is best performed with a reload cancel once your clip of Divinity ammo runs out, but can be used mostly any time.
Example Team Loadouts
3 Man Dungeon Team
For the sake of simplicity and inclusion let’s assume your team contains 1 of each class.
Warlock
Well of Radiance, Izanagi’s Burden, any weapon in the energy slot, Linear Fusion rifle with Triple Tap and Firing Line, Lunafaction Boots.
This player’s role is to lay down the well just before the damage phase to buff everyone’s damage and create stasis wells for this using the Supreme Wellmaker mod to further buff a teammate’s damage if they opt to use Reed’s Regret and a stasis subclass.
Damage strategy is to shoot Izanagi’s Burden, reload cancel with a swap to Linear Fusion Rifle, shoot all shots, and reload cancel back to Izanagi’s Burden.
Hunter
Shadowshot – Moebius Quiver and Vortex Grenade with Echo of Undermining, Izanagi’s Burden, and energy slot weapon, rocket launcher with auto-loading holster and explosive light, and charged with light mod.
This player’s role is to apply the debuff and deal damage by first shooting the first shot of their super, shooting Izanagi’s Burden, reload cancel Izanagi’s Burden with the second shot of their super, shoot Izanagi’s Burden, reload cancel Izanagi’s Burden by swapping to rocket, shoot rocket, swap to Izanagi’s Burden, reload cancel by throwing grenade to reapply debuff, shoot Izanagi’s Burden, reload cancel by swapping to rocket launcher, and finish the phase by swapping between the rocket launcher and Izanagi’s Burden.
This class has the most juggling and if mastered deals a lot of damage and applies a debuff for everyone.
Titan
Thundercrash, Crest of the Fallen Star, Witherhoard, any SMG, Linear Fusion Rifle with Bait and Switch, and charged with light mod. This role is a little less intensive as you will be using your Witherhoard and then a super first, but make sure the Hunter’s tether has landed to get the bonus from the debuff, and then once you land do the Bait and Switch combo highlighted earlier.
The Witherhoard is shot before the super so the tick damage from Witherhoard is occurring when using your super because of the cast time. A pulse grande can be worked into the combo to reload cancel the Linear Fusion Rifle.
Things to note
There is no Divinity because there are only 3 people, and the 30% debuff isn’t worth the loss of damage and can be made up by use of tether and a Vortex Grenade. There is only one Witherhoard to avoid any lost damage from damage tick bugs.
The specific weapons can be swapped across classes, but it is recommended the Titan to use Witherhoard as the tick damage can occur when in super. Gjallarhorn can be used if a player does not have the other exotic weapons mentioned. If this is the case the other players will be incentivized to use rocket launchers.

6 Man Raid Team
We’ll do the same thing and assume even class numbers across the board with 2 of each class.
Warlock 1
Well of radiance, Divinity, Auto-Loading Holster rocket launcher, and Lunafaction Boots. Due to this class using a super before The damage phase actually starts it is best to run Divinity to keep up the debuff. The rocket launcher can be shot to reload cancel the Divinity, or sporadically a few times during the damage phase which will interrupt the debuff briefly.
Warlock 2
Nova Bomb – Cataclysm, Vortex Grenade with Echo of Undermining and combination of weapons based on preference. No need to run Divinity nor Witherhoard. This player can be the one Gjallarhorn user. Damage using the strategies mentioned earlier by reload canceling through a weapon swap, a vortex grenade, or super. The grenade is good to have as it can keep a debuff going in case the divinity user needs to reload or shoots a rocket.
Hunter 1
Golden Gun or Blade Barrage – Marksman and Celestial Nighthawk if using golden gun for precision damage bonus or Knock ‘em Down and Star-Eater Scales if using Blade Barrage, and any group of weapons. Can be the Gjallarhorn user.
Hunter 2
Golden Gun, Blade Barrage, or Tether with Mobius Quiver. Any group of weapons can be used with this player. If they use Tether to cover windows in which the Divinity debuff drops, they pair well with using an Izanagi’s Burden and rocket launcher with Auto-Loading Holster due to the number of abilities used.
Titan 1
Thundercrash with Crest of the Fallen Star, Witherhoard, and any heavy based on preference. This Titan will use the same damage strategy with the Witherhoard and super combination.
Titan 2
Can use Thundercrash with Crest of the Fallen Star or Ward of Dawn. Weapons can be any preference and is a good candidate to be the sole Gjallarhorn user.
Things to note
There is only 1 Divinity and 1 or zero Gjallarhorn users. Void classes use debuff abilities as they can help keep the debuff going if the Divinity user needs to reload, shoots a rocket, or dies.
The Last Word (Don’t Use The Last Word for DPS)
There are a few things to consider when selecting your loadout with the main goal of DPS. The main factor is the encounter and the boss itself. Is the boss constantly moving and hard to hit like Rhulk in Vow of the Disciple?
If so, Izanagi’s Burden may not be the best choice if you are not confident in your sniping skills, and running Divinity and a rocket launcher could be a better bet. Does the boss and surrounding enemies deal a lot of damage? In that case, prioritizing a well of radiance instead of a nova bomb super would be best to ensure you and your teammates stay alive while dealing damage.
What your teammates are using is another consideration. For example when using Gjallarhorn make sure your teammates are using rocket launchers to get the most out of the perk.
Another thing to consider is debuff stacking with teammates. If a teammate is using Divinity, no other debuffs will be respected, and applying a weaker debuff can be a waste of time that can be better used shooting the boss.
The Last and most important factors to consider are what you have and what you are comfortable using.
The former is a little obvious… using Witherhoard is not ideal for you if you don’t have Witherhoard. But the second is often not considered.
Players get hung up on what options have the most DPS in a perfectly ideal setting, but most settings are not ideal, and some players are better with some weapons than others. So choose what is best for you out of these options discussed here.
Thanks for reading! For more articles, check out our other Destiny 2 guides.
 Download APP
 Collapse