 League of Legends
 Teamfight Tactics
 Valorant
 Lost Ark
 Destiny 2
 Diablo 4
 Download APP
BG3 Tips and Tricks for Tactician Combat
Baldur’s Gate 3 combat can definitely be complex, especially if you’re new to turn-based RPGs or D&D.
In this guide, we’ll cover ten BG3 combat tips and tricks that will help make your life easier all the way through the Tactician difficulty.
We do have one section (tip #10) with minor Act 1 spoilers so keep an eye out for the warning if you want to avoid them.
Lastly, there are so many aspects to BG3 combat that there’s no way we could cover everything but we’ll be updating our list with more advice over time.
Let’s dive in!
1. Know your party’s gameplan
There are many ways to build a Baldur’s Gate 3 party!
The traditional lineup would have something like:
- Frontliner – Paladin, Fighter, or Barbarian
- Ranged damage dealer – Ranger, Warlock
- Utility/supportive – Bard, Cleric, Wizard
- Flex – Druid, Monk, Rogue, basically anything works here
This would provide a balanced approach that can adapt accordingly to the situation.
On the other hand, a different BG3 player could opt for a stealthy assassin party like this:
- Gloomstalker Ranger
- Way of the Shadow Monk
- Assassin Rogue
- Trickery Cleric
This party would be most effective in sneaking around and getting into the perfect positions to deal as much death in the initial rounds before their enemies can react.
No matter what sort of combination you choose, knowing your strengths and weaknesses ahead of time will make your battle go more smoothly before it even begins.
2. Examine enemies immediately
Throughout your journey in Faerun, you’ll run into a wide range of enemy types and subtypes.
Even if you play to your party’s gameplan, you can still make a ton of mistakes if you don’t examine your foes at the beginning of the fight.
Doing so will help you understand their built-in resistances and vulnerabilities so you can adapt accordingly and make the most of every action.
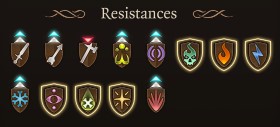
Is one of the enemies resistant to bludgeoning, piercing, and slashing damage? Let your elemental spellcaster deal with them.
Are you facing a horde of zombies? It’s time for your Cleric to bust out their unique abilities like Turn Undead.
3. Have the ability to target different skill stats
Although there will be powerful bosses who seem like they’re good at everything, most enemies in BG3 will be designed to have strengths and weaknesses.
For example, a melee martial class is more likely to have stronger STR, DEX, and/or CON stats with weaker INT, WIS, and/or CHR stats while a caster may have the reverse.
There are of course different combinations like the Paladin which will have high STR/CON/CHR and the Monk which has DEX/CON/WIS, but you get the idea.
The main point of this tip is to make sure that you can exploit and target a wide range of stats when you’re selecting your party’s spells and abilities.
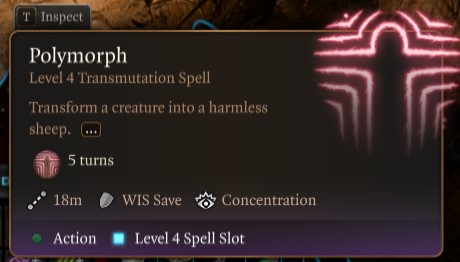
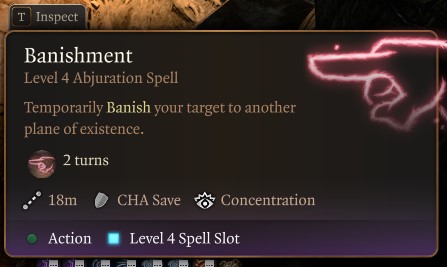
For example, Polymorph and Banishment are both powerful single-target crowd control spells that can remove a big threat from the battlefield.
Polymorph is a WIS save, meaning it would be a good choice against the Paladin we mentioned above.
On the other hand, Banishment might be a better choice against the Monk who has high WIS.
In an ideal world, your party comp would have access to targeting all six stats, but this may not always be possible based on the classes you have.
If you can’t, instead try to avoid taking too many spells and abilities that overlap the same stat and diversify where possible.
For extra credit, remember to place Hex on the key threat to exploit the weak stat even more with Disadvantage!
4. Use your movement carefully
Unless you’re reloading a save, there aren’t redos in BG3.
Be sure to be intentional with your limited amount of movement each turn.
Any wasted movement could mean being just out of range for a finishing blow or being unable to hide behind cover.
Being careless can also result in you being hit by attacks of opportunity, which can immediately swing a fight against you.
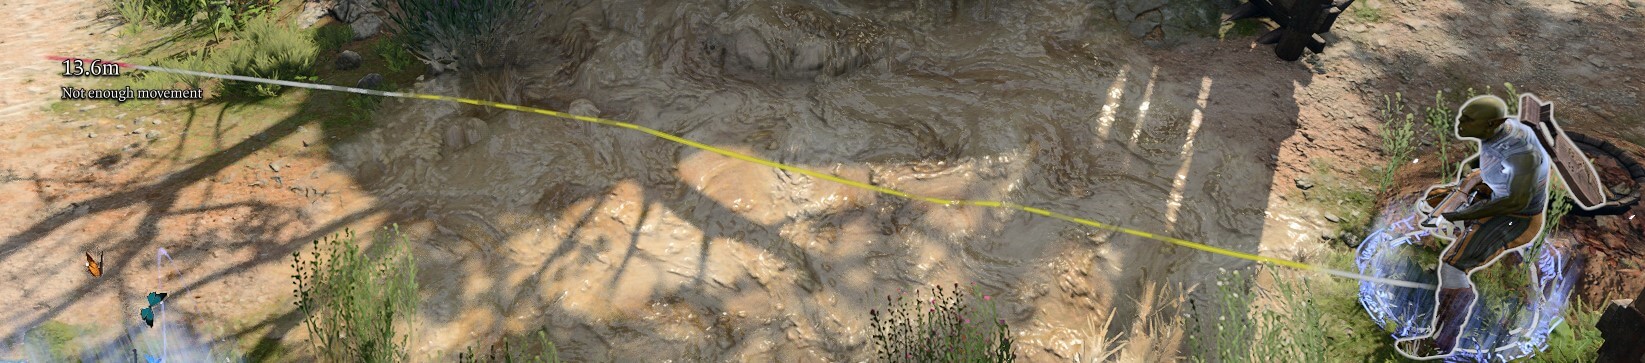
Rather than clicking on the final destination of where you want to go, click gradually to have a precise path.
While doing so, pay attention to the color of the line. This will help you avoid hazards and help you make sure you get to where you need to go safely.
If you’re going to be opportunity-attacked you’ll see a big red arrow pop up.
![]()
When going through hazards, the line will turn yellow. In the example below, you can see that the area with Grease. Admittedly, it can be easy to miss!
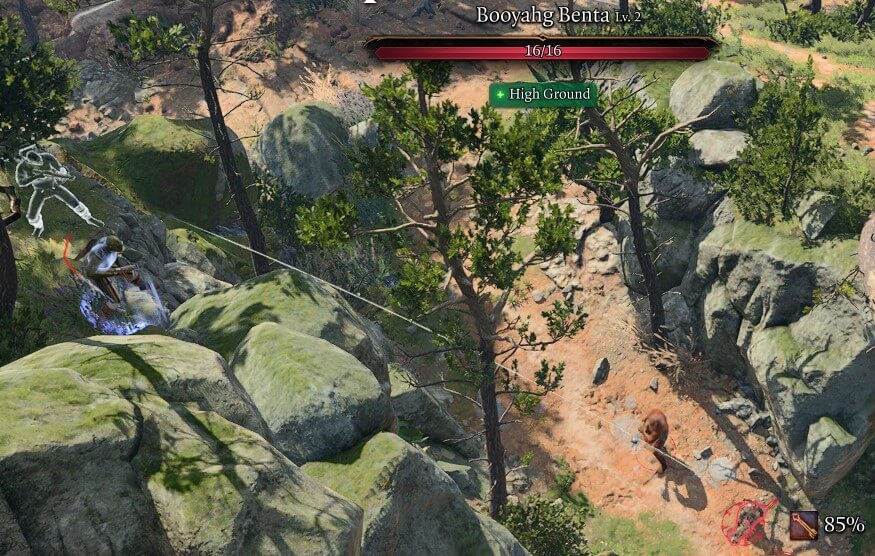
5. Fight for high ground
There is a lot of verticality in BG3! In most areas, you’ll find climbable rock terrain, ladders, stairs, and more.
Due to this, be like Obi-Wan Kenobi and fight for the high ground as it will not only improve the probability of your rolls, but also decrease the probability of your enemies.
Sometimes, you’ll have unexpected ambushes against you where the enemies begin on the high ground.
In these cases, try to limit the amount of turns where you have disadvantage and safely work your way up to either be on the same level as them, or take it yourself.
Usually, you can have a mobile tank like a Barbarian or Owlbear Druid jump in to create an opening for the rest of your party to follow behind with Misty Steps, Dashes, and so on.
Another option is to cast something like Fog, Stinking Cloud, or Darkness to give you cover while your party moves in.
Once you have the high ground established, have your melee characters protect entryways while your ranged damage dealers do the heavy lifting.
If needed, consider using spells like Glyph of Warding or Guardian of Faith to make it even harder for enemies to reclaim the high ground.
Lastly, remember that Shoving is incredibly strong in BG3. When you have a strong position on the high ground, you can push enemies who climbed up back down to their deaths.
6. Sequence your choices for success
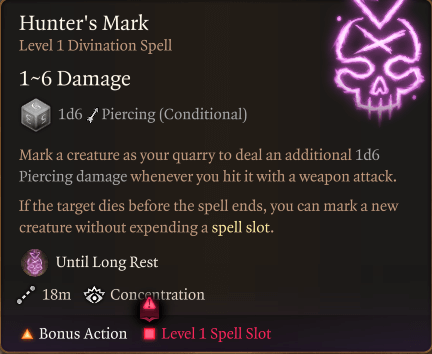
If you’ve played D&D for a while, you know the pain of forgetting to Hunter’s Mark at the beginning of your turn.
For those of you who don’t know how the spell works, it basically grants a 1d6 boost of damage every time the Mark’s caster hits their marked target.
This means by forgetting to cast it first, you potentially missed getting 6 damage.
When there’s always an element of randomness from dice rolls, it’s important to really increase your damage floors whenever you get the chance.
Another example, that applies more on the party level, is to try to land your crowd control (CC) before swinging with standard damage.
If you have a Monk in your party, try to have them land their Stuns or Prone attacks before the rest of your party attacks the target.
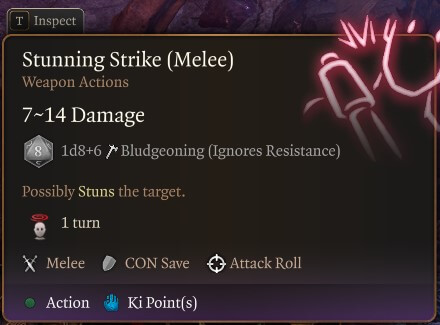
This is because if the CC lands, it’ll result in your party increasing your odds of hitting due to Advantage.
Sequencing can be hard to remember when playing solo, but even more difficult when playing multiplayer, so be sure to communicate!
7. Synergize your abilities, spells, and items
In addition to the standalone capability of an ability, spell, or item, there are also additional bonuses you can benefit from when you combine them.
When executed properly, you can swing a fight heavily in your favor! Let’s go through some classic examples.
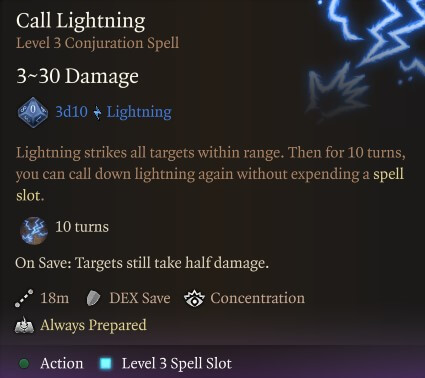
Water + Lightning
By using Create Water or simply throwing a water item (commonly found when looting), you can wet enemies directly or create a pool of water they have to walk through.
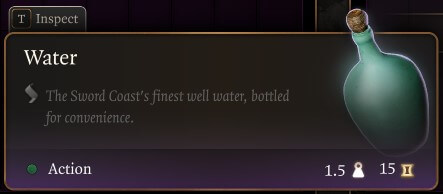
Any enemy that is wet will be vulnerable to Lightning (and Cold damage). So if you wet an enemy and then cast a spell like Call Lightning, they’ll take double damage from it.
In addition, any enemy that steps in the electrified water will automatically take 1d4 Lightning damage at the start of each turn they’re in it.
Grease + Fire
Don’t have access to Lightning and Water? You probably have some Grease and fire on hand.
This combat starts with using Grease (in spell, scroll, or throwable form) and placing it for maximum enemy slippage.
Once enemies are slipped and prone, light them ablaze with a fire cantrip, Arrow of Fire, or many other sources of flame.
![]()
You’ll be rewarded with a nice explosion with 1d4 of burning damage to the targets next turn.
Silence + Martial Class
This last one is a bit more situational but can be devastating against enemy casters.
First off, make sure that the casters cannot easily escape. Although Silence has a pretty big sphere, you’ll want the them to be in as tight a space as possible, like a hallway or at the top of a roof.
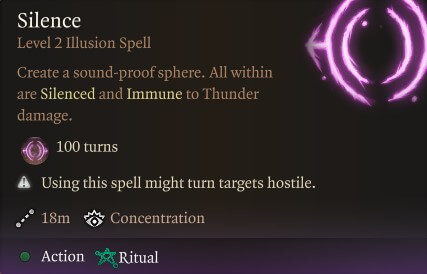
Once the casters are Silenced, send in your martial classes like a Fighter or Barbarian who wreak havoc since they don’t need to cast spells to be effective.
Since magic wielders typically have weak physical capabilities and lack weapon proficiencies, it’ll basically be like target practice for your melee damage dealers.
8. Concentrate on…Concentration!
Understanding how Concentration works is another thing that beginners can struggle with at first.
Here’s a list of the important things to remember:
- Concentration effects persist through multiple turns, and must be ‘maintained’ by its caster
- Every time the caster takes damage, they must take a CON Saving Throw to continue its effect
- Every character can only have one Concentration spell active, casting another will cancel the previous
- The caster can choose to cancel their Concentration at any time during their turn
Since your party can only have a total of four Concentration spells, it’s typically a good idea to try to have every party member have at least one.
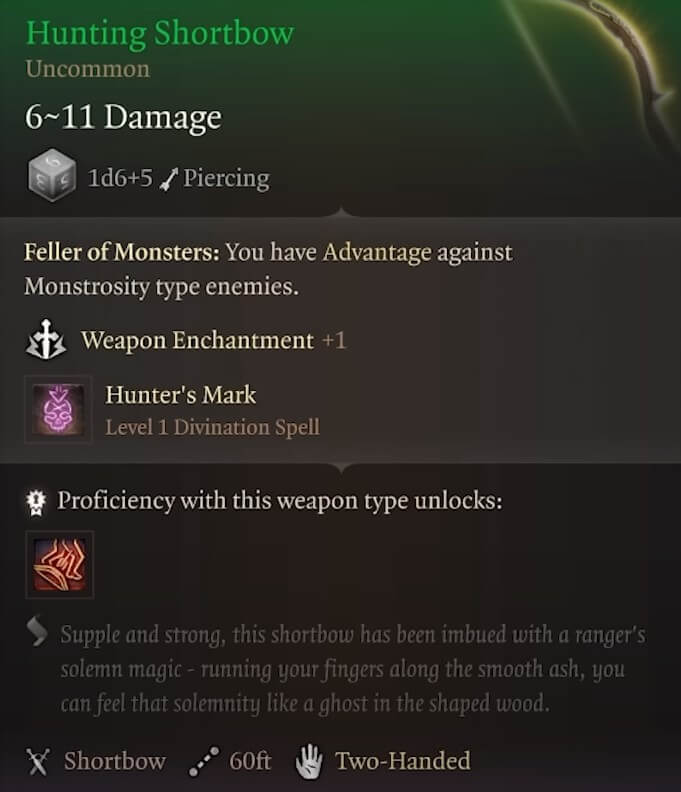
With items like Hunting Shortbow out there, even your non-casters can get access to them.
Since each party member can only have one Concentration effect active at once, it’s also important not to take too many Concentration spells.
If you have an important Concentration spell up, do your best to protect them by using cover or spells like Sanctuary.
For party comps that have a class like Cleric that casts high-level Concentration spells, it might be worth investing in the Warcaster Feat to have even more consistency.
9. Watch the initiative order and prioritize kills
In a turned-based game, being able to remove enemy action economy is almost always fundamentally good.
Get in a habit of watching the initiative timeline order to help you improve your targeting choices.

For example, if you have two party members coming up before a low-health enemy caster takes their turn, it’s worth trying to find a way to finish them off.
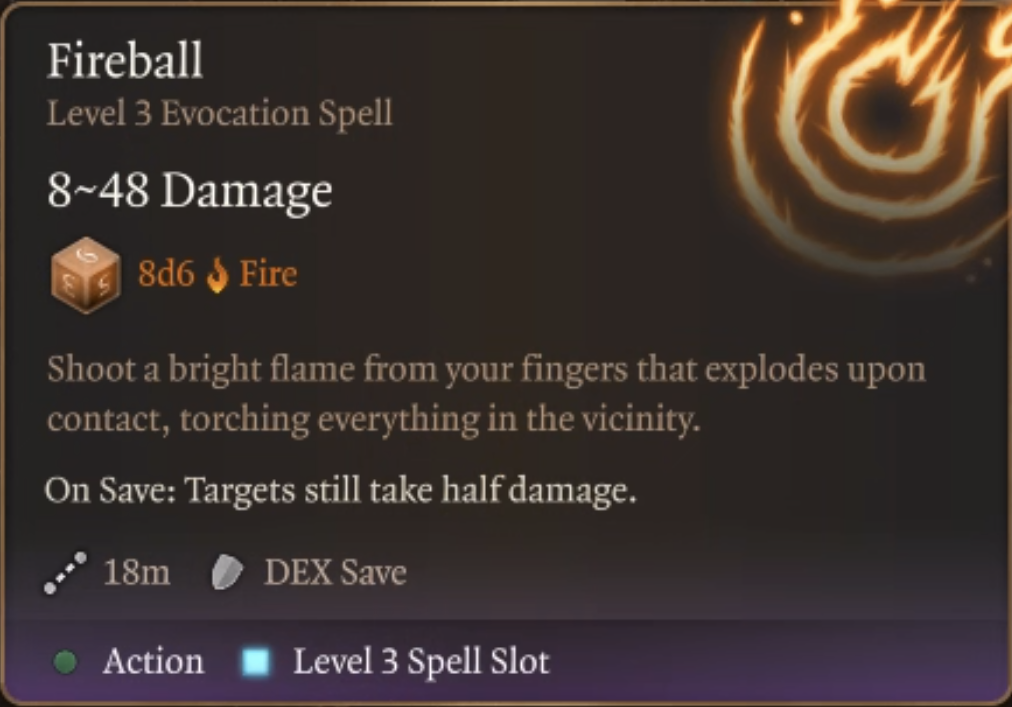
Just because they’re on low health, doesn’t mean they aren’t a threat. That Fireball from a 1 HP enemy is going to hurt as bad as a full-health one.
There will be some fights that have specific objectives like trying to escape in X turns or defeat an enemy before a time limit, so make sure to adapt to context.
10. Pay attention to environmental mechanics
Like a veteran D&D dungeon master, Larian has handcrafted each area where combat occurs to have its own built-in features that you and your enemies can make use of.
So whenever you start combat, take a look around and see what you can take advantage of.
Is there a door? Consider opening and closing it between ranged attacks. No door? Grab random furniture to block key pathways.
A ladder? Try to get to the high ground and remember that you can break it to ensure enemies can’t easily follow (just make sure to have an exit plan).
When you have a particularly tough battle, there is likely a unique interaction you may be missing.
Act 1 Spoilers Incoming!
Here’s a key example of a unique environmental mechanic.
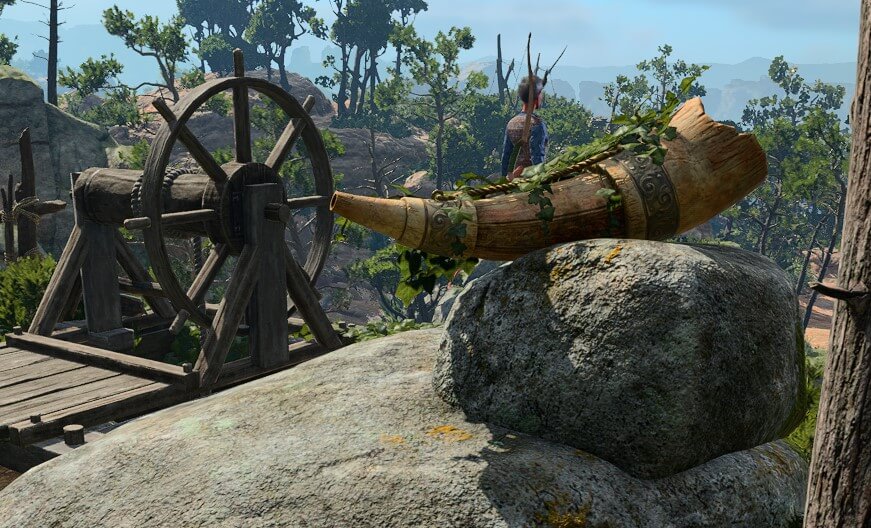
If you ended up doing the Helm’s Deep style battle to protect the Druid Grove instead of taking out the three Goblin leaders, Zevlor prompts you to blow the horn to initiate the battle.
After blowing the horn, there are a few things that are easy to miss.
First off, all of your party members and Tiefling allies will be granted Rally, making them more durable (8 HP is a lot at lower levels!)
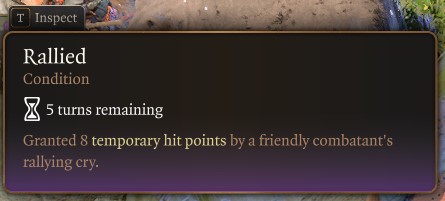
Second, you can blow the horn as many times as you need to reapply the Rally to all allies who don’t have any temporary health.
By prioritizing blowing the horn throughout the fight, you can make the battle much easier and increase the survival odds for the Tiefling NPCs.
Almost every major battle and boss will have something like this, so be ready to find it…

Bonus Quick Tips
- Potions are versatile! In addition to just drinking one, you can also throw them at an ally or multiple allies.
- Try to set up surprise rounds with stealth and good positioning to start fights off strong.
- Have your ranged party members switch back to their melee weapons at the end of their turn in case enemies get in range for opportunity attacks.
- If there is a key enemy that might have information, try not to destroy their body with destructive spells like a Fireball since you won’t be able to cast Spead with Dead on them.
- Be creative! True to its D&D, roots Larian has tried to reward players who approach combat with imagination.