 League of Legends
 Teamfight Tactics
 Valorant
 Lost Ark
 Destiny 2
 Diablo 4
 Download APP
Table of contents
How to Beat Rellana, Twin Moon Knight in Elden Ring Shadow of the Erdtree
Welcome to our Rellana, Twin Moon Knight guide for the Elden Ring Shadow of the Erdtree expansion.
This is likely the second boss you will face from the new DLC, after you defeat Divine Beast Dancing Lion.
Check out our many Elden Ring build guides if you need help clearing this boss or any other content.
After beating Rellana, head to our Golden Hippopotamus guide!
Location
Rellana the Twin Moon Knight can be found in the final chamber in the minor legacy dungeon, Castle Ensis found northeast of the Three Paths Cross site of grace.
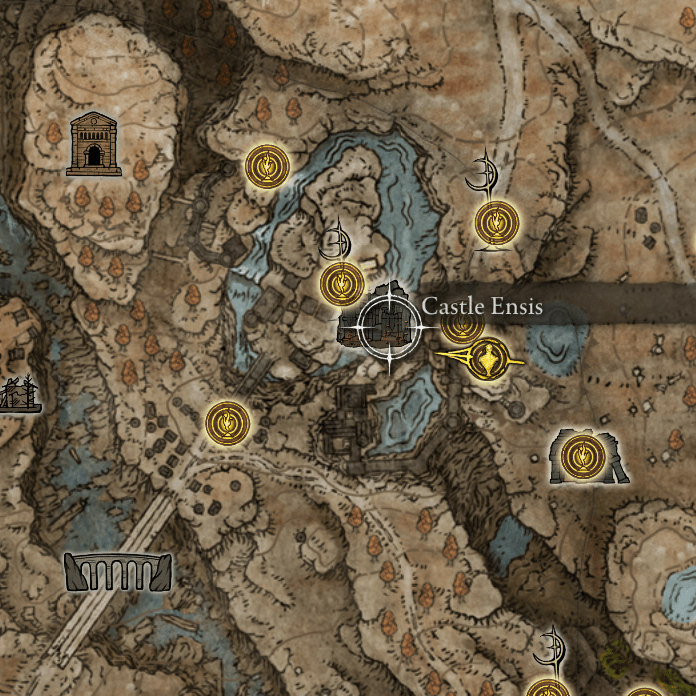
She can be found in the final chamber of Castle Ensis, just past the Castle-Lord’s Chamber site of grace.
Reward
After killing this boss you will be rewarded with the Remembrance of the Twin Moon Knight which can be traded in for one of two things.
1. Her weapon, Rellana’s Twin Blades
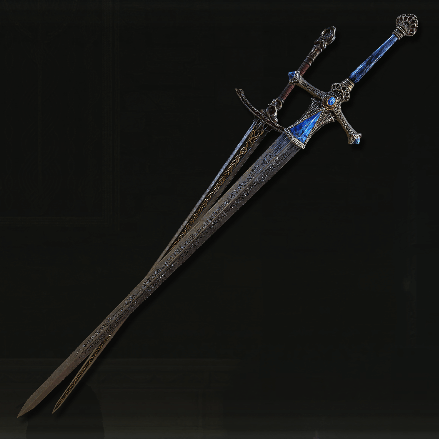
- This is a dual-handed Light Greatsword weapon with a unique moveset.
- It requires 13 Strength, 16 Dexterity, 16 Intelligence, and 16 Faith to wield.
- Has a powerful Ash of War similar to the Sword of Night and Flame that puts the player into a stance that will allow you to input a heavy attack to create a flaming vortex, or a light attack to unleash a flurry of lightblade waves.
- This weapon has strong light attacks and a powerful Ash of War that can be used to knock up smaller foes which makes this a good weapon.
2. A Sorcery, Rellana’s Twin Moons
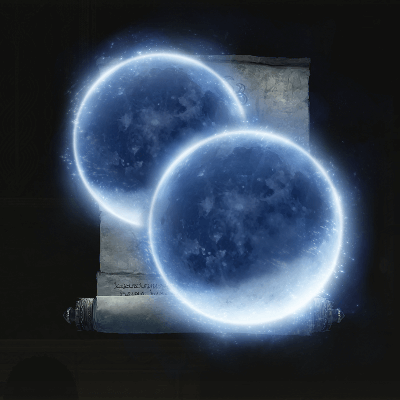
- This is a full-moon sorcery that incarnates overlapping twin moons which strike the ground one after the other, violently shaking the earth with moonlight.
- It requires 72 Intelligence to cast and takes up 2 spell slots.
- This spell can deal very high amounts of magic damage but has no hyper armor, so enemies with greater reach can easily knock you out of the air while you are channeling the spell.
- It can be difficult to find an opening to cast this spell so I would not recommend choosing this as your reward.
Recommended Level for Attempt
Since this DLC is meant to be tackled after completing the main game, it is recommended for you to reach at least level 150.
As far as the DLC’s leveling system goes, I recommend being at least Level 6 for your Scadutree Fragments level.
Damage Types
Strong Against
Rellana is resistant to Fire damage and Bleed buildup so it is not recommended to rely on these as your primary damage type for this boss fight.
Weak Against
Here are a few damage types she is weak against:
- Slash
- Holy
- Frostbite
Frostbite is especially strong in this DLC because all bosses have very high HP. This means the damage that frost does is also much higher, which is why I recommend this damage type above the rest. The rest, however, will still get the job done.
Phases
Rellana the Twin Moon Knight has 2 phases. Her second phase begins once she has lost at least 55% of her HP.
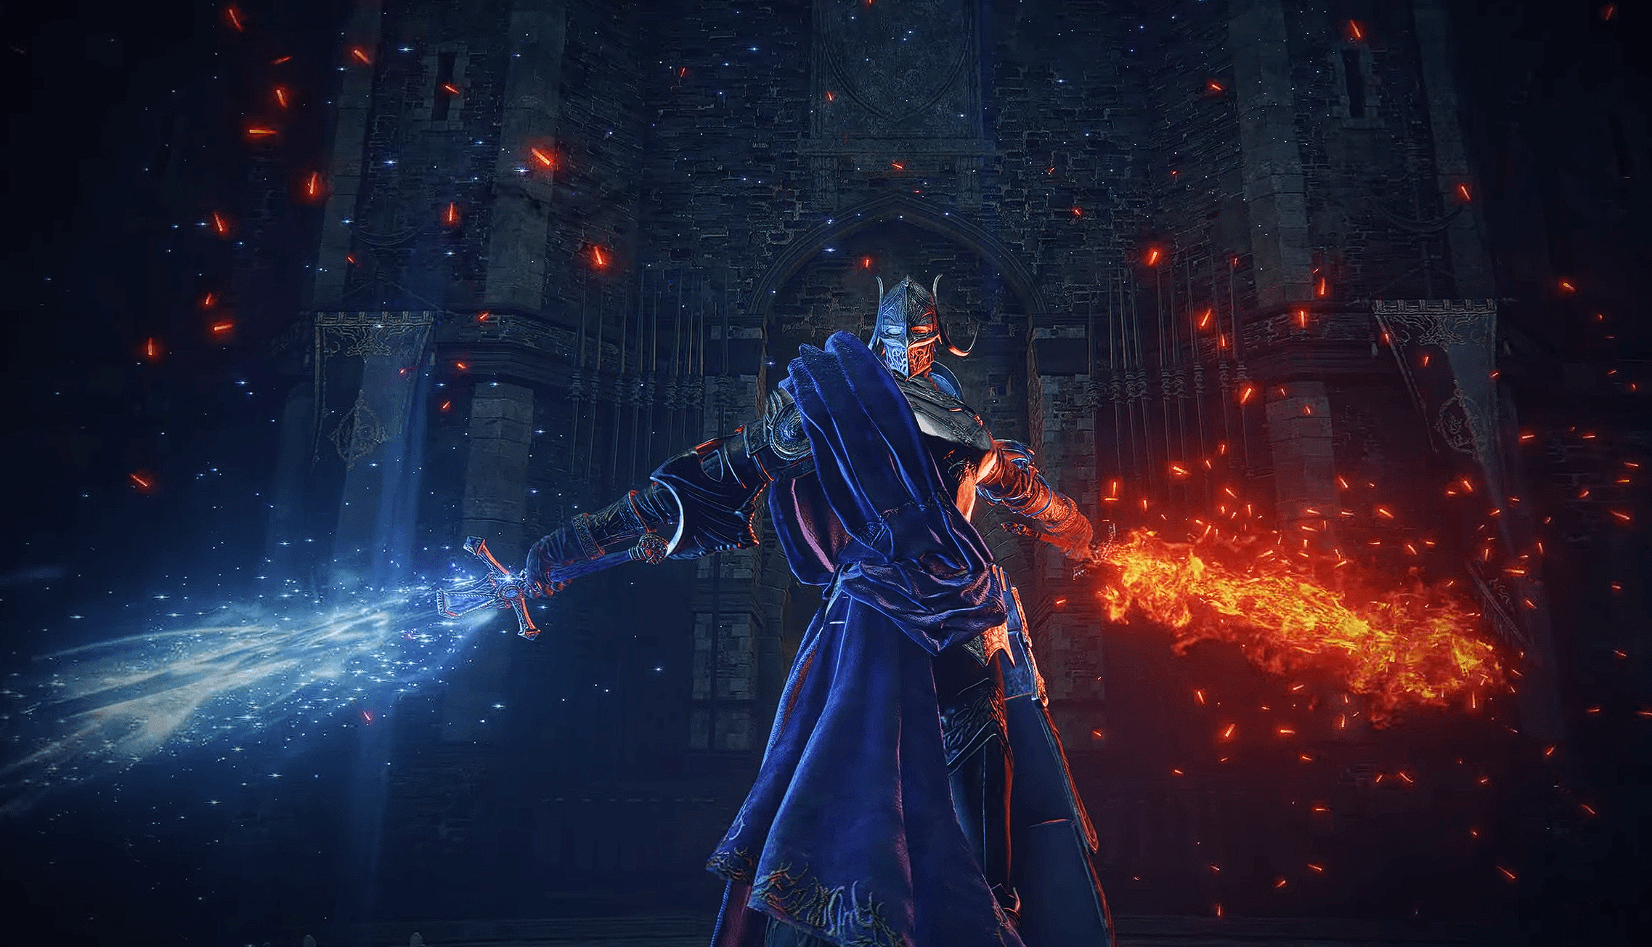
In her first phase, she mostly deals physical damage while being very aggressive and agile, dashing toward the player with extremely long combos while also using glintblades to force you to roll while she approaches.
In her second phase, she gets much more difficult by empowering many of her melee attacks with explosions and projectiles while also increasing the potency of many of her spells.
She also gains access to three new attacks that can be fatal when connecting.
Notable Attacks
This boss has very long combo strings that can be chained together somewhat unpredictably and be very hard to dodge.
To get around this, you can take advantage of her weakness to parrying. Most of her sword attacks can be parried once you learn the timings and this will allow you to avoid having to dodge her attacks which can feel like they last forever.
The best tool for parrying would be the Buckler equipped with the Carian Retaliation Ash of War.
This will allow you to parry not only her sword strikes but also her spells (although I would avoid trying to parry her Glintblades as you can not parry them all).
| Attack Name | Description | Counter |
|---|---|---|
| Glintblade Phalanx | Rellana summons magic glintblades overhead that fly at the player after a delay. | Walking to either side or rolling. |
| Glintblade Sweep | Rellana sweeps her sword summoning magic glintblades ahead that fly at the player after a short delay. | Run to the side and roll when they get close. |
| Lightblade Slash | Renalla sheaths her sword and then delivers a horizontal slash that shoots out a wave of light. | Roll forward or jump the attack after she swings her sword. |
| Carian Sovereignty | Rellana holds her sword overhead and empowers it, increasing its size, then does an overhead slash and a sweeping attack. | This attack deals heavy damage but is very telegraphed and can be avoided by rolling in any direction. |
| Lightblade Flurry | Rellana goes into a stance and then empowers her sword with magic, firing off waves with each swing of her sword. | She does this attack if you are far away while she goes into her stance. This can be avoided by running to the left for the first two waves, then jumping the third wave, and rolling the fifth wave. |
| Flaming Vortex | Rellana goes into a stance and then empowers her sword with fire, spinning around creating a vortex of flames and summoning pillars of fire that erupt from the ground. | She does this attack if you are close to her while she goes into her stance. This can be avoided by rolling backward and then backing away out of the range of her AOE. |
| Twin Moons | Rellana flies into the air and summons two dark moons to slam into the ground producing shockwaves that knock up the player. | You can jump over the waves as the moons hit the ground. |
| Dancing Blades | Rellana spins around doing downward slashes three times before slashing up twice and finishing with a cross slash. | Roll past her to your left, then back away and roll backward for her final slash and cross slash. |
| Double Slash | Rellana raises her sword and slashes twice in quick succession in a cross pattern. | This attack can be avoided by rolling backward. |
| Forward Dash | Rellana lunges towards the player and quickly swipes both her swords at you. | This can be avoided by rolling past her to the right, giving you a window to either attack or heal. |
| Dash (Left) | Rellana dashes to your left and does a spinning attack, quickly followed by an upward slash with her other sword, and then finishing by striking down with both her swords. If you are too far from her she will not perform the final strike. | You can roll past her spinning slash to the right which will create enough distance for her to miss her second slash, and then roll forward to dodge the final downward strike and get one light attack in. |
| Dash (Right) | Rellana dashes to your right and does a quick slash and thrust attack. If you are close to her after this attack she can perform two more downward slashes. | You can roll to the right to dodge the initial attack and then roll past her to the left if she does the follow-up attacks. |
| Rapid Slashes | Rellana goes into a stance with her swords at her side and then dashes forward, quickly slashing 4 times and then following it up with a very delayed final horizontal slash. | Roll backward twice for the first few slashes and then do a jump attack for her final delayed slash. |
| Upward Slash into Spin | Rellana swings her left sword up and then spins doing two slashing attacks and finishes with a sweeping attack. | Roll forward then roll to the left as she starts spinning and then finish with a backward roll for her final sweep. |
| Double Overhead Slash | Rellana holds both of her swords over her head and performs a very slow downward slash. This can be followed up by a second downward slash but from the other side if you are close enough. | Roll to the left and then roll to the right if she does the follow-up attack. |
Phase 1
Rellana will usually start the fight with either her forward dash or one of her Glintblade attacks.
Her Glintblades can be avoided by dodging to the side and her dashes can be avoided by rolling backward or past her to the right. If you roll backwards she may stop her attacks early giving you a window to get an attack in.
When you want to engage an attack, doing a heavy jump attack with certain weapons can be a fairly safe way to get damage off as this will cause your player to crouch down to recover afterwards which causes many of her attacks to swing overhead and miss.
Timing windows to attack/heal
The best openings for attacking are after she does larger attacks like Carian Sovereignty which can leave her open to a couple of attacks or give you time to heal.
She also takes some time to recover after her dash attack combos which can be the perfect window to deal some damage or heal.
Phase 2 (55% HP)
Rellana will empower her swords with magic and fire making her attacks far more lethal.
She does many of the same attacks as in her first phase but her swords can also create a delayed explosion and light wave projectiles.
Just like before however, the dash attacks and Carian Sovereignty are great attacks to punish her or heal.
Her Twin Moons are another great attack to still punish her on.
You can make this part easier by using the Spelldrake Talisman +3 which can be found underneath the bridge that leads into her castle and also some fire resistance spells or talismans.