
The Wailing Caverns is a massive, sprawling dungeon with loads of bosses, dangerous enemies, and great loot. Its one of the most challenging dungeons in the early game featuring a whole host of dangerous monsters and bosses, but once cleared it has a ton of high value quest rewards.
 Use your favourite features in-game with our Desktop App
WoW Forever Dungeon
Wailing Caverns - Bosses, Quests & Loot
Mechanics
Beginner
Wailing Caverns Map and Recommended Route
Overview
Wailing Caverns Loot
Boss Loot
Boss | Loot |
|---|---|
Lady Anacondra |
|
Lord Cobrahn |
|
Lord Pythas |
|
Skum |
|
Lord Serpentis |
|
Verdan the Everliving |
|
Kresh |
|
Mutanus the Devourer |
|


Quest Loot
Quest | Loot |
|---|---|
Deviate Eradication |
|
Leaders of the Fang |
|
Glowing Shard |
|


Wailing Caverns Quests
Deviate Eradication
Quest Giver: Ebru
Coordinates/Location: The cave above Wailing Canverns which can be reached by jumping down from the mountain above
Required Level:
Reward: 25s + 5,950 XP
Glowing Shard
Quest Giver: Mutanus the Devourer boss
Coordinates/Location: Using the Glowing Shard he drops after killing him
Required Level:
Reward: 7,700 XP
Leaders of the Fang
Quest Giver: Nara Wildmane
Coordinates/Location: Thunderbluff, in the Elder Rise
Required Level:
Reward: 6,400 XP
Deviate Hides
Quest Giver: Nalpak
Coordinates/Location: The cave above Wailing Canverns which can be reached by jumping down from the mountain above
Required Level:
Reward: 18s + 4650 XP
Serpentbloom
Quest Giver: Apothecary Zamah
Coordinates/Location: Thunderbluff, in the cave below Spirit Rise
Required Level:
Reward: 20s + 4950 XP
Trouble at the Docks
Quest Giver: Crane Operator Bigglefuzz
Coordinates/Location: Ratchet near the dock
Required Level:
Reward: 10s + 3900 XP
Serpent Bloom
Quest Giver: Apothecary Zamah
Coordinates/Location: Spirit Rise in Thunderbluff
Required Level:
Reward: 10s + 4950 XP
Lady Anacondra
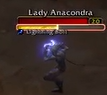
Lady Anacorda is located in the first large chamber of the Wailing Caverns and is essentially an enhanced version of the Druid's of the Fang. She can spawn in 1 of 4 random locations, and is always surrounded by a several random adds.
Lady Anacorda Strategy
She will use three primary abilities, Sleep,  Healing Touch and
  Lightning Bolt. Her Sleep will target a random party member, including healers and tanks. It's very important that her sleep is KICKED or CC'D. Shaman's can also use
  Grounding Totem which will frequently remove any sleep effects that are out.
Lord Cobrahn

Lord Cobrahn Strategy
He is very similar to Lady Anacorda, again using Sleep, Healing Touch, and Lightning Bolt. His sleep should still be KICKED or CC'D, and  Shaman can use Grounding Totem to cancel the sleeps. The main difference with Lord Cobrahn is that when he gets low he will shapeshift into a snake, dealing much higher amounts of damage but losing the ability to cast spells.
Kresh
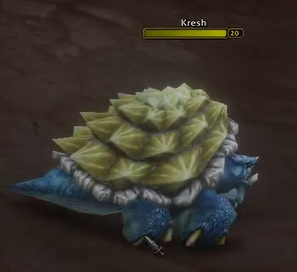
Kresh patrols the entire length of the river in the first large chamber and is non aggressive.
Kresh Strategy
He is a very simple and easy TANK AND SPANK boss with his only ability being a Daze on hit.
Lord Pythas
Lord Pythas Strategy
Lord Pythas is another Druid boss that uses Sleep, Healing Touch, and Lightning Bolt. Kick Sleep as your top priority, followed by Healing Touch. His unique mechanic is that he will sometimes use  Thunder Clap, but overall he is very similar to the other Druids and is quite easy.
Lord Serpentis
Lord Serpentis Strategy
Lord Serpentis is another druid but he has no unique mechanics and no extra adds. Just KICK Sleeps and Healing Touch, and burn him down.
Skum
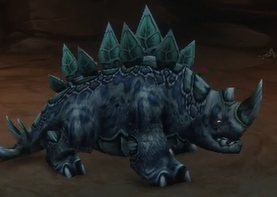
Skum Strategy
Skum is a straightforward boss that is primarily a TANK AND SPANK. He does use a  Chain Lightning ability, but it deals a very low amount of damage and does not really need to be respected.
Verdan the Everliving
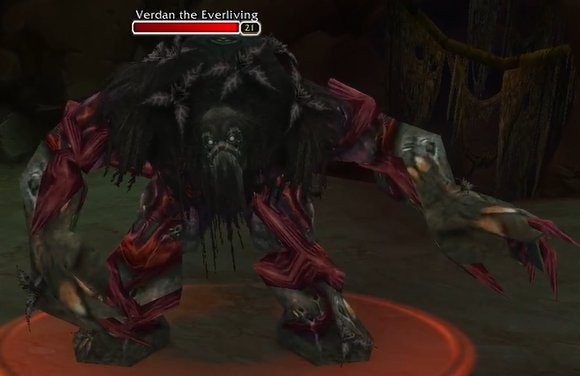
Verdan the Everliving Strategy
Verdan can actually be quite dangerous as he deals incredible tank damage with his attacks and also has an AOE root + knockdown against nearby enemies. Healers need to make sure to keep the tank topped up and DPS should far away from the boss if they can be.
Mutanus the Devourer
Mutanus the Devourer is a hidden final boss that can only be accessed after killing all 4 Lords of the Fang. Once they've all been killed, talk to the druid Disciple of Naralex at the entrance of the dungeon to begin an escort quest. At the end, you will fight several ways of enemies culminating in Mutanus. Make sure you clear out the top areas of the first large cavern before beginning the escort quest!
Mutanus the Devourer Strategy
Mutanus deals large amounts of AOE MELEE DAMAGE with Thunder Clap. This ability also stuns for 2 seconds so make sure you stay out of melee if you're playing a ranged character. He's also got a sleep that can be KICKED, and a fear that is instant cast. When an ally is slept by this boss, you can actually attack them to break the sleep.
Because of this high amount of AOE damage and the multiple waves of enemies leading up to this fight, its important that you have good mana management. You can also sit to drink between waves.
Dangerous Mobs in Wailing Caverns
The Wailing Caverns is one of the first dungeon to have notable, dangerous trash mobs. Its important to be aware of a few, key mobs and abilities that can easily cause problems for your group.
This list is ordered by danger level each mob.
Deviate Guardian
When low health, this mob will cry out for help and aggro other nearby enemies onto your party. This actually has a decent range and can pull bosses. So as a tank always pull Deviate Guardians a safe distance from other enemies that you don't want to pull!
Druid of the Fang
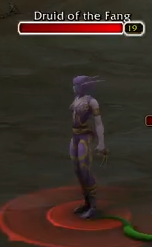
This Druid has more notable mechanics than some entire dungeons. Luckily each mechanic is pretty simple.
Druid's Slumber is a casted ability that will put a randomly targeted party member to SLEEP for up to 15 seconds. This can target healers and tanks. Make sure to save your KICKS and CC for the Druid's Slumber cast, and if you have a Shaman in your party they can use  Tremor Totem to remove sleep effects from your party every couple of seconds.
Druid's of the Fang will also sometimes cast Healing Touch as well as Lightning Bolt. DO NOT KICK Lightning Bolt, as kicks should be used on Druid's Slumber and then Healing Touch as a much higher priority.
Its also worth noting that after these enemies turn into their SNAKE TRANSFORM, they can NO LONGER CAST spells but will do considerably higher dps.
Deviate Lasher
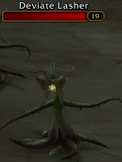
Deviate Lashers are the only non elite enemy on this list but their incredibly high attack damage paired with a passive  Cleave ability makes them very dangerous. Make sure to STAY AWAY FROM YOUR TANK, and healers need to be very aware of the high damage and keep the tank topped up. DPS should FOCUS these mobs down to reduce the amount of outgoing damage.
Noteworthy Mobs in Wailing Caverns
Deviate Shambler
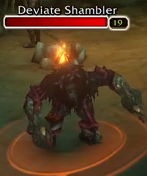
Deviate Shamblers will cast  Rejuvenation when low life, which while not typically a problem this can actually cause real problems if your party is trying to clear WC at a low level. This cast should be KICKED or CC'D, and if the cast goes off they should be FOCUSED. Shaman can also remove Rejuvenation with
  Purge.
Evolving Ectoplasm
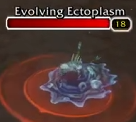
While not very dangerous if you have fought these before you've probably noticed that they're sometimes immune to your damage. The way this works is that the COLOR of the mob tells you what its IMMUNE to. Red for fire, blue for frost, etc.
Table of Contents
1. Wailing Caverns Map and Recommended Route2. Overview3. Wailing Caverns Loot4. Wailing Caverns Quests5. Lady Anacondra6. Lord Cobrahn7. Kresh8. Lord Pythas9. Lord Serpentis10. Skum11. Verdan the Everliving12. Mutanus the Devourer13. Dangerous Mobs in Wailing Caverns14. Noteworthy Mobs in Wailing Caverns