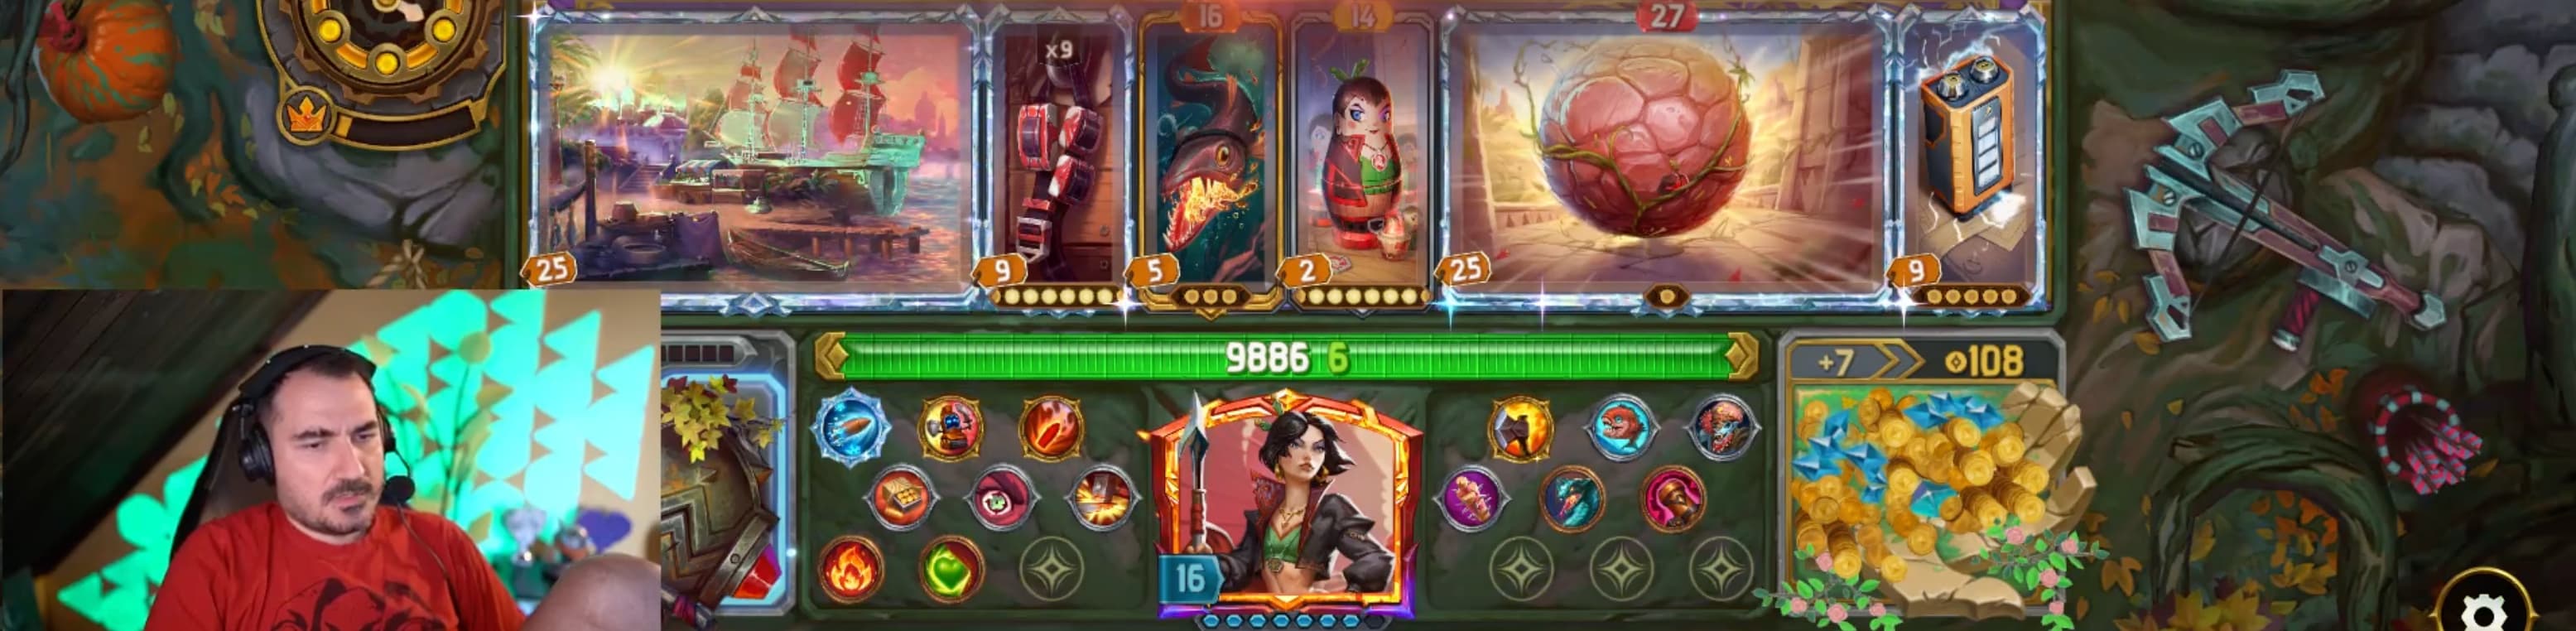
The Boulder
The Boulder has some pretty obvious drawbacks. For starters, it has an extremely long Cooldown without any built-in Charge mechanics (ex.
Powder Keg), meaning you'll need a very dedicated setup to let it go off in a timely matter.
Secondly, you'll need to find additional ways to increase its Damage, or else you'll be extremely vulnerable to Shield builds.
The Boulder only has one Ammo, and while it's not too hard to expand (or Reload) it, pulling off a second activation isn't always feasible.
As a Large Gold-tier item with very specific conditions,
The Boulder builds are inevitably quite rare. However, it can be an incredible late game build if you're able to pivot and assemble the essentials.
- Haste, Charge, and Cooldown Reduction: By far the most important component is having an efficient way of activating
The Boulder. If you're lucky with matchmaking you can potentially get away without additional Damage, but being too slow is not possible. You need at least 2/3 of these, otherwise don't bother.
- Damage Scaling: In order to take the build to the next level, you'll want to find a way to get a significant boost in Damage. The easiest way to achieve this is with an Obsidian enchant, but otherwise aim to maximize your Crit Chance. Being able to deal double the enemy's max Health will greatly improve your matchmaking odds, and prevents you from auto-losing against even the slightest bit of Shield.
- Additional Ammo (Optional): If you want to go a step further, it never hurts to have an extra point of Ammo.
Gunpowder is generally your best bet, which allows you a second activation against particularly tanky foes. However, this is only really relevant with a fast enough combo setup. Don't forget, if you're relying on Charge skills that have a limited number of uses, the second hit will be far slower than the first.
Captain's Wheel
Captain's Wheel is one of the easiest and most reliable forms of Haste, as long as you have a Large item. Its main drawback is occupying two slot's worth of space while only providing a single effect. However, when it comes to
The Boulder, speed is all that matters.
Its exceptionally low Cooldown makes it faster than most items in the game, helping you get off the ground running before the opposition comes into play. The only thing to keep in mind is its positioning requirement, in case you have other items that need to be adjacent.
Cooldown Reduction
Stacking Cooldown Reduction is probably the most reasonable approach, as it puts far less emphasis on skills, and can be assembled directly within Vanessa's own item pool. Charge and Haste are less important when your base Cooldown is already so low.
Star Chart,
Seashadow, and
Silencer are some of the common components.
Star Chart in particular also provides Crit, which could be the difference maker depending on the rest of your setup.
The main challenge with these items is that they need to be upgraded in order to be viable; Silver-tier just won't cut it. However, don't forget that
The Boulder still takes priority, as the shift from Gold to Diamond is a direct four second decrease!
Always try to think outside of the box, as there's plenty of support that lies well beyond the normal means.
Phonograph is a powerful addition, and if you wanna go a step further,
3D Printer +
Silencer is a crazy combo. These are just a couple examples to lookout for in case you encounter Pearl's Dig Site or other specialty vendors.