menu
MobalyticsUse your favourite features in-game with our Desktop App
PoE 2 Build

[0.5.5] Twister Gemling Legionnaire

presentationMercenary
presentationGemling Legionnaire
Starter
End Game
Speed Leveling
0.5.5 FR
Verified
Updated on Sep 18, 2026
Sep 18, 2026

Build Overview

SUMMARY:

This build is my event starter of choice for 0.5.5, "Forbidden Rites," which includes several leveling loadouts alongside early, mid, and late-endgame variants. The guide will continue to be updated as new information becomes available that enhances the build in some way.

This particular Twister variant is tailored more for the late game, with an emphasis on gem dual-quality scaling through the most powerful Gemling Legionnaire's ascendancy point, Advanced Thaumaturgy.

CAMPAIGN REGEX:

"[egdl] da.*to a|ck s|nt s|rare" !quiv

Strengths and Weaknesses

  • High ceiling for mobility scaling through weapon swap tech
  • Easy mapping with multi-screen-wide freeze and clear
  • Extremely high DPS in arena zones like Ritual and other similar layouts
  • Unlocks unique power boosts across several skills on account of the ascendancy
  • Multi-button rotation required for optimal performance
  • Highly-gear dependant for scaling damage and other effects
  • Poor visual clarity in combat
  • Complex gearing constraints on account of the ascendancy

Build Variants

This build variant reroutes the passive tree with Split Personality (Shadow) and features a modest increase investment costs from several unique items, including The Ordained, The Taming, Lavianga's Spirits, Controlled Metamorphosis (medium-large), From Nothing (Oasis) and more. It also forgoes Verglas + Frost Wall tech in favor of introducing Trinity and Alchemist's Boon into the build, resulting in even more damage and speed scaling. This also the point whereby infinite Frenzy Charge uptime is achieved by reaching a 100%+ chance not to consume charges with Barrage. 193+ Spirit (without a sceptre) is the benchmark required to equip all of the Spirit gems in this setup.

Equipment

item
7
item
3
item
1
item
11
item
5
item
4
item
7
item
10
item
6
item
9
item
item
item
item
item
Jewels
item
item
item
item
item
Equipment Priority
+11

CRAFTING GUIDE:

An all-encompassing crafting guide for this build can be found here.

STAT PRIORITY:

While a significant increase in unique items are present in this variant, all of the same four or five-modded rare items present in Early Endgame remain here as well, leaving a lot of room for growth. In general, speed and damage become the priority at this stage. The goal is still elemental resistance capped with 10,000+ Evasion and 2,500+ Energy Shield. 193+ Spirit (without a sceptre) is the benchmark required to equip all of the Spirit gems in this setup.

UNIQUES:

The Taming is one of the biggest upgrades for the entire build, automatically gifting all three elemental ground effects to Twister. The Ordained is a considerable upgrade to Tangletongue, and has the perfect damage profile to unlock Trinity when combined with Ice-Tipped Arrows,Guiding Palm of the Heart and Heart of the Well to help balance out the remaining elements. Controlled Metamorphosis, From Nothing, and Split Personality (Shadow) greatly refine the passive tree to allow for more pathing efficiency. Blood of the Warrior is a cheap but mildly useful flask option to maintain permanent rage while weapon set 1 is active. Rite of Passage can go Owl or Primate as budget options, but remains low on the priority list for how expensive it is.

Skill Gems

Support Gem Requirements:

Str 60

Dex 55

Int 55

1

Whirling Slash

Level 1

•

Set 1

supportrageplayerthree
supportrapidattacksplayerthree
supportknockbackplayer
supportheightenedaccuracyplayertwo
supportrigwaldsferocityplayer
2

Twister

Level 20

•

Set 2

supportretreatplayerthree
prolongeddurationsupportplayertwo
supportprojectileaccelerationplayerthree
supportsalvoplayer
supportpinpointcriticalplayer
3

Barrage

Level 20

•

Set 1

supportcooldownrecoveryplayertwo
supportuhtredsconstellation
supportperpetualchargeplayer
supportheightenedchargesplayer
supportolrothsconvictionplayer
4

Ice-Tipped Arrows

Level 20

•

Set 2

supportshortfuseplayertwo
supportelementalarmamentplayerthree
supportmagnifiedareaplayertwo
supportelementalfocusplayer
supportpinpointcriticalplayer
5

Charge Regulation

Level 20

supportuhtredexodusplayer
6

Wind Dancer

Level 20

supportknockbackplayer
supportclashplayer
supportmagnifiedareaplayertwo
supportmanaleechplayer
7

Ghost Dance

Level 20

supportcooldownrecoveryplayertwo
8

Trinity

Level 20

supportcoldmasteryplayer
supportuhtredomenplayer
9

Alchemist's Boon

Level 14

supportdiallasdesireplayer
10

Berserk

Level 14

•

Set 2

supportprecisionplayer
supportvitalityplayer
supportclarityplayer
11

Purity of Fire

Level 19

supportprecisionplayertwo
supportcannibalismplayertwo
supportvitalityplayertwo
supportclarityplayertwo
Gem Priority
+36

COLOR BALANCE:

Because this build features weapon swap tech, balancing the color of support gems can be especially complicated. The current snapshot of socketed support gem colors shown here supports all three buffs from Gem Studded, regardless of which weapon is activated. If further manipulation of colors is desired, Wind Dancer is an excellent place to balance things out at effectively no cost.

ROTATION:

This stage of the build brings more simplicity to the rotation, with Thaumaturgic Generator granting ample Frenzy Charges passively. For maximum damage scaling, the rotation of Whirling Slash > Whirling Slash > Whirling Slash > Twister remains but should include pre-casting both Ice-Tipped Arrows and Barrage when either buff is down.

SPIRIT GEMS:

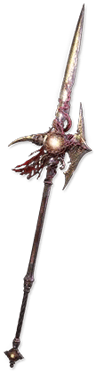
193+ Spirit with 20% quality on Ghost Dance and a minimum of +15% global gem quality is the benchmark required to equip all of the Spirit gems in this setup. This also requires a desecrated spirit reservation roll on the Soaring Spear weapon, Beacon of Azis and a high Spirit roll on the body armor. If you fail to hit this mark, drop Alchemist's Boon for the time being.

GEM LEVELING:

Whirling Slash should NOT be leveled up. It remains at level one to reduce the mana cost of the skill as much as possible. This is especially important in the later stages of the game. Barrage can be de-leveled for the sake of meeting the Ward cost requirement. All remaining skills can be leveled to their maximum capacity, pending attribute requirements.

WEAPON SET ASSIGNING:

To assign a skill to a specific weapon set, open the skill window and click the checkbox for the desired weapon set (both are checked by default).

A new weapon-specific spirit gem makes its way into the build at this stage.Whirling Slash and Barrage are designated to weapon set one, while Twister, Ice-Tipped Arrows, and Berserk are designated to weapon set two. All other gems can remain assigned to both.

More on how to assign weapons and passives to their preferred weapon set can be found in their respective sections of the guide.

Passive Tree

main:
123
123
set 1:
20
20
set 2:
20
20

ASCENDANCY ORDER:

  1. Essence of Virtue (first trial may be skipped)
  2. Advanced Thaumaturgy
  3. Gem Studded
  4. Implanted Gems

The first ascendancy point, Essence of Virtue provides a modest defensive boost to the buil.

Advanced Thaumaturgy is the most powerful ascendancy point of the build, and one of the best for Twister across all ascendancies once global gem quality scaling kicks in.

Gem Studded, is quite powerful, albeit with a major gearing constraint. In most settings, the corresponding blue gem buff "Skills having 30% less cost" is the single best one. Be advised, pursuit of gaining two or more of these buffs simultaneously makes sense so long as it doesn't disrupt the core build's functionality. To that point, Wind Dancer is an excellent place to balance out different support gem colors at effectively no cost.

This build variant features a swap from Integrated Efficiency to Implanted Gems, mainly on account of crit being easier to cap with the additional jewels in play and getting ever slightly more value out of +2% global gem quality.

WEAPON SETS:

Over the course of the completing the campaign, you will be granted up to 24 passive points that can be split between two weapon sets. These points can be assigned to a specific weapon set using the interface in the top right corner of the passive tree window. These passives are color-coded. Red is weapon set one, and green is weapon set two both in this guide and in-game. As a general rule, weapon set one will be dedicated to speed, and weapon set two will be dedicated to damage. Follow the passive priority list and utilize the weapon set points as they become available.

More on how to assign skills and weapons to their preferred weapon set can be found in their respective sections of the guide.

Quest Rewards

Check which quests you’ve completed on your character
Clearfell — Beira of the Rotten Pack
+10% to Cold Resistance
Hunting Grounds — The Crowbell
Grants Two Weapon Set Passive Skill Points
Freythorn — The King in the Mists
+30 to Spirit
Ogham Farmlands — Una's Hut
Grants Two Weapon Set Passive Skill Points
Ogham Manor — Candlemass, the Living Rite
+20 to maximum Life
Keth — Kabala, Constrictor Queen
Grants Two Weapon Set Passive Skill Points
Valley of the Titans — Medallion
30% increased Charm Charges gained
+1 Charm Slot
Deshar — Final Letter
Grants Two Weapon Set Passive Skill Points
The Spires of Deshar — Sisters of Garukhan
+10% to Lightning Resistance
Jungle Ruins — Mighty Silverfist
Grants Two Weapon Set Passive Skill Points
The Venom Crypts — Venom Draught
30% increased Elemental Ailment Threshold
Jiquani's Machinarium — Blackjaw, the Remnant
+10% to Fire Resistance
The Azak Bog — Ignagduk, the Bog Witch
+30 to Spirit
The Molten Vault — The Molten Vault
Reforging Bench
Aggorat — Blood Sacrifice
Grants Two Weapon Set Passive Skill Points
Journey's End — Captain Hartlin
Two Weapon Set Passive Skill Points
Skill Gem(Lv 13)
Delirium Drop
Whakapanu Island — Great White One
Not Specified2 choices
Eye of Hinekora — Navali's Rest
5% increased Maximum Mana
Halls of the Dead — Yama The White
Grants Two Weapon Set Passive Skill Points
Halls of the Dead — Tawhoa's Test
+5 to Dexterity
Abandoned Prison — Goddess of Justice
30% increased Mana Recovery from Flasks
Halls of the Dead — Tasalio's Test
+5 to Intelligence
Halls of the Dead — Ngamahu's Test
+5 to Strength
Halls of the Dead — Tribal Medicine
+30% increased Global Armour, Evasion and Energy Shield
Wolvenhold — Oswin, the Dread Warden
Grants Two Weapon Set Passive Skill Points
The Khari Crossing — Akthi and Anundr
Two Weapon Set Passive Skill Points
The Khari Crossing — Molten Shrine
5% increased Maximum Life
Qimah — Tabana's Pillar
12% increased Cooldown Recovery Rate
Kriar Village — Lythara, the Wayward Spear
+40 to Spirit
Howling Caves — The Abominable Yeti
Grants Two Weapon Set Passive Skill Points

How it Plays

This build plays much like your standard endgame Twister build, but with nearly-infinite Frenzy Charge uptime, resulting in many more projectiles than usual. It's fast-paced and typically favors a more glass-cannon playstyle on account of its high mobility and being capable of off-screening most enemies. The rotation begins with hard-casting Sniper's Mark then using Whirling Slash at least three times to max out the Whirlwind and activate the mark. Hard-cast Ice-Tipped Arrows and Barrage together to further empower the primary skill. If using a buckler, Parry the enemy in advance to make them take 50% more attack damage for a short duration. Finally, use Twister.

How it Works

In the final stages of the build, several skills and abilities come together to scale Twister's damage and clear in an expenential way. Some of these scalers are granted passively, such as Salvo support or Advanced Thaumaturgy with its dual-quality scaling for more Twister projectile speed and enhanced Frenzy Charge uptime. Whereas skills like Whirling Slash, Ice-Tipped Arrows, and Barrage make up the more active components. All of these scalers come together to culminate in a single moment that results in a deadly torrent of seemingly infinite elemental Twisters shooting out in all directions, leaving no room for enemies to escape.


Changelog

9/2/26 - Removed Eternal Rage, while shuffling Berserk into weapon set two, and added Alchemist's Boon for its powerful speed boosts for both Mid and Late Endgame variants.

9/4/26 - Dropped Spirit supports and swapped Cast on Elemental Ailment for Cast on Critical as a superior option proc wise. Fixed support gem colors in order to obtain all three color bonuses in all build variants from Early Atlas onward.

9/18/26 - Swapped an augment on the Body Armour for the Mid Endgame variant.

Comments

127
S
Sam D Britten•5h ago

A little confused about spirit in early endgame version of the build. I have 208 spirit with rune of the blossom spirit and +4 quality to gems. Where does the rest of the global gem quality meant come from, really struggling to fit in another 100 spirit gem

0
F
FreshKey•1d ago

I followed your build and ran into a problem in the late endgame build stage. When I used Trinity from weapon set 2 and switched back to set 1, Trinity stopped working and showed a message saying there wasn't enough life. Can you help me adjust it?

0
B
BrightDagger•1d ago

pretty goated build; lv96 with basically most of the late-end game gear/gems, essentially wiping 99% of the enemies off the map, including 200% deli expedition; definitely recommend if you wanna try out gemling at its absolute peak, though investment is quite high without luck (around 1.5k div spent; self farmed rakiata and rigwald)

1
R
RichDagger•4d ago

This is the worst build ive ever done in my 1300 hours on poe2

-6
D
DeadlyKey•4d ago

so ur new to the game? alrighttt

3
T
tenokami•3d ago

why?

0
S
ShinyFlower•5d ago

How can you have space for Berserk in mid endgame setup, it seems I can't put in an additional skill and dunno what to do at this point :/

0
K
Kritikal•4d ago

Attack speed spear has desecrated spirit res efficiency roll. Amanamu mod

0
View 1 reply
R
RustyDagger•5d ago

how do you start your skill tree from ranger's side on late endgame ???

I don't understand how to start from the other point at the end of the game


0
R
RichDagger•4d ago

You need a skill gem that lets you allocate from the "shadow" starting point. im pretty sure it goes for like 190 div

1
G
GrimShadow•5d ago

Speaking for late endgame setup, I cant maintain berserk while having vitality 2 and vitality 1 which gives me 3% max life recovery per second, however berserk without quality on gem already makes my max rage 36, which reduces my life in a rate of 3.6% max life per second. This gets my character killed very oftenly.

0
B
BoldDagger•5d ago

for me everything works perfectly maybe u miss out an item or something?

0
B
BoldDagger•5d ago

i have 44 max rage and no problem


0
View 1 reply
B
BrightMask•31min ago

Berserk should only be active on weapon set 2. You spend most of your time in ws1 so the life degen should not apply most of the time

0
S
StoneCrown•6d ago

alchemist boon is not changing any DPS speed modifier? why so

0
P
Phobia•5d ago

Gives attack speed with Gemling Quality mod

0

Video Guide

Build Planner Export

Export all build variants directly to your game.

Path of Building Code

Table of Contents

Featured Builds

[0.5.5] Scorps Plants COC Endgame Guide
Updated on Sep 23, 2026
0.5 - Eventide Shatter Chain Martial Artist
Updated on Sep 23, 2026
0.5.5 Floor is Lava Gemling - 6D Budget 200% Rarity Stacker - Flameblast/OIl Grenade
Updated on Sep 22, 2026
Cold Spark Sorceress League Starter - by Asmodeus
Updated on Sep 22, 2026
0.5.5 ICEFANG POISON SHIELD WALL Gemling Legionnaire
Updated on Sep 22, 2026

Become a Creator

Want to earn rewards by sharing your builds with your community?