Above you will find an example gear set with the most desirable modifiers, as a point of reference.
Weapon
Weapon is by far the most important piece of gear. You should know which bases to craft on and what modifiers are most desirable for your character. Below you will find the list of the Staff bases that you should focus on. When it comes to modifiers, you want the following ones:
- %Increased and flat Physical Damage
- Flat Fire/Lightning/Cold Damage
- Attack Speed
- +to levels of Melee skills
Flat Physical combined with Increased Physical Damage is the best combination, but you also need to make sure to always have a source of Lightning and Fire damage, in order to Shock and Ignite your  Tempest Bell, for much more damage. You can get that flat elemental damage from weapon/ring/glove prefixes or from elemental runes socketed in your weapon.
Attack speed is typically the most desirable Suffix. +to levels of Melee Skills is also good, but getting +2 or more extra levels on your skills will cause you to run into mana issues, so do NOT prioritize it.
lvl 4. 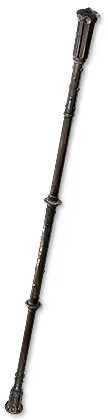 Long Quarterstaff
You should swap to Long Quarterstaff asap and spend your first Transmutations/Alterations on it. You can find Refined Arms scattered around Red Vale, which drop a random lvl 4. weapon when clicked. It's an almost guaranteed way to get a white Long Quarterstaff early on.
lvl 11. 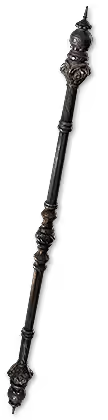 Gothic Quarterstaff
Before fighting Count Geonor, at the end of Act 1, you should try to craft as good of a Gothic Quarterstaff, as you can. You can spend a Regal Orb, Alchemy Orb, Artificer's Orb etc., because this staff will have to last you for a long time.
(we're skipping the next base, which is  Crackling Quarterstaff, because it doesn't let us freeze and shatter consistently, making it very bad for our build).
lvl 20. 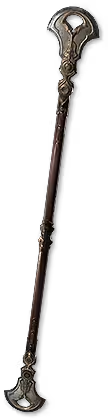 Crescent Quarterstaff
If you were able to craft a good Gothic Quarterstaff in Act 1. you might not be able to easily get a Crescent Quarterstaff that beats it. That's ok, you can skip it and focus on getting a good 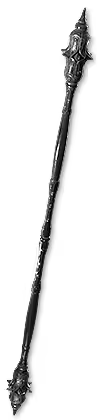 Steelpoint Quarterstaff instead.
(it is worth noting that L'im the Impaler - the Rare boss in Halani Gates Forward Command Tents, drops a guaranteed rare lvl 20. weapon which can be a Crescent Quarterstaff, so it is always worth killing this optional boss)
lvl 28. Steelpoint Quarterstaff
A good Steelpoint Quarterstaff will carry you through the entire act 3. It is worth spending your currency - including Exalts and Blacksmith Whetstones on it. Ideally you'd like to craft it right before the Jamanra fight at the end of Act 2.
lvl 33.  Slicing Quarterstaff
If you weren't able to get a great Steelpoint Quarterstaff, you should prioritize the Slicing Quarterstaff instead. It's the last of the currently available bases, before we move on the the "Advanced" versions of Quarterstaves.
From act 4 to act 6, you can rely on "Advanced" versions of the same Quarterstaff bases as you did in acts 1-3. You'll most likely only need to craft a single decent staff in act 4, which will carry you until the end of the campaign.
Boots
Prioritize crafting boots, over other pieces of armor, until you have movement speed on them. Nothing else matters on boots during leveling. Of course life attributes and resistances are always good to have, but you should highly prioritize MS.
Here are the item level requirements for different movement speed modifiers on boots:
- 10% movement speed (ilvl 1)
- 15% movement speed (ilvl 15)
- 20% movement speed (ilvl 30)
- 25% movement speed (ilvl 50)
- 30% movement speed (ilvl 70)
- 35% movement speed (ilvl 82)
Armour
Wear Evasion and Evasion/Energy Shield armour primarily. You're going to be scaling Evasion and some Energy Shield as your primary defensive stat, so make sure to wear decent bases that are close to your level.
Life and Evasion modifiers, will give you the most defense. Resistances and Attributes (Strength/Dexterity/Intelligence) on suffixes are very desirable, but a good Life Regeneration modifier is definitely not something you should overlook. Getting a decent amount of Life Regeneration, will make you feel significantly more tanky.
Jewelry
Jewelry is the hardest to upgrade, as it drops in very limited amount and is not widely available at the vendor. Make sure to learn all of the guaranteed jewelry drop spots during the campaign, to increase your chances at getting a decent piece of gear.
- Guaranteed Iron or Lazuli Ring at the Cemetery
- Guaranteed Amulet in Keth ruins
- Guaranteed Resistance Ring in Buried Shrines
- Guaranteed Ring in Sandswept Marsh - Hanging Tree
Prioritize flat Added Damage, Life, Resistances and Attributes.
Mace + Shield
From the very beginning of act 1, you need to be looking for a 1-handed weapon with Strength and a Shield with Strength and/or Increased Chance to Block. Ideally you want a hybrid base shield, because a pure Armour shield slows you down by 3% while a hybrid shield slows you only by 1.5%.
We do this to start using  Shield Charge and
  Leap Slam as soon as possible.
After level 15, when you get the extra strength on your Weapon Set 2 passives, you can prioritize Increased Chance to Block on a shield, over Strength.
Currency
Majority of your currency, should be always spent on your weapons. You should always think about what you're trying to get from your Transmutes and Augmentations. Don't just throw them on every item you have. Be purposeful.
For example - if you haven't found movement speed boots in the early game, and you already have a decent weapon, you can spend Augmentations on boots with an elemental Resistance suffix and an open prefix, to fish for a Movement Speed prefix. Blue weapons with Attack Speed or +to Levels of Melee Skills are the best target for your Augmentation Orbs. Always take stock of your gear and try to figure out what's your weakest piece. If you're level 28 and haven't upgraded your chest piece since level 4, it's a good idea to pick up white  Studded Vests and throw some Transmutes at them. Even a mediocre evasion roll + life regeneration on a good base will be better than most random rares that you found 20 levels ago.
Be disciplined with your currency. For example, you should NEVER Exalt a piece of gear that isn't a Quarterstaff unless you have more than 6 Exalts - which is enough for your next 2 upgrades during the campaign. Same goes for Regal orbs if you have 2 or less, and Artificer's Orbs if you have 4 or less. Keep them for weapon upgrades, and only spend the surplus on other items.
If you get really lucky and drop a great weapon - save your currency and don't craft it any further if your damage is still very high. This will help you transition to the next weapon base much easier. You can afford to save your currency whenever your character feels very strong and you should spend more currency if your character feels weak.
Regex
While looking for gear at the vendor, you can press Ctrl+F and Ctrl+V to paste this string into the search bar:
"dds|o str|mov|ed bl"
This will highlight items with flat added damage, strength, movement speed and increased chance to block.