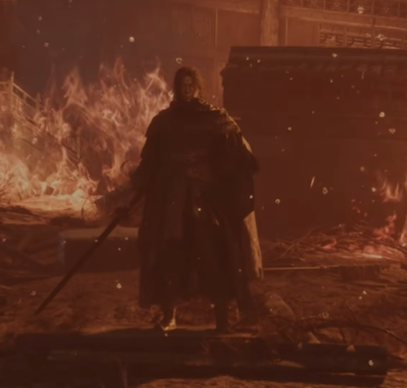
The Gold Masked One is an optional boss that you will encounter more than once throughout the game. Your first encounter with him takes place in the Weeping Creek Valley, and each version of the boss can be fought by interacting with the Long Pillars.
The Gold Masked One can be a difficult fight at first because his mechanics are very different from most bosses you will have encountered up to this point. He punishes mistakes heavily and forces you to properly use the game's Red and Blue attack systems rather than simply relying on normal damage.
He only has one phase.
This guide was written and tested on Hellwalker difficulty.
Boss Mechanics
The Gold Masked One has several different attack strings that can flow into one another, but the fight revolves around one main mechanic: you cannot reliably damage him until you correctly interact with his Red and Blue attacks or deplete his Sha-Chi.
Once you understand that, the fight becomes much more manageable.
The Red Blue Gimmick
This is the most important mechanic in the entire fight.
Most of your normal attacks will simply phase through The Gold Masked One while his Sha-Chi is not depleted. You can only properly damage him after:
Depleting his Sha-Chi
Landing a Perfect Blue Parry
Landing a Perfect Red Dodge
This can take some time to get used to, because attacking him normally without first creating an opening will accomplish very little.
The entire purpose of this encounter is to force you to properly learn the Blue and Red counter systems, so focus more on reacting correctly to his attacks than trying to maintain constant pressure.
Once you successfully counter one of these attacks, take advantage of the opening and deal as much damage as you safely can before he recovers.
Sudden Red Grabs
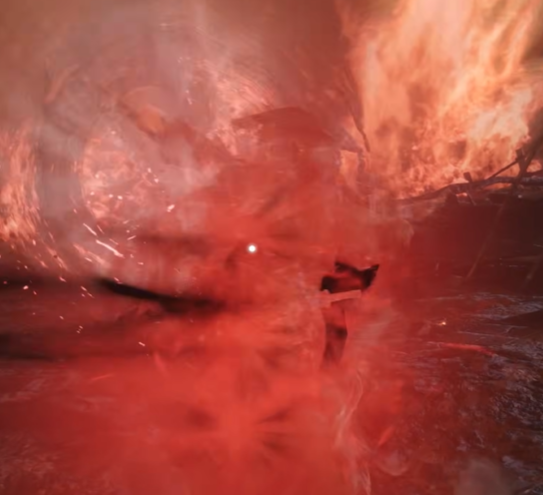
One of the most dangerous parts of the fight is his sudden Red grab attacks.
He can use these with very little warning, and on Hellwalker they can remove around half of your Health or even more if they connect.
Because of how quickly they come out, try to always stay ready to react with R1 or RT. Do not get too comfortable during his slower attack strings, as the grab can suddenly turn what looked like a safe moment into a huge punish.
There is no real shortcut for dealing with these attacks. You simply need to recognize the Red cue quickly and react immediately.
Other Punishable Attacks
The Gold Masked One has two attacks in particular that create very clear opportunities to punish him.
Projectile Attack
One of his most common punishable attacks begins with a single projectile.
He will then back away and fire a rapid volley before finishing the sequence with a Blue Parry attack.
The individual projectiles are relatively easy to parry, but there are several of them in quick succession, so you still need to maintain the correct timing throughout the full sequence.
This attack is especially important to learn because the Blue attack at the end gives you one of the most reliable opportunities to counter him and create a proper damage window.
Do not rush toward him while he is firing. Focus on the projectiles first, then prepare for the Blue Parry at the end.
Aerial Overhead Slash
The second major punishable attack often appears at the end of a combo, although he can also use it on its own.
He jumps into the air, performs an overhead attack, and then follows it with a Red Dodge attack.
The timing is fairly forgiving compared to some of his other Red attacks, making this one of the easier opportunities to trigger a successful counter.
Once you recognize the jump, prepare for the follow-up instead of immediately attacking after the first hit.
Flurry Attacks
For the rest of the fight, The Gold Masked One mainly relies on long multi-hit flurries and slash combinations.
These are much less threatening once you become comfortable with the parry rhythm.
Trying to block through an entire string is generally a bad idea because it drains your Stamina extremely quickly and can leave you completely vulnerable before the combo ends.
Instead, try to parry the individual hits and learn the rhythm of each string.
Do not panic if the combo looks long. Most of his normal attacks are much easier to deal with than his Red grabs once you understand their timing.
General Strategy
The Gold Masked One is not a fight where constant aggression is rewarded.
Your main goal is to wait for the boss to give you a Red or Blue interaction, counter it correctly, and use the resulting opening to deal damage.
Trying to force damage while his Sha-Chi is still active will usually just waste time and can leave you exposed to one of his sudden grabs.
Stay patient during his normal combos, parry rather than block whenever possible, and always stay ready for Red attacks.
The fight becomes significantly easier once you stop treating it like a normal boss and instead approach it as a test of your Perfect Parry and Perfect Dodge timing.