


This Eredrim build will have you SHATTERING your way through an NG+ playthrough. It takes full advantage of every recent buff and frost related item the game currently has to offer. It's VERY fun to play. Let's get into it!
 Use your favourite features in-game with our Desktop App
Overview
Body Text
Best Eredrim Frost Build in Mortal Shell II – NG+ Build Guide
If you want to turn Eredrim into an unstoppable frost-powered tank capable of smashing through NG+ enemies and bullying some of the toughest bosses in Mortal Shell II, this is the build for you.
This Eredrim Frost build combines the newly buffed Great Martyr's Blade with the Bulwark Stone to deliver huge Frost damage, exceptional survivability, and some seriously powerful stagger and execution potential.
The Great Martyr's Blade might look painfully slow at first, but once you combine it with the Thief Stone, Warden Stone, and Eredrim's Frost-focused skill tree, it becomes a completely different weapon.
You can build Warp stacks to dramatically increase your attack speed, freeze enemies, break their posture, and then punish them with enormous critical and repost damage.
I've been using this as a 42-point, max-level Eredrim setup for NG+ content, and it is an incredibly fun way to play.
In this guide, we'll go through the Eredrim skill tree, Frost mechanics, weapon and Tar Stone setup, ability stones, boss strategy, and where to find the key items.
Spoiler warning: The boss section contains footage and discussion of a late-game encounter. Skip that section if you want to remain completely spoiler-free
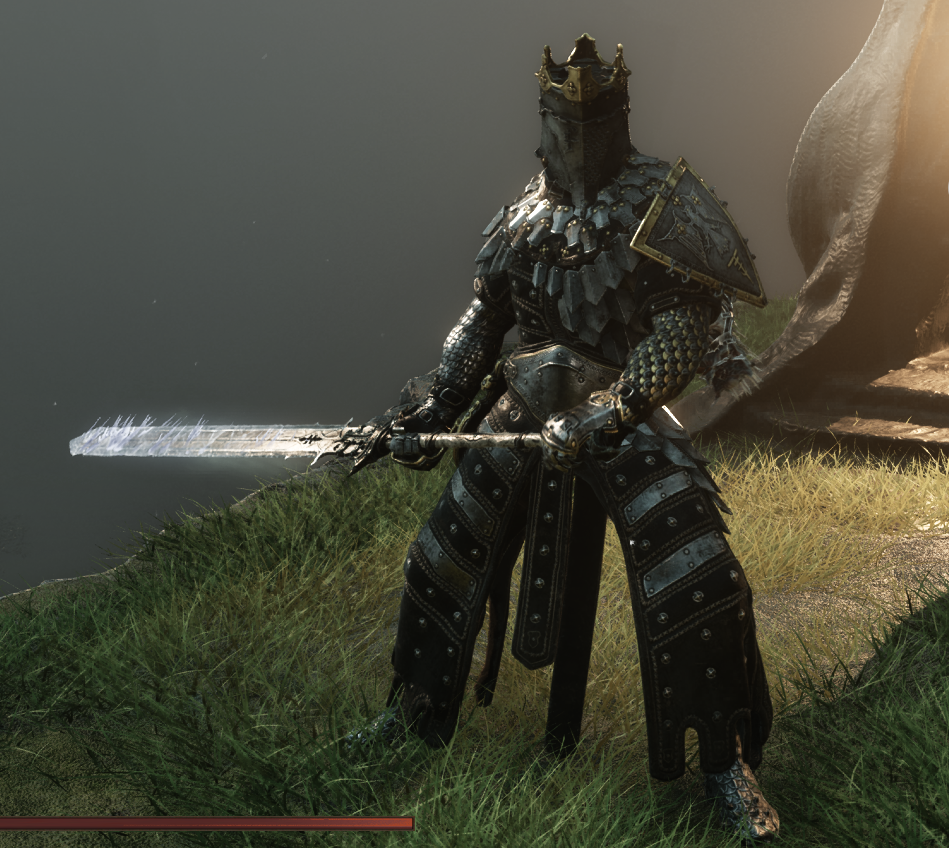
Eredrim Frost Build Overview
The idea behind this build is simple:
Build Slaughter stacks, become incredibly tanky, freeze enemies, break their posture, and then destroy them with the Great Martyr's Blade.
The core setup is:
- Shell: Eredrim
- Skill Points: 42-point max-level setup
- Weapon: Great Martyr's Blade
- Combat Stone: Thief Stone
- Combat Stone: Warden Stone
- Support Stone: Bulwark Stone
- Support Stone: Auspicious Stone
- Support Stone: Headsman's Stone
- Third Support Stone: Berserker Stone or Retribution Stone
- Ability Stone: Wieldly Stone, Captive Scab Stone, or Acolyte Stone
The build has two major strengths.
First, Frost gives you powerful crowd control and massive damage against frozen enemies.
Second, Slaughter stacks + Bulwark Stone + Tank give you an absurd amount of damage reduction.
Put those together and you have an Eredrim that can fight extremely aggressively without needing to constantly retreat.
Eredrim Skill Tree
This is the 42-point max-level variant used for the build.
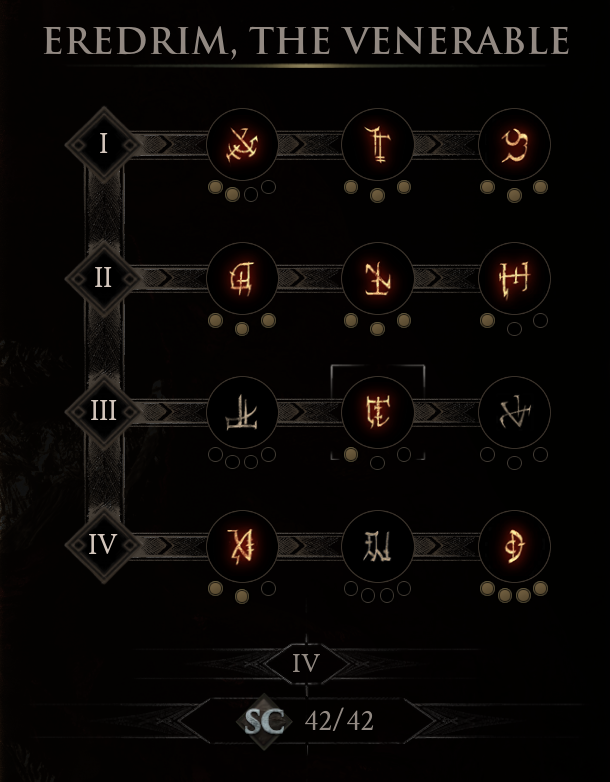
Alacrity – 2 Points
We're starting with 2 points in Elacrity.
This gives us:
- 30% faster Shoulder Bash charge
- 30% reduced Resolve cost
The faster charge is particularly important.
Shoulder Bash has a fairly long wind-up without this investment, and that can leave you vulnerable when you're trying to use it during an aggressive fight.
Reducing the Resolve cost is equally useful because we want to have those two charges available as frequently as possible.
The faster and cheaper Shoulder Bash is one of the foundations of the build.
Massacre – 3 Points
Next, we're taking 3 points in Massacre.
This gives us plenty of ways to generate Slaughter stacks, including gaining 10 Slaughter stacks when killing an enemy with a repost.
Slaughter is incredibly important for Eredrim.
Every stack increases the low-health threshold at which enemies can be executed.
That means the more enemies you kill and the more Slaughter stacks you build, the more frequently you'll be able to execute enemies.
And because the rest of the build also scales with Slaughter, these stacks are doing much more than simply giving you execution opportunities.
Apathy – 3 Points
This is one of the most important parts of the Frost setup.
We're taking 3 points in Apathy.
Apathy provides Frost mitigation and immunity, but the major reason we're investing here is the 200% increased damage against frozen enemies.
That synergizes incredibly well with our max-level Warden Stone, which permanently infuses the Great Martyr's Blade with Frost damage.
This is where the build starts getting ridiculous.
We're not simply freezing enemies for crowd control.
We're freezing them so that we can deal significantly more damage to them.
Great Martyr's Blade + Frost
The Great Martyr's Blade has one obvious weakness:
It's slow.
Very slow.
Fortunately, we have an answer for that.
The Thief Stone gives us 5 Warp stacks per hit, increasing our swing speed as we build those stacks.
Those stacks can reach 30, and once you've built them up, the Great Martyr's Blade feels dramatically faster.
This is particularly important because the weapon has recently received a 20% buff, making the combination even stronger.
The basic combat loop is:
Attack → build Warp stacks → attack faster → build Frost → freeze enemies → hit frozen targets for massive damage.
Once your Warp stacks are rolling, the weapon feels much less cumbersome.
Anguish – 3 Points
We're also putting 3 points into Anguish.
This heavily buffs our Shoulder Bash.
The first point provides:
- 150% increased damage
The following investment gives us:
- 10 Weakness stacks on Shoulder Bash
- Significant additional stagger damage when Shoulder Bash lands
This is absolutely fantastic against bosses.
Shoulder Bash becomes more than just a movement or defensive tool.
It becomes one of the primary ways we build pressure on an enemy's Break meter.
The Weakness effect also means affected enemies deal less damage.
That gives us another layer of survivability while we're fighting aggressively.
So when you open a boss fight with Shoulder Bash, you're simultaneously:
- Dealing damage
- Building Break
- Applying Weakness
- Creating opportunities for reposts
- Making the enemy deal less damage
It's an extremely efficient ability.
Tank – 3 Points
The aptly named Tank node is another critical part of the build.
At maximum Slaughter stacks, you can gain up to 20% damage reduction.
The effect scales at 0.2% per Slaughter stack, giving you a potential 20% reduction at 100 stacks.
This is where the build's defensive side really starts coming together.
We're already building Slaughter stacks through combat, and Tank turns those stacks into a permanent defensive benefit while we're maintaining them.
Combine that with Bulwark Stone and you can reach an enormous amount of damage reduction.
Consecration – 1 Point
We're putting 1 point into Consecration.
The purpose here is simple:
More Resolve regeneration when we heal.
That helps us keep our Shoulder Bash charges available and can also give us more opportunities to use our ultimate ability for additional healing.
It's not the most important node in the build, but it helps smooth out the entire rotation.
Executioner – 1 Point
We're taking 1 point in Executioner.
This isn't mandatory.
In fact, this point was essentially a spare point in the original setup.
It gives us a violent burst of blood that deals 50 splash damage whenever we execute an enemy.
It's a nice bonus when you're already executing enemies frequently through your Slaughter stacks, but I wouldn't consider it one of the core requirements of the build.
Oppression
Oppression is another important part of the Shoulder Bash setup.
It helps us build the Break meter and create more opportunities to perform reposts.
That's exactly what we want.
The build is designed around repeatedly:
Shoulder Bash → break enemy → repost → gain Slaughter stacks → become tankier → repeat.
This is particularly powerful against bosses because you can repeatedly force stagger and stun opportunities.
Seal Affinity
Finally, Seal Affinity is a fantastic finishing piece for the build.
It provides:
- 35% increased repost damage
- A dramatically increased parry window
The larger parry window is especially valuable because the entire build is encouraging us to break enemies and then look for repost opportunities.
You're already trying to force parries to generate Slaughter stacks.
Seal Affinity makes that much easier while also increasing the damage you get from successfully landing them.
It's a perfect fit for this playstyle.
Alternative Build: Persistence
There's another variation I really like for players who want to lean even harder into Eredrim's tankiness.
You can remove:
- 1 point from Tank
- 1 point from Consecration
And put those 2 points into Persistence.
Persistence allows you to retain 50% of your Slaughter stacks if you're severed from your shell.
This might not sound like a huge deal at first, but it becomes extremely valuable once you've built a large number of Slaughter stacks.
Losing all those stacks also means losing the damage reduction you've built through Tank.
Persistence acts as an insurance policy.
For example, if you had built up around 100 stacks and were then severed, you'd still retain a significant portion of that investment.
You can even rest and retain part of the benefit.
So if you're playing specifically for maximum survivability, I strongly recommend considering the Persistence variant.
How the Frost Eredrim Build Works
The build becomes much easier to understand once you see how all the mechanics feed into each other.
1. Build Slaughter stacks
Use reposts and kills to build Slaughter.
These stacks:
- Increase your execution threshold
- Give you damage reduction through Tank
- Help you snowball through encounters
The longer you remain in control of a fight, the stronger Eredrim becomes.
2. Use Shoulder Bash aggressively
Shoulder Bash is one of your most important tools.
Use it to:
- Deal burst damage
- Build Break
- Apply Weakness
- Stagger enemies
- Create repost opportunities
The Alacrity investment makes the ability much more practical to use repeatedly.
3. Build Warp stacks
Start attacking with the Great Martyr's Blade.
Every hit gives you 5 Warp stacks through the Thief Stone.
Those stacks increase your swing speed up to a maximum of 30 stacks.
Once you're fully stacked, the Great Martyr's Blade becomes dramatically more manageable.
4. Apply Frost
The max-level Warden Stone permanently infuses your weapon with Frost.
Keep attacking and building Frost stacks until enemies freeze.
This is where Apathy becomes incredibly valuable.
5. Destroy frozen enemies
Once an enemy is frozen, your Apathy investment gives you 200% increased damage against frozen targets.
This is your big damage window.
The Great Martyr's Blade hits extremely hard, and the combination of Frost and increased frozen-target damage can result in enormous numbers.
6. Use reposts to keep snowballing
Once you've broken an enemy, use your enlarged parry window to land reposts.
Reposts can generate more Slaughter stacks, which make you tankier and allow you to execute enemies earlier.
The whole build feeds itself.
Bulwark Stone – The Defensive Core
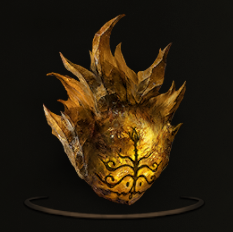
The Bulwark Stone is arguably the star of the build.
At its current level, it provides 70% damage reduction for 4 seconds after killing an enemy.
The fact that this effect can continually refresh makes it incredibly powerful on Eredrim.
You're already playing aggressively and killing enemies at close range, so maintaining the Bulwark effect is very achievable.
Now combine:
- 70% damage reduction from Bulwark Stone
- Up to 20% damage reduction from Tank
And you're looking at up to 90% damage reduction.
That's an absurd amount of survivability.
This is one of the reasons the build feels so comfortable in NG+.
You aren't trying to avoid every hit.
You're building your character so that when you inevitably take hits, they matter considerably less.
Support Stones
We're using three support stone slots to complement the build.
Auspicious Stone
Auspicious Stone provides:
- 100% increased critical damage
- 80% increased critical hit chance
This gives us another significant source of burst damage.
Headsman's Stone
Headsman's Stone further complements the critical-hit setup and works beautifully with the rest of our damage bonuses.
Together with Auspicious Stone, we're heavily investing into critical damage and chance.
This is particularly powerful once you've created an opening with a freeze, break or repost.
Third Support Stone: Berserker or Retribution
You have a choice for the third slot.
Berserker Stone
At Level 3, Berserker Stone gives you up to 165% increased melee damage while below 50% health.
That's an enormous damage bonus.
It's also very fitting for Eredrim because you already have so much damage mitigation.
You're able to remain aggressive even when your health gets low, and Berserker rewards you for doing exactly that.
This is my personal choice.
I think the damage bonus is simply too good to pass up.
Retribution Stone
Alternatively, you can use Retribution Stone for 20% increased repost damage.
This is the better option if you want to lean harder into the repost-focused side of the build.
If you prefer a more controlled, parry-heavy playstyle, Retribution is a perfectly viable alternative.
Thief Stone
The combat setup is very straightforward.
We're using a max-level Thief Stone.
It provides:
- 5 Warp stacks per strike
- Up to 30 Warp stacks
The more stacks you build, the faster your Great Martyr's Blade attacks.
This is essential because the weapon's base attack speed is one of its biggest weaknesses.
Once you're fully stacked, the difference is enormous.
Warden Stone
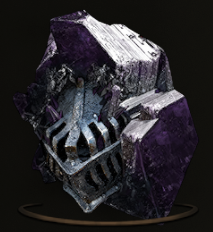
We're also using a max-level Warden Stone.
This one should be maxed out so that the Frost infusion becomes permanent.
Permanent Frost infusion is critical to the build.
Without it, you're losing one of the main reasons we're investing so heavily into Apathy.
With it, every attack contributes towards Frost buildup, eventually freezing enemies and unlocking our massive frozen-target damage bonus.
Ability Stones
The final slot is more flexible.
I've experimented with several options here.
Wieldly Stone
I've tested the Wieldly Stone at Level 2.
It provides:
- 20 health restored on kill
- 3 Leech stacks
The Leech stacks increase your maximum health, making this a nice option if you want even more survivability.
It's a comfortable choice for general exploration.
Captive Scab Stone
The Captive Scab Stone is another interesting option.
It deals a huge amount of damage, but there's a downside:
It consumes a lot of Resolve.
That can leave you Resolve-starved and interfere with the rest of your rotation.
If you can build your setup around that Resolve cost, it can be very powerful.
For me, however, the Resolve economy makes it less attractive than some of the other options.
Acolyte Stone
The Acolyte Stone is another really interesting option.
When you charge your attack, it creates an ice cone from your weapon.
This is extremely useful for building Frost stacks on enemies.
You can quickly fill up an enemy's Frost meter from range, freeze them, and then move in with your fully charged attack.
That gives you another way to force the frozen-target damage bonus from Apathy.
For players who want to lean heavily into the Frost side of the build, this is a very fun option.
Best Combat Rotation
For normal enemies, the basic rotation is:
Run → heavy attack → build Warp → apply Frost → freeze → destroy.
The running attack is particularly effective with the Great Martyr's Blade.
Keep moving and use the weapon's twirling animation to sweep through groups.
You're able to hit multiple enemies at once while simultaneously building Frost.
Many normal enemies will freeze during the process, allowing you to immediately take advantage of the massive damage bonus against frozen targets.
Shoulder Bash can then be used on tougher enemies to build Break and apply Weakness.
Once the enemy is broken, look for the repost.
This generates more Slaughter stacks and continues your defensive snowball.
Why This Build Is So Good Against Bosses
This is where the Frost Eredrim setup gets particularly ridiculous.
Bosses are normally where slow weapons can become a liability.
Not here.
Shoulder Bash gives you huge amounts of Break pressure.
Frost gives you powerful crowd control and damage amplification.
Slaughter stacks give you survivability.
Bulwark Stone gives you enormous temporary damage reduction.
And the Great Martyr's Blade gives you massive damage when you find your openings.
The result is a build that can make some extremely difficult boss encounters feel surprisingly manageable.
Boss Strategy
Against bosses, start by using Shoulder Bash.
The goal is to immediately start building the Break meter.
Back away after the first bash, wait for your opening and then go back in with the second charge.
Once you've built enough Break, look for your repost.
If the boss becomes frozen, that's your opportunity to unload your biggest attacks.
The frozen-target bonus from Apathy can produce some enormous numbers.
In the footage from the build, this setup was producing 999 damage hits, including two consecutive 999s.
That's the kind of damage we're looking for.
And because your defensive layers are so strong, you can afford to play aggressively and stay close enough to capitalize on those openings.
Frost Eredrim Build: Recommended Setup
Slot | Item |
|---|---|
Shell | Eredrim |
Skill Points | 42-point max-level setup |
Weapon | Great Martyr's Blade |
Combat Stone | Thief Stone |
Combat Stone | Warden Stone |
Support Stone | Bulwark Stone |
Support Stone | Auspicious Stone |
Support Stone | Headsman's Stone |
Support Stone Alternative | Berserker Stone / Retribution Stone |
Ability Stone | Wieldly / Captive Scab / Acolyte Stone |
Core Skill Investments
- Elacrity – 2 points
- Massacre – 3 points
- Apathy – 3 points
- Anguish – 3 points
- Tank – 3 points
- Consecration – 1 point
- Executioner – 1 point
- Oppression
- Seal Affinity
Alternative Tank Variant
For maximum stack retention:
- Remove 1 point from Tank
- Remove 1 point from Consecration
- Add 2 points to Persistence
Where to Get the Bulwark Stone
To find the Bulwark Stone, travel to the Citadel of Penance Waypoint.
From there:
- Run south and head up the stairs.
- Continue south through the courtyard.
- Take the route to the left.
- You'll eventually reach a gate with a lever.
- Cross the bridge and fight your way through the enemies.
- The Bulwark Stone is inside the chest at the end.
This is one of the most important items to collect for the build because of the huge damage reduction it provides.
Where to Get the Warden Stone
The Warden Stone is obtained as a reward for defeating the boss inside the tower in the Conquered Temple.
It's a significant fight, so be prepared.
Once you've obtained it, make sure you upgrade it to max level so you can take advantage of the permanent Frost infusion.
Where to Get the Thief Stone
The Thief Stone is located in the southern part of the map.
You'll need to complete one of the trial events in the area.
Complete the trial and you'll be able to collect the Thief Stone.
Because this stone is so important to making the Great Martyr's Blade feel faster, it's one of the first pieces of equipment I'd recommend picking up for this build.
Where to Get the Great Martyr's Blade
The Great Martyr's Blade can be found in the Great Martyr's Prison dungeon.
Start from the Gloomshade Beacon.
From there:
- Head past the large scrap.
- You'll come across a chest — ignore it for now.
- Continue forward.
- Take the left-hand route.
- You'll see a well.
- Bypass the well.
- Continue into the dungeon.
- The Great Martyr's Blade will be located ahead.
Once you've got the weapon, combine it with the Thief Stone and Warden Stone to complete the core of the Frost setup.
Final Thoughts
This Eredrim Frost build is an absolute monster in NG+.
The Great Martyr's Blade starts out looking like a painfully slow weapon, but the Thief Stone's Warp stacks completely change the way it feels.
Then you add permanent Frost from the Warden Stone, the 200% increased damage against frozen enemies from Apathy, and you've got a weapon capable of absolutely deleting enemies once they're frozen.
The defensive side is arguably even more ridiculous.
Bulwark Stone's 70% damage reduction combines with up to 20% damage reduction from Slaughter stacks through Tank, giving you potentially 90% damage reduction.
That means you can play Eredrim the way he should be played:
Aggressively.
Get in there.
Shoulder Bash your enemies.
Break them.
Parry them.
Build your Slaughter stacks.
Freeze them.
Then swing the Great Martyr's Blade straight through them.
Against bosses, the build becomes a certified bully. The combination of Break pressure, Frost, reposts, huge critical damage and ridiculous survivability gives you an incredible amount of control over the fight.
If you enjoy slow, powerful weapons, huge damage numbers, Frost effects and becoming almost impossible to kill, this is absolutely a build worth trying in NG+.
I'll be covering plenty more Mortal Shell II builds, streams, tips and tricks, so keep an eye out for the next guide.
Table of Contents
1. Overview2. Body Text Best Eredrim Frost Build in Mortal Shell II – NG+ Build Guide Eredrim Frost Build Overview Eredrim Skill Tree Massacre – 3 Points Apathy – 3 Points Great Martyr's Blade + Frost Anguish – 3 Points Tank – 3 Points Consecration – 1 Point Executioner – 1 Point Oppression Seal Affinity Alternative Build: Persistence How the Frost Eredrim Build Works Bulwark Stone – The Defensive Core Support Stones Third Support Stone: Berserker or Retribution Thief Stone Warden Stone Ability Stones Acolyte Stone Best Combat Rotation Why This Build Is So Good Against Bosses Boss Strategy Frost Eredrim Build: Recommended Setup Core Skill Investments Alternative Tank Variant Where to Get the Bulwark Stone Where to Get the Thief Stone Where to Get the Great Martyr's Blade Final Thoughts
See More





Like our guides?
Add Mobalytics as a preferred source on Google!