


This Hunter build is designed around freezing enemies, shattering them for huge area damage, and rapidly refreshing your abilities. You will find extreme and insane difficulty much easier utilising this setup! Let's get into it!
 Use your favourite features in-game with our Desktop App
Gamebase Guide
S-TIER Endgame Hunter Build - Shatter EVERYTHING!
Guides
Overview
Body Text
This Hunter build is designed around freezing enemies, shattering them for huge area damage, and rapidly refreshing your abilities.
The core combination of Cryopulse, Arcbolt, Shatter Protocol, and the Drive perk system gives the build exceptional horde clear and elite control. Frozen enemies can be shattered with your weapons to trigger a large Cryoblast, while Drive continually reduces your ability cooldowns as you eliminate elite and special enemies.
The result is a Hunter that can lock down entire groups, freeze priority targets, and repeatedly cycle its abilities throughout a mission.
Build Overview
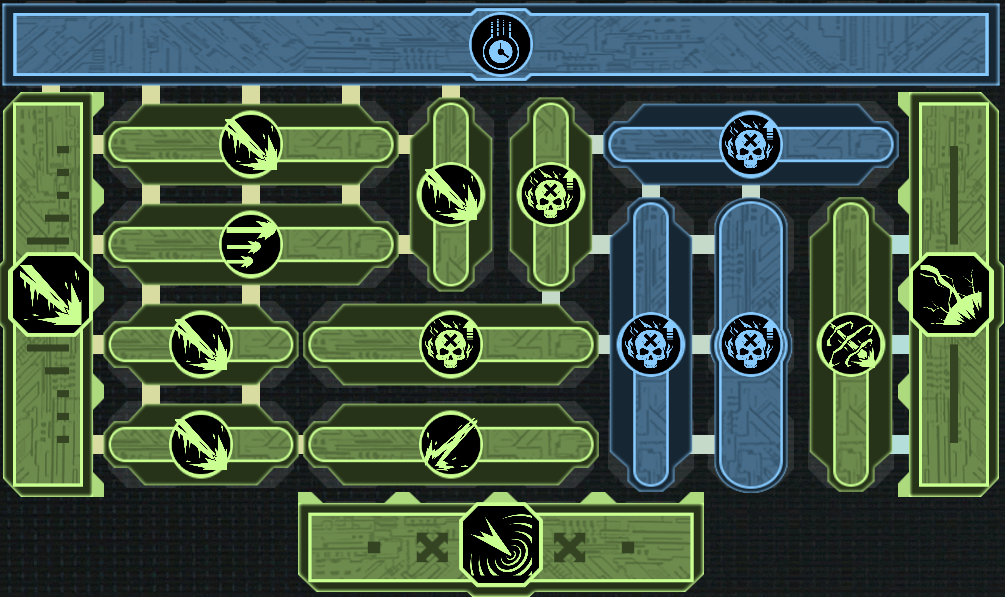
The build revolves around three key mechanics:
- Arcbolt provides area control and applies a spreading bleed.
- Cryopulse freezes enemies and creates the setup for Shatter Protocol.
- Shatter Protocol turns frozen targets into large Cryoblast explosions that can freeze and damage enemies around them.
The BD48 Heavy Rifle provides sustained fire and excellent horde clear, while either the Din Personal Rail Gun or L33 Pike can be used to deliver the heavy hit needed to shatter frozen elite enemies.
The build also invests heavily into Drive, allowing kills against elite and special enemies to rapidly reduce ability cooldowns.
Core Ability — Arcbolt
The build replaces Stasis Bolt with Arcbolt and the Hemorrhage Fever modifier.
Hemorrhage Fever applies a bleed to enemies struck by Arcbolt, with the effect spreading when affected enemies are killed.
This gives Arcbolt excellent area control against both swarms and elite enemies.
It is particularly effective when used to shut down choke points. Enemies entering the affected area are slowed, allowing the Hunter to control incoming waves while the bleed steadily reduces their health.
Arcbolt becomes even more effective when combined with other crowd-control effects, but the build doesn't rely on teammates to provide that control.
Cryopulse provides the second half of the combination.
Cryopulse — The Core of the Build
Cryopulse is the centerpiece of the setup.
The beam freezes enemies in place, with higher charge levels providing longer freezes. A fully charged Cryopulse also chills the surrounding area, reducing enemy movement and attack speed.
The build is heavily invested into Cryopulse because keeping enemies frozen gives you the time needed to set up your weapon damage and trigger Shatter Protocol.
Deep Chill
Deep Chill causes Cryopulse to use an even lower temperature, increasing the duration of both the freeze and chill effects.
This gives you considerably more time to reposition, line up your shots, or prepare your next ability.
Particle Cyrosure Matrix
Particle Cyrosure Matrix significantly reduces the charge time of Cryopulse.
Since the entire build revolves around repeatedly freezing enemies, reducing the time required to charge the ability is extremely valuable.
The goal is simple: keep Cryopulse available and minimize downtime.
Cold to Touch
Cold to Touch causes enemies hit by Cryopulse to chill enemies around them.
This allows a single beam to provide considerably more crowd control, making it easier to lock down groups rather than focusing on individual targets.
Shatter Protocol — The Damage Engine
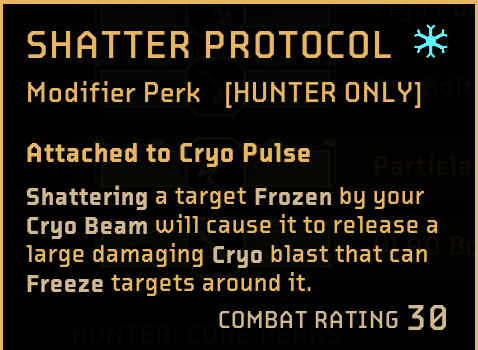
Shatter Protocol is where the build really comes together.
Shattering an enemy frozen by Cryopulse causes it to release a large damaging Cryoblast. The explosion also freezes enemies around the target, creating a chain of crowd control and area damage.
This gives the build a simple but extremely powerful loop:
Freeze → Shatter → Cryoblast → Freeze nearby enemies → Shatter again.
Against groups of elite enemies, the effect becomes particularly powerful.
Freeze several targets with Cryopulse, switch to your heavy-hitting weapon, and land the required shots to trigger the explosions.
The result is substantial area damage while simultaneously keeping the surrounding enemies under control.
Particle Swords — Freeze Multiple Targets
Particle Swords causes the Cryopulse beam to pierce through targets.
The trade-off is that it doesn't provide the additional weak-point damage.
For this build, that's a worthwhile sacrifice.
Cryopulse isn't primarily being used as a damage ability. Its job is to freeze as many targets as possible so they can be shattered afterward.
If several elite enemies line up, the piercing beam can freeze multiple targets at once. You can then switch to your Rail Gun or Pike and begin shattering them individually.
This is particularly effective in narrow corridors and other situations where enemies naturally group together.
Ambient Cooling — The Cooldown Engine
Ambient Cooling is one of the most important perks in the entire build.
When Cryopulse is activated, abilities currently on cooldown have their remaining cooldown reduced by 50%.
This creates the foundation for the build's ability-spamming potential.
The interaction is especially powerful because Cryopulse itself already has a very short cooldown thanks to Rapid Deployment.
Rapid Deployment provides a 60% cooldown reduction, allowing Cryopulse to return extremely quickly.
The result is a constant cycle of:
Use ability → activate Cryopulse → reduce remaining cooldowns → freeze enemies → kill elites → reduce cooldowns again.
Drive — The Cooldown Loop
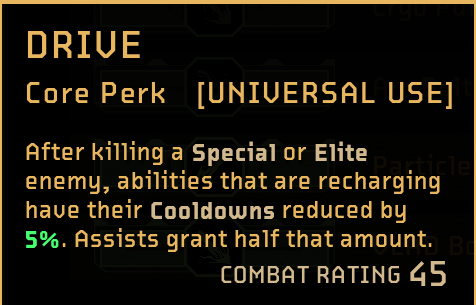
The second major component of the build is the Drive perk system.
Drive reduces the cooldown of abilities that are currently recharging whenever you kill a Special or Elite enemy.
The base effect reduces the remaining cooldown by 5%, while assists provide half of that amount.
The build invests heavily into Drive modifiers to turn elite kills into a constant source of cooldown reduction.
Flow State
Flow State increases Drive's cooldown reduction by another 5%.
This takes the effect from 5% to 10% cooldown reduction.
Big Game
Big Game doubles Drive-related bonuses when killing an Elite enemy.
That means an Elite kill can reduce the remaining cooldown by 20%.
This becomes extremely powerful during longer engagements where multiple elite enemies are present.
For example, if an ability has only a few seconds remaining and you eliminate several elites, the cooldown can disappear extremely quickly.
This is what allows Cryopulse and Arcbolt to be used repeatedly rather than waiting for their normal cooldowns.
Muscle Memory
Muscle Memory provides permanent damage for killing Special or Elite enemies.
Each qualifying kill grants 1% increased damage, with assists providing half the amount.
With the Drive bonuses doubling this effect, the build gains 2% permanent increased damage per qualifying kill.
The longer the mission continues, the stronger the Hunter becomes.
Reaper
Reaper works in a similar way but provides permanent health instead.
Each Special or Elite kill grants additional permanent health, with the Drive bonuses increasing the effect to 4 permanent health per qualifying kill.
This gives the build a useful defensive scaling mechanic alongside its offensive bonuses.
BD48 Heavy Rifle
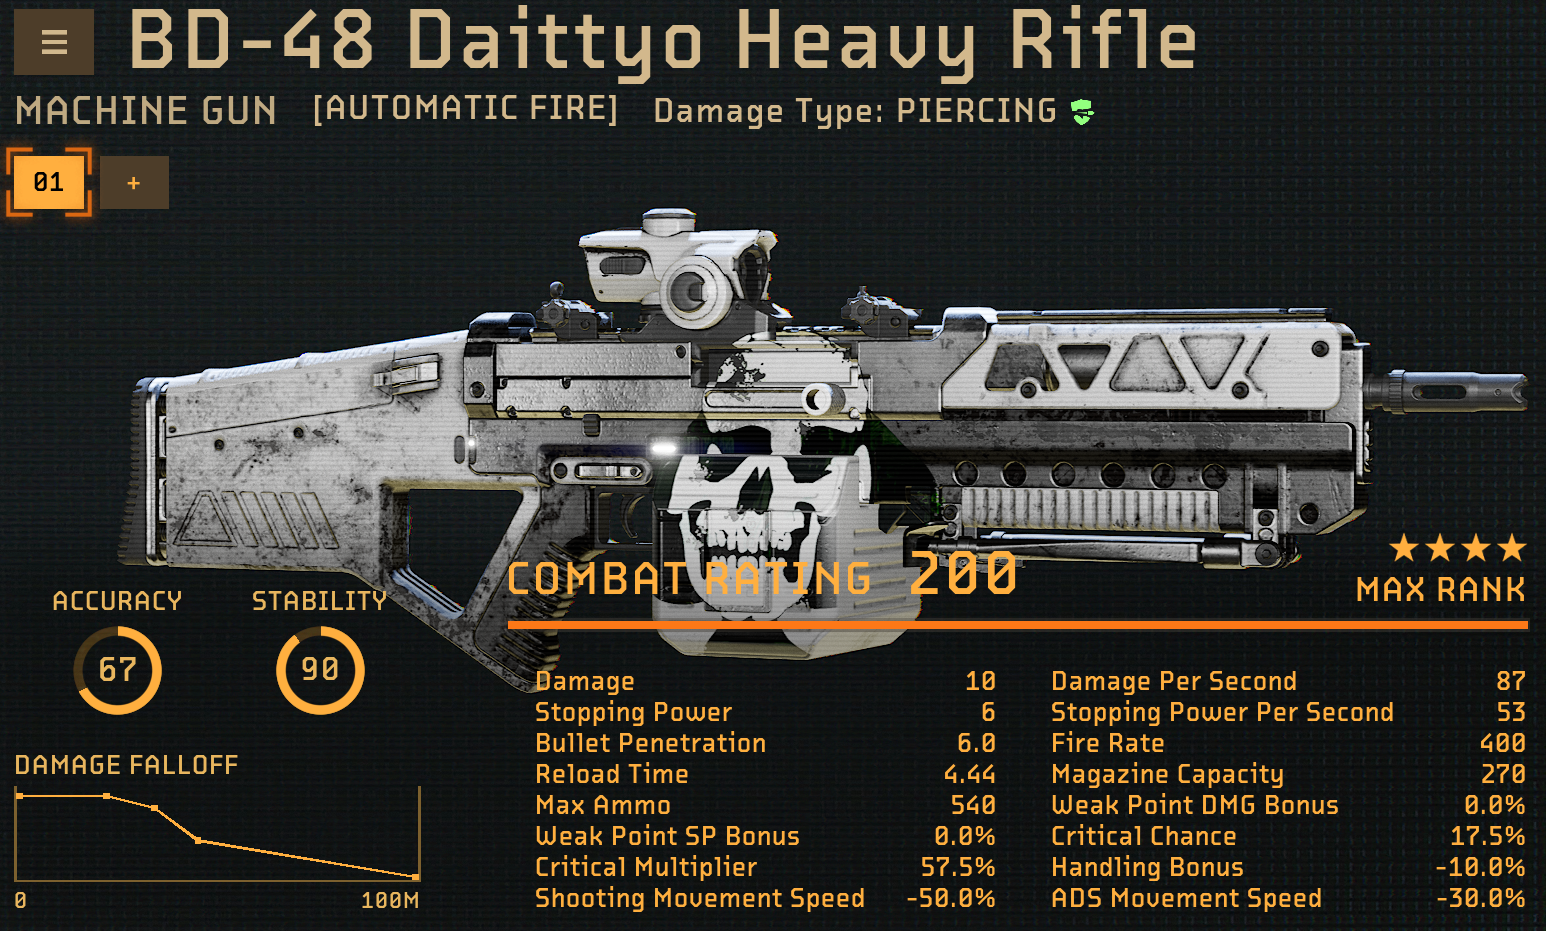
The BD48 Heavy Rifle is the ideal primary weapon for this setup because it combines a huge magazine, strong ammo reserves, multiple fire-rate options, and excellent sustained damage.
It can clear swarms while also providing enough stopping power to keep elite enemies under control.
Most importantly, the BD48 gives the build plenty of opportunities to capitalize on frozen targets and maintain its damage output while abilities are cycling.
Nagpur Shroud
Nagpur Shroud gives 40% increased stopping power for 7 seconds every third hit.
With the BD48's enormous magazine, this effect can be maintained very consistently.
It is the preferred option when the goal is to stagger and control elite enemies.
Boosted Flash Hider
Boosted Flash Hider is the alternative if you want to focus more heavily on critical hits.
On kill, it provides:
- 30% Critical Hit Chance
- 40% Critical Hit Damage
The effect lasts for 10 seconds and can trigger once every 20 seconds.
This effectively gives a 10-second damage window followed by a 10-second cooldown.
Both muzzle options are viable. Nagpur Shroud is better for control, while Boosted Flash Hider is better for critical-hit damage.
Combat Actuator
Combat Actuator provides 5% increased damage on kill, stacking up to five times.
At maximum stacks, that's 25% increased damage.
It also increases Bullet Penetration, reaching 2.5 Bullet Penetration at maximum stacks.
This makes the BD48 particularly effective against groups, allowing its rounds to penetrate through multiple enemies.
Compressed Optic
Compressed Optic provides:
- 7.5% Critical Hit Chance
- 7.5% Critical Hit Multiplier
- Additional Handling
The alternative is Green Dot Sight, which provides Weak Point Damage and Weak Point Stopping Power.
Both options work well. Use Compressed Optic when leaning into critical-hit damage, or Green Dot Sight when prioritizing weak points and stopping power.
Gray Market Rounds
Gray Market Rounds is the preferred Augment.
Each shot can deal between 50% and 250% damage.
The BD48's huge magazine makes this particularly effective because hundreds of rounds can be fired during a single engagement.
The individual damage rolls are inconsistent, but the sheer number of shots means the higher rolls can add up to substantial additional damage.
Particle Emitter
Particle Emitter increases damage by 1% per hit, stacking up to 20 times.
At maximum stacks, the weapon gains 20% increased damage.
The stacks reset after one second without hitting an enemy, so maintaining continuous fire is important.
BD16 Bego is an alternative, providing 6.5% Critical Hit Chance for players who prefer a more critical-focused setup.
Signature Weapon — Djinns Personal Rail Gun
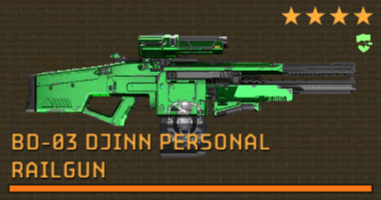
The signature weapon is designed specifically to deal the heavy hit required to shatter frozen targets.
The Din Personal Rail Gun is my preferred option because of its larger magazine and more practical sustained damage.
The L33 Pike is also extremely powerful, but the Din is easier to manage during longer fights.
AFG Precision Underbarrel
AFG Precision Underbarrel provides:
- 30% Critical Hit Chance
- 40% Critical Hit Damage on kill
The effect lasts for 10 seconds, giving the weapon a substantial burst window.
Large Drum Magazine
The Large Drum Magazine increases magazine capacity and maximum ammunition.
The setup reaches 10 shots per magazine and 44 maximum ammunition, providing significantly more flexibility than the Pike.
This is especially valuable when multiple frozen elite enemies need to be shattered in succession.
Digital Scope
The Digital Scope provides:
- 10% reduced spread
- 20% Critical Hit Chance
- 5% Critical Hit Multiplier
The trade-offs to Handling and ADS movement speed are relatively minor for this build.
The Rail Gun also has a charge-up mechanic, so learning to use the charge correctly is important. Firing without fully utilizing the charge leaves significant damage on the table.
Reload Speed
The Classic Pulse Rifle reload-speed Trait provides 20% increased reload speed, helping reduce the downtime between Rail Gun magazines.
This is particularly useful when the weapon is being used repeatedly to shatter frozen elites.
Gray Market Rounds
Gray Market Rounds can also be used on the Rail Gun, although the value is somewhat lower than on the BD48 because of the smaller number of shots.
The Rail Gun's high individual damage makes it an excellent weapon for triggering Shatter Protocol, but the lower magazine size means a poor damage roll can be more noticeable.
Alternative Signature — L33 Pike
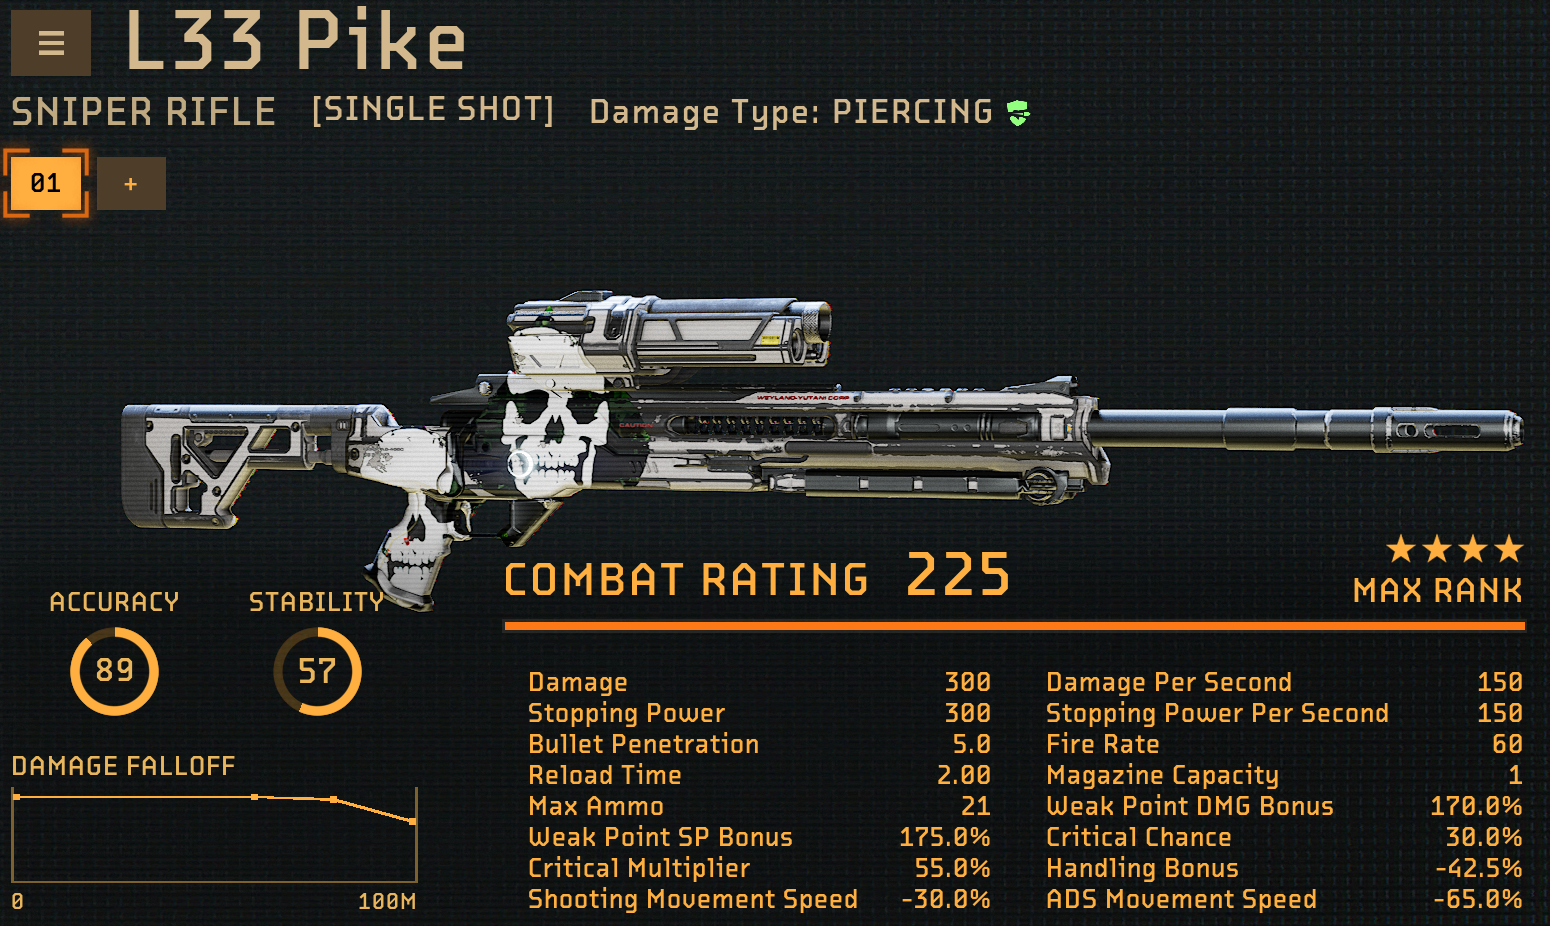
The L33 Pike is the alternative for players who prefer massive individual damage numbers.
It has fewer shots available than the Din, but its critical hits can be extremely powerful.
Extended Flash Hider
The Extended Flash Hider provides the same type of critical-hit bonus, giving 30% increased Critical Hit Chance and Critical Hit Damage.
Expanded Reserve
Expanded Reserve increases maximum ammunition by 40%.
This is particularly important because the Pike has a very small ammunition reserve without additional investment.
Digital Scope
The Digital Scope is used again for its Critical Hit Chance and Critical Hit Multiplier.
The additional critical scaling makes the Pike particularly effective when targeting the weak points of frozen elites.
Hollow Point Rounds
For the Pike, Hollow Point Rounds are preferred over Gray Market Rounds.
Hollow Point Rounds provide:
- 120% Weak Point Damage
- 125% Weak Point Stopping Power
Because the Pike has significantly fewer shots, Gray Market Rounds are less reliable. A low 50% damage roll on one of your limited shots can be particularly punishing when you're trying to shatter an elite.
Hollow Point Rounds provide a much more consistent source of damage for this weapon.
Djinns Rail Gun vs L33 Pike
Both weapons perform the same fundamental role: deal massive damage to frozen targets and trigger Shatter Protocol.
Weapon | Strength | Best For |
|---|---|---|
Din Personal Rail Gun | Larger magazine and more sustained fire | Consistent Shatter Protocol triggers |
L33 Pike | Higher burst potential | Massive weak-point hits |
The Din is the more practical choice for most situations because it gives you more shots and less reload downtime.
The L33 Pike is better suited to players who enjoy precision gameplay and want to land enormous critical hits.
Hunter Gameplay Rotation
The build is easiest to understand as a repeating cycle.
1. Establish Crowd Control
Use Arcbolt to create an area of control and begin applying Hemorrhage Fever.
2. Freeze the Wave
Use Cryopulse to freeze enemies inside the Arcbolt area.
Particle Swords allows the beam to pierce through groups, while Cold to Touch spreads the chill around affected targets.
3. Shatter Priority Targets
Switch to the Din Rail Gun or L33 Pike and hit the frozen targets.
Triggering Shatter Protocol causes the Cryoblast to damage and freeze nearby enemies.
4. Trigger Drive
Focus on killing Special and Elite enemies to activate the Drive cooldown reductions and permanent scaling effects.
5. Reset Your Abilities
Use Cryopulse again to reduce the remaining cooldowns of your other abilities by 50%.
6. Repeat
Continue cycling Arcbolt, Cryopulse and your signature weapon to keep enemies frozen and constantly trigger Shatter Protocol.
Why the Build Works
The strength of the build isn't any individual perk or weapon.
It's the way the mechanics interact.
Arcbolt controls the area.
Cryopulse freezes the targets.
Shatter Protocol converts those frozen targets into massive Cryoblast explosions.
Drive reduces ability cooldowns when elite and special enemies die.
Ambient Cooling cuts remaining cooldowns whenever Cryopulse is activated.
Rapid Deployment keeps Cryopulse available more frequently.
Meanwhile, the BD48 provides the sustained fire needed to clear swarms, while the Din or L33 provides the burst damage required to shatter elite enemies.
The result is a Hunter build that can repeatedly freeze, shatter, and reset its abilities throughout an entire mission.
Final Build Summary
Primary Weapon: BD48 Heavy Rifle
Primary Weapon Trait: Particle Emitter
Primary Augment: Gray Market Rounds
Primary Muzzle: Nagpur Shroud or Boosted Flash Hider
Primary Optic: Compressed Optic or Green Dot Sight
Signature Weapon: Din Personal Rail Gun
Signature Alternative: L33 Pike
Signature Augment: Gray Market Rounds on Din / Hollow Point Rounds on L33
Core Ability: Arcbolt + Hemorrhage Fever
Core Ability: Cryopulse + Deep Chill + Particle Syoso Matrix + Shatter Protocol + Cold to Touch + Particle Swords + Ambient Cooling
Core Drive Perks: Flow State, Big Game, Muscle Memory and Reaper
The build's primary objective is simple: keep enemies frozen, shatter them for Cryoblast explosions, and use elite kills to keep the entire cooldown engine running.
With the right execution, the Hunter can maintain almost constant crowd control while producing huge bursts of damage against elite targets.
Video
Table of Contents
1. Overview2. Body Text Build Overview Deep Chill Particle Cyrosure Matrix Cold to Touch Drive — The Cooldown Loop BD48 Heavy Rifle Signature Weapon — Djinns Personal Rail Gun Alternative Signature — L33 Pike Djinns Rail Gun vs L33 Pike Hunter Gameplay Rotation 1. Establish Crowd Control 2. Freeze the Wave 3. Shatter Priority Targets 4. Trigger Drive 5. Reset Your Abilities 6. Repeat Why the Build Works Final Build Summary
See More





Like our guides?
Add Mobalytics as a preferred source on Google!