


This Duelist build absolute CRUSHES extreme and insane difficulties in Alien Fireteam Elite 2. With a combination of strong horde clear and elite-crippling punching power, this build has every avenue covered. Let's get into it!
 Use your favourite features in-game with our Desktop App
Gamebase Guide
Aliens Fireteam Elite 2 | S-TIER Endgame Duelist Build
Guides
Overview
Body Text
Duelist Build Overview
This Duelist build is designed to dominate the Zeno scum with incredible damage output, exceptional swarm clear, and extremely fast ability cooldowns.
The core idea is simple:
Keep firing → build Stay on Target → trigger cooldown reduction → spam Cluster Grenades and Precision Configuration → repeat.
The result is a build that can control entire corridors, shred large groups of enemies, and quickly delete elite targets before they become a threat.
The build is particularly effective because it combines:
- Huge swarm-clearing potential
- Extremely high Cluster Grenade uptime
- Strong elite damage
- Excellent crowd control
- Fast ability cooldowns
- High weapon fire rate
- Strong critical-hit scaling
- Multiple ways to trigger cooldown reduction
- Flexible secondary weapon choices
The gameplay footage used for this build was taken on Extreme difficulty, demonstrating just how hard the setup can hit when the correct damage types and weapon perks are combined. Check the video out!
Core Weapon — F44A Pulse Rifle
The backbone of this build is the F44A Pulse Rifle.
It has almost everything we want:
- Large magazine
- High ammo reserves
- Excellent fire rate
- Smart targeting
- Strong sustained damage
- Excellent synergy with Stay on Target
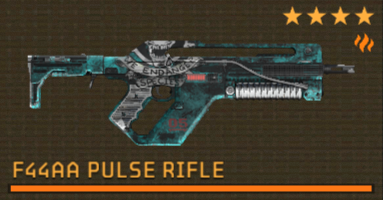
The onboard smart targeting makes the weapon particularly effective for maintaining Stay on Target stacks.
Stay on Target
Stay on Target increases your damage as you continue dealing damage, stacking up to 20% increased damage.
Because the F44A fires so quickly and has such a large magazine, maintaining these stacks is extremely easy.
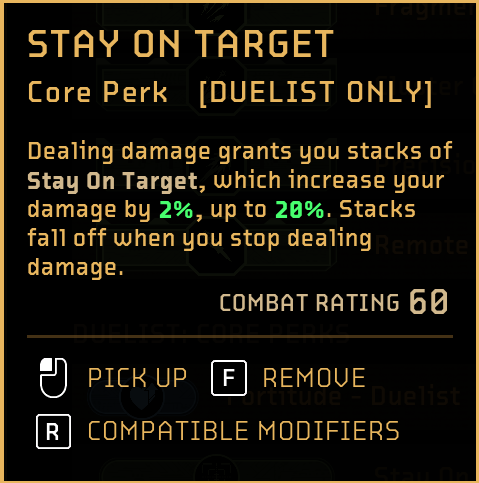
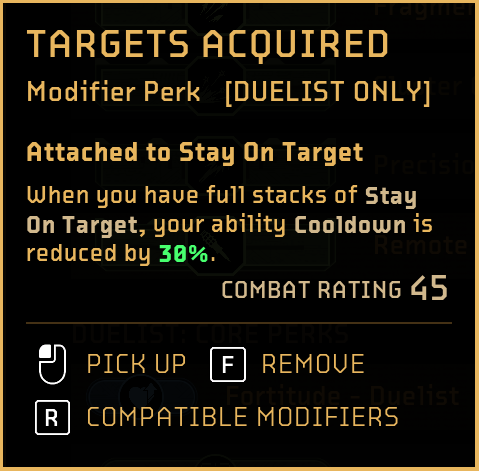
Once you have full Stay on Target stacks, you can take advantage of another important interaction:
Targets Acquired
This provides a 30% ability cooldown reduction when the condition is met.
That cooldown reduction is one of the most important parts of the entire build.
Why the F44A Works So Well
The F44A effectively gives you a reliable way to maintain your damage buffs while continuously triggering the mechanics that allow your abilities to come back faster.
You're not just using the rifle to kill enemies.
You're using it to:
- Maintain Stay on Target.
- Build weapon damage.
- Trigger Targets Acquired.
- Reduce ability cooldowns.
- Return to your Cluster Grenade and Precision Configuration.
- Repeat the cycle.
This creates a very aggressive playstyle where you are constantly alternating between weapon fire and powerful abilities.
Duelist Elite Weapons
While the F44A is the primary weapon around which the build is constructed, you'll want a secondary weapon that can deal with elite targets.
There are two particularly useful choices:
- Alamein Revolver Rifle
- BD48 Heavy Rifle
Both have different strengths, so the choice largely comes down to your preferred playstyle.
The Alamein is better suited to precision and weak-point damage
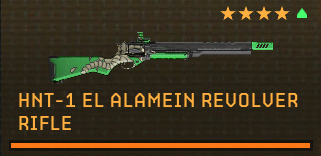
The BD48 is more of a bullet hose that provides sustained stopping power and stagger.
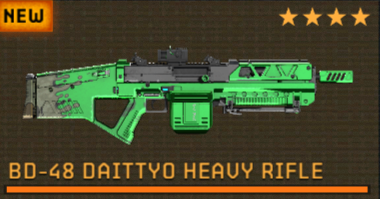
We'll break both down below.
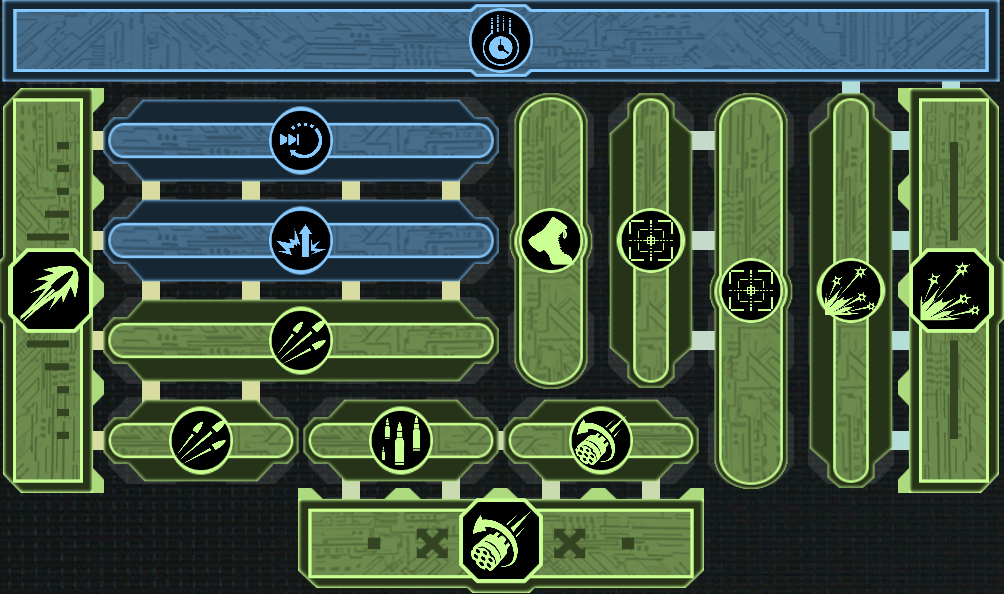
Duelist Perk Tree
The perk tree is where this build really starts to come together.
The primary focus is on three things:
1. Cluster Grenade Spam
We want to maximize the number of grenades we can throw.
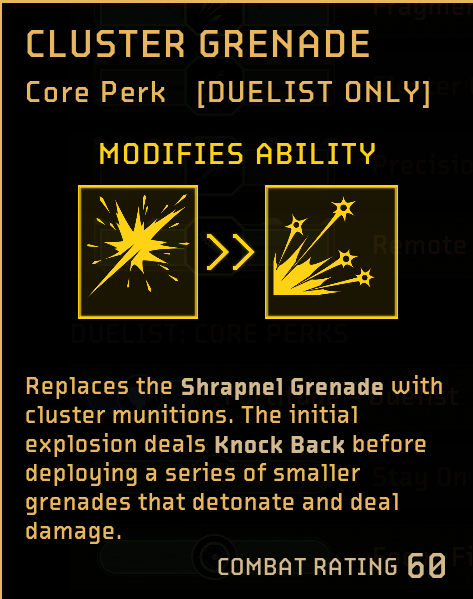
2. Precision Configuration
This gives us a powerful tool for deleting elite enemies.
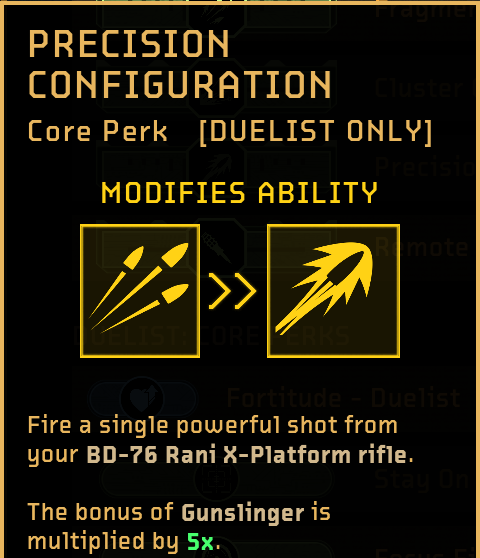
3. Cooldown Reduction
The more frequently we can use these abilities, the stronger the build becomes.
Cluster Grenade Core Perk
The Cluster Grenade is the centerpiece of the build's swarm-clear potential.
We're pairing it with the Cluster Storm modifier.
Cluster Storm causes the grenade to release additional clusters, massively increasing its area of effect.
This gives you an enormous amount of battlefield control.
How to Use Cluster Grenade
There are two primary ways to use it.
Surrounded?
Fire the grenade at your feet.
This creates an AoE around you and gives you an immediate answer when enemies begin overwhelming your position.
Large Enemy Wave?
Throw it ahead of the incoming swarm.
The additional clusters spread through the group and can wipe out huge numbers of enemies.
Cluster Grenade also provides stagger, giving it an additional crowd-control function.
If an elite enemy is pushing toward you, landing a Cluster Grenade can stagger it long enough for you to reposition or line up your next attack.
Rapid Deployment
The most important Cluster Grenade modifier is Rapid Deployment.
This provides a massive 60% cooldown reduction.
That alone gives Cluster Grenade excellent uptime.
However, we're not stopping there.
The rest of the build is designed to stack additional cooldown reduction on top.
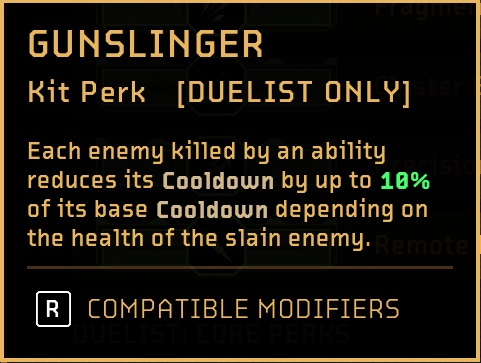
Gunslinger — The Cooldown Engine
Gunslinger is another essential part of the build.
Whenever an enemy is killed by an ability, Gunslinger reduces the ability's cooldown by up to 10% of its base cooldown, depending on the health of the enemy that was killed.
This works beautifully with Cluster Grenade.
Imagine throwing a grenade into a large group and killing several enemies.
You're simultaneously:
- Clearing the swarm
- Dealing damage
- Triggering Gunslinger
- Reducing your ability cooldown
- Moving closer to your next grenade
This is one of the reasons the build can feel like it has almost no downtime.
Targets Acquired
Targets Acquired is another major piece of the cooldown engine.
Once you have built your Stay on Target stacks, Targets Acquired can provide 30% ability cooldown reduction.
This means your F44A isn't simply dealing damage.
It's actively helping you get your abilities back faster.
The basic cycle becomes:
Shoot → build Stay on Target → trigger Targets Acquired → use ability → kill enemies → Gunslinger reduces cooldown → repeat.
Combining the Cooldown Reduction
This is where the build becomes particularly powerful.
You're combining:
- Rapid Deployment: 60% cooldown reduction
- Targets Acquired: 30% cooldown reduction
- Gunslinger: Up to 10% of an ability's base cooldown per qualifying kill
- Additional cooldown reduction from universal modifiers
The result is extremely high ability uptime.
The important part is learning when to switch back to your ability.
Once you've built your Stay on Target stacks and activated the cooldown-reduction window, you want to make sure you're actually using the ability before the opportunity expires.
Precision Configuration
While Cluster Grenade handles swarms, Precision Configuration is your primary tool for dealing with elite enemies.
It changes the platform rifle's normal burst into a single powerful shot.
This gives Duelist a reliable way to remove priority targets.
The really interesting part is its interaction with Gunslinger.
The Gunslinger bonus is multiplied by five when used with Precision Configuration.
This means that landing a killing shot can immediately give you a huge chunk of your ability cooldown back.
Precision Configuration Cooldown Loop
If you land a Precision Configuration shot and kill an enemy, you can potentially recover a substantial portion of the ability's cooldown.
Against weaker elite targets, this can result in an almost continuous cycle:
Precision Configuration → Kill → Gunslinger → Cooldown reduction → Precision Configuration
This becomes particularly ridiculous in Horde Mode, where large numbers of enemies are constantly appearing.
You can effectively work your way through targets one at a time while continually resetting the ability.
The Downside: You Have to Hit
There's one major drawback.
If you miss your Precision Configuration shot, you're stuck waiting for the full cooldown.
That means this is not an ability you want to throw away randomly.
Be precise.
When you're confident that the shot will land and secure the kill, the cooldown loop becomes incredibly powerful.
Universal Modifier Perks
The build also benefits from the universal modifier perks available through the Armory.
These provide additional:
- Cooldown reduction
- Damage
The setup shown in the build uses the larger versions for a substantial boost.
If you're still building your collection, you can also mix and match the smaller versions.
The smaller variants can potentially give you a slightly more optimized total percentage once you have enough of them available.
Increased Bullet Penetration
Increased Bullet Penetration is another useful choice.
The reason is simple:
If enemies line up, you can shoot through multiple targets.
This is particularly effective in corridors, which is one of the environments where the F44A already performs extremely well.
Quick Trigger
Quick Trigger reduces the delay before firing the Platform Rifle.
This makes Precision Configuration feel more responsive and helps you land the shot before an elite enemy has an opportunity to close the distance.
Alternative Perks
There are a few alternative options worth considering.
Specialized Ammunition
Use this if you want more Weak Point damage.
This is a particularly good option if you're leaning harder into the elite-killing side of the build.
Turbo Loading
Turbo Loading provides even more cooldown reduction at the cost of 40% reduced damage.
The trade-off is that your ability can potentially come off cooldown extremely frequently.
This can be viable if you want to lean completely into ability spam.
Ultimately, the setup presented here is simply the version that provides the best overall balance of damage, cooldown reduction, and consistency.
Gunslinger Weapon Synergy
Gunslinger isn't only useful for reducing ability cooldowns.
It can also increase your weapon's overall output.
Whenever Gunslinger is triggered, Rapid Cadence can increase your weapon's fire rate by up to 4% for 10 seconds, and the effect stacks.
This means that repeatedly triggering Gunslinger can progressively increase your weapon's rate of fire.
That's another reason the build works so well with a weapon like the F44A.
Overclock Chip
Overclock Chip provides another major weapon boost.
After your abilities end, you gain:
- 50% increased fire rate
- 50% increased reload speed
- 4-second duration
This gives you a short but extremely powerful window after using your abilities.
Use this time to unload as much ammunition as possible before returning to your next ability.
Overclock Uplink
If you're playing with a coordinated squad, you can also use Overclock Uplink.
This allows the same fire-rate and reload-speed benefits to extend to allies.
It's a good option if you want to shift the build toward team utility rather than purely maximizing your own damage.
Mobility Alternative
There is also an argument for taking Mobility instead.
Mobility provides:
- 10% movement speed
- 20% stun recovery
- 50% increased Stay on Target duration
The third effect is particularly interesting.
A longer Stay on Target duration gives you more time to switch weapons and secure the kill while the cooldown reduction effect is active.
This makes Mobility a very appealing alternative if you want more consistency from the cooldown loop.
How Stay on Target + Targets Acquired Works
This interaction is worth understanding because it is central to the build.
You need to build Stay on Target stacks by dealing damage.
Once you've reached maximum stacks, you have a window in which you want to trigger the Targets Acquired effect.
If you get a kill during that window, you can activate the 30% cooldown reduction.
That then stacks with:
- Rapid Deployment
- Gunslinger
- Other cooldown modifiers
The result is extremely fast access to both Cluster Grenade and Precision Configuration.
F44A Weapon Perks
Now let's look at how to configure the F44A itself.
Boosted Flash Hider
This provides:
- 30% Critical Hit Chance
- 40% Critical Hit Damage
The effect lasts 10 seconds and can trigger once every 20 seconds.
This gives you a substantial burst of additional damage after securing a kill.
Combat Actuator
Combat Actuator provides, on kill:
- 5% increased damage
- 0.5 Bullet Penetration
The effect stacks up to five times and lasts nine seconds.
That gives you another powerful damage ramp while clearing groups.
Miller Twist Rifling
Miller Twist Rifling provides:
- 7.5% Critical Hit Chance
- Increased weapon range
- Improved handling
It's a straightforward way to add more consistent weapon damage without introducing a complicated condition.
Particle Emitters
The weapon Trait used in this setup is Particle Emitters.
On hit, it provides a 1% damage increase, stacking up to 20%.
The effect resets after one second without hitting an enemy.
This is an excellent match for the F44A because its rapid fire rate makes maintaining the stacks extremely easy.
You can therefore combine:
Stay on Target: 20% damage
with
Particle Emitters: 20% damage
for a substantial combined damage increase while continuously hitting enemies.
Ammunition Choices
Your ammunition choice should depend on what you're fighting.
Incendiary Ammunition
Against Xenomorphs, Incendiary Ammunition is an excellent option.
The F44A's high rate of fire allows you to apply the damage type extremely consistently.
Electric Ammunition
Against Synths, you'll eventually want to use the Electric version.
If you don't have it yet, use your available rounds or Supply Pack options.
Gray Market Rounds
Gray Market Rounds are another interesting choice.
Each shot randomly deals between 50% and 250% damage.
This means individual bullets can deal significantly less or significantly more damage than normal.
However, because the F44A fires so many rounds, the randomness can work in your favour over the course of a sustained burst.
Secondary Weapon Option 1 — Alamane Revolver Rifle
The Alamne Revolver Rifle is the precision-oriented option.
Use it when you want:
- Weak Point damage
- Stopping power
- High single-target damage
- Strong elite control
The weapon is particularly effective when you're confident at consistently hitting weak points.
Alamane Weapon Setup
Nagpore Shroud
Nagpore Shroud causes every third hit to provide:
40% increased stopping power for 7 seconds.
This can allow you to stun-lock enemies and keep dangerous targets under control.
Combat Actuator
We're using Combat Actuator again for additional damage scaling after kills.
Triangulation Sight
Triangulation Sight provides:
- 10% Weak Point Damage
- 10% Weak Point Stopping Power
- Increased range
- Reduced spread
This makes the weapon much more effective when you're focusing on elite weak points.
Reload Speed
The Revolver Rifle has a relatively slow reload because you're loading one round at a time.
Adding reload speed from the Classic Pulse Rifle can provide a 20% reload speed increase, helping reduce the weapon's downtime.
Alamane Augment Choices
You have several options here.
Gray Market Rounds
Adds the same random damage mechanic used elsewhere in the build.
Hollow Point Rounds
Provides a significant damage/Weak Point bonus.
Weak Point Stopping Power
Another strong option if your priority is locking elite enemies down.
A Note on Piercing
One thing to watch with this weapon is the Piercing icon.
When the weapon was originally purchased, the Piercing icon was present, but it was no longer displayed when selecting the weapon.
Because of that uncertainty, Piercing Rounds are worth testing alongside the build.
The interaction may be a bug or visual issue, so it's something to keep an eye on as the game develops.
Alamane Revolver Rifle — Strengths & Weaknesses
Strengths
- Excellent weak-point damage
- Strong stopping power
- Great against elites
- Can punch through tough targets
- Strong against Xenomorphs
- Strong against Synths
Weaknesses
- Slow reload
- More downtime between shots
- Doesn't trigger Stay on Target as consistently as the BD48
If you enjoy precision shooting and deliberately targeting weak points, this is the better choice.
Secondary Weapon Option 2 — BD48 Heavy Rifle
The BD48 Heavy Rifle takes the opposite approach.
Instead of focusing on individual precision shots, you're using it as a bullet hose.
The goal is to keep enemies away from you, maintain pressure, and continuously trigger your build's various on-hit and on-kill effects.
BD48 Weapon Setup
Nagpore Shroud
Again, we're using Nagpore Shroud for the increased stopping power.
Combat Actuator
Combat Actuator provides additional damage scaling after kills.
Green Dot Sight
The Green Dot Sight provides:
- Increased Weak Point Damage
- Increased Weak Point Stopping Power
- Increased range
This gives the BD48 additional utility against elite targets while retaining its excellent sustained-fire capability.
Gray Market Rounds
Gray Market Rounds are another strong choice.
The constant stream of bullets gives you plenty of opportunities to benefit from the random damage increases.
Why the BD48 Works So Well
The biggest advantage of the BD48 is the sheer number of bullets it puts downrange.
That makes it excellent for maintaining Stay on Target.
You're constantly hitting enemies, so you can maintain your damage stacks while keeping the cooldown engine running.
It also provides excellent stopping power.
This makes the weapon particularly effective against enemies such as Acid Exploders.
If a corridor is full of them, you can simply hold the trigger and keep them staggered while steadily destroying the entire group.
Alamane vs BD48
Weapon | Best For | Main Strength |
|---|---|---|
Alamne Revolver Rifle | Elites / Weak Points | Precision damage & stopping power |
BD48 Heavy Rifle | Swarms / Control | Sustained fire & stagger |
Choose Alamane if:
You enjoy precision shooting and want to delete elite enemies with carefully placed shots.
Choose BD48 if:
You want maximum sustained fire, easier Stay on Target maintenance, and better control over groups.
Both are viable.
Recommended Consumables & Damage Types
Your item choices should depend on the enemy faction you're facing.
Xenomorphs
Prioritize Thermal damage.
Incendiary Ammunition is particularly effective here.
Synths
Prioritize Electric damage.
Bring the appropriate Electric ammunition or Supply Pack when available.
Hybrids
Consider bringing Cryo or Shock options depending on your squad composition and what you're expecting to encounter.
Piercing
Piercing Rounds are another useful general-purpose option, particularly when dealing with armoured targets or testing the potential Piercing interaction on the Alamein or Heavy Rifle.
Duelist Gameplay Rotation
The build becomes much easier to play once you understand the rhythm.
Step 1 — Start Firing
Use the F44A to build Stay on Target.
Step 2 — Maintain Your Stacks
Continue dealing damage so your Stay on Target stacks remain active.
Step 3 — Trigger Targets Acquired
Once your stacks are ready, make sure you capitalize on the cooldown-reduction window.
Step 4 — Use Cluster Grenade
Throw Cluster Grenade into the largest group possible.
The grenade clears the swarm while potentially triggering Gunslinger through kills.
Step 5 — Rebuild Your Cooldown
Use the resulting kills and cooldown effects to get your abilities back.
Step 6 — Use Precision Configuration
When an elite appears, line up your shot and eliminate it.
A successful kill can dramatically reduce the ability's cooldown through Gunslinger.
Step 7 — Return to Your Rifle
Use the Overclock and Rapid Cadence effects to maximize your weapon damage.
Step 8 — Repeat
The goal is to keep the entire cycle moving continuously.
Horde Mode Strategy
This build is particularly strong in Horde Mode.
The reason is that Horde constantly throws large numbers of enemies at you.
That gives the build exactly what it wants:
- Lots of targets
- Lots of potential kills
- Frequent Gunslinger triggers
- Easy Stay on Target maintenance
- Excellent Cluster Grenade targets
- Plenty of elite enemies for Precision Configuration
The more enemies there are, the more opportunities you have to trigger the cooldown engine.
This is where the build can start feeling almost ridiculous.
How to Play Against Swarms
Against large groups, don't waste Precision Configuration.
Your Cluster Grenade is the primary tool.
Throw it into the densest part of the wave and allow Cluster Storm to spread the damage.
Then use the F44A to clean up whatever survives.
If enemies get too close, you can also throw the grenade at your feet to create immediate breathing room.
How to Play Against Elites
Against elite targets, switch your attention toward Precision Configuration.
Build your Stay on Target stacks, find your opening, and land the shot.
If you secure the kill, Gunslinger can immediately start working toward another use of the ability.
If you're using the Alamne Revolver Rifle, focus on weak points and stopping power.
If you're using the BD48, use its sustained fire and stagger to keep the enemy under control.
Final Build Summary
The Duelist build is essentially a cooldown-spamming bullet hell setup.
Your F44A provides sustained damage and keeps Stay on Target active.
Your Cluster Grenade handles swarms and provides crowd control.
Your Precision Configuration deletes elite targets.
Gunslinger constantly pushes your abilities back toward ready.
Targets Acquired and Rapid Deployment provide additional cooldown reduction.
Your weapon perks then increase fire rate, critical damage, sustained damage, and stopping power.
The final result is a Duelist build that can control enormous groups while still having the single-target burst needed to deal with elite enemies.
Core Build
Primary Weapon: F44A Pulse Rifle
Elite Weapon: Alamne Revolver Rifle or BD48 Heavy Rifle
Core Ability: Cluster Grenade + Cluster Storm
Elite Ability: Precision Configuration
Core Perks:
- Stay on Target
- Targets Acquired
- Rapid Deployment
- Gunslinger
- Rapid Cadence
- Overclock Chip
Alternative: Mobility
Primary Weapon Trait: Particle Emitters
Primary Weapon Attachments:
- Boosted Flash Hider
- Combat Actuator
- Miller Twist Rifling
Final Tips
Keep Stay on Target Active
The entire cooldown engine becomes much stronger when you maintain your damage stacks.
Don't Waste Precision Configuration
Missing the shot means losing the opportunity for the Gunslinger cooldown reset.
Use Cluster Grenade Aggressively
The ability isn't just a panic button. Use it proactively to control incoming waves.
Choose Your Secondary Weapon Based on Your Playstyle
Alamne: Precision and weak points.
BD48: Sustained fire and stagger.
Match Your Damage Type
Don't blindly use the same ammunition against every faction.
Build for the Content
The higher the difficulty, the more important your damage type, crowd control, stopping power, and cooldown management become.
Master the cooldown loop and Duelist becomes one of the most satisfying classes to play: you're constantly firing, throwing grenades, deleting elites, and getting your abilities back before the enemy has time to recover.
Table of Contents
1. Overview2. Body Text Duelist Build Overview Core Weapon — F44A Pulse Rifle Why the F44A Works So Well Duelist Elite Weapons Duelist Perk Tree 1. Cluster Grenade Spam 2. Precision Configuration 3. Cooldown Reduction Cluster Grenade Core Perk Surrounded? Large Enemy Wave? Rapid Deployment Gunslinger — The Cooldown Engine Targets Acquired Combining the Cooldown Reduction Precision Configuration Precision Configuration Cooldown Loop The Downside: You Have to Hit Universal Modifier Perks Increased Bullet Penetration Quick Trigger Alternative Perks Gunslinger Weapon Synergy Overclock Chip Overclock Uplink Mobility Alternative How Stay on Target + Targets Acquired Works F44A Weapon Perks Particle Emitters Ammunition Choices Secondary Weapon Option 1 — Alamane Revolver Rifle Alamane Weapon Setup Alamane Augment Choices Gray Market Rounds Hollow Point Rounds Weak Point Stopping Power A Note on Piercing Alamane Revolver Rifle — Strengths & Weaknesses Strengths Weaknesses Secondary Weapon Option 2 — BD48 Heavy Rifle BD48 Weapon Setup Why the BD48 Works So Well Alamane vs BD48 Choose Alamane if: Choose BD48 if: Recommended Consumables & Damage Types Duelist Gameplay Rotation Step 1 — Start Firing Step 2 — Maintain Your Stacks Step 3 — Trigger Targets Acquired Step 4 — Use Cluster Grenade Step 5 — Rebuild Your Cooldown Step 6 — Use Precision Configuration Step 7 — Return to Your Rifle Step 8 — Repeat Horde Mode Strategy How to Play Against Swarms How to Play Against Elites Final Build Summary Final Tips Keep Stay on Target Active Don't Waste Precision Configuration Use Cluster Grenade Aggressively Choose Your Secondary Weapon Based on Your Playstyle Match Your Damage Type Build for the Content
See More





Like our guides?
Add Mobalytics as a preferred source on Google!