 League of Legends
 Teamfight Tactics
 Legends of Runeterra
 Valorant
 Lost Ark
 Destiny 2
 Diablo 4
 Download APP
How to Play Darkin City
Anyone who knows me knows that while I might play basically anything I can get my hands on these days, my first real love in Runeterra is Targon/Shadow Isles midrange.
I’m Jordan “WhatAmI” Abronson and for the first time in a couple of seasons, this combination of regions is actually looking to have some real power behind it again.
How could I not do a write up on it?
Let’s dive in, starting with our list and deck code for you to try.
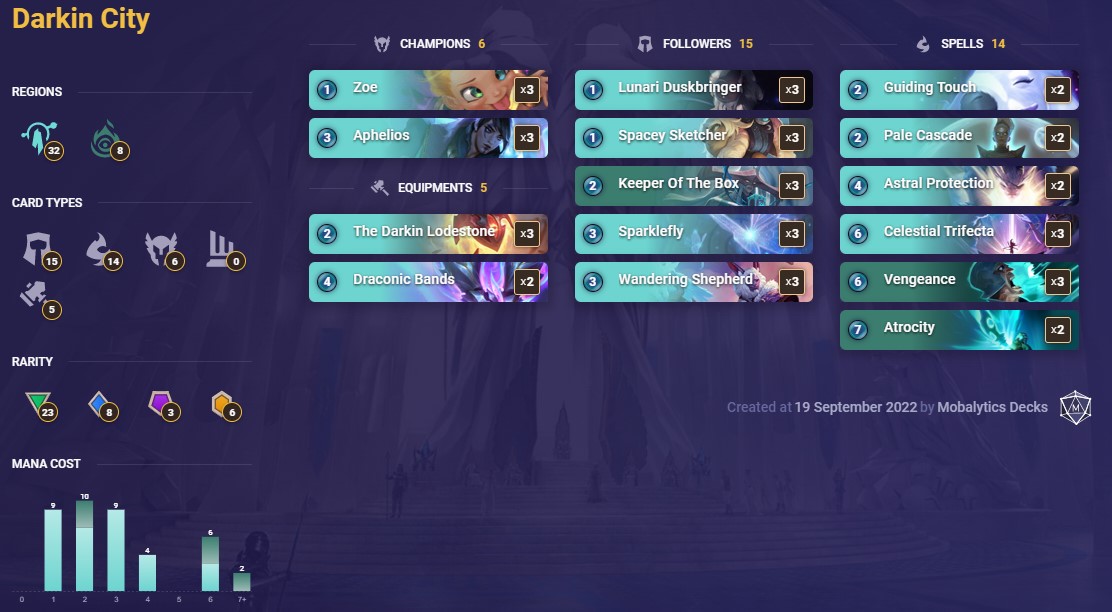
Deck Code: CECAKAYJBEUESVWZAEAQMBIGAMDASBAGFUAQCBIBAMBQGCJDFUZQCBQJEEAQCBIZAA
Protect the Queen
This is the deck that I pushed through to masters with this season so I actually have some quite real level of confidence in its game plan. What specifically is that game plan you might ask? Well, we have so many different win conditions it varies from game to game, but the central theme remains the same.
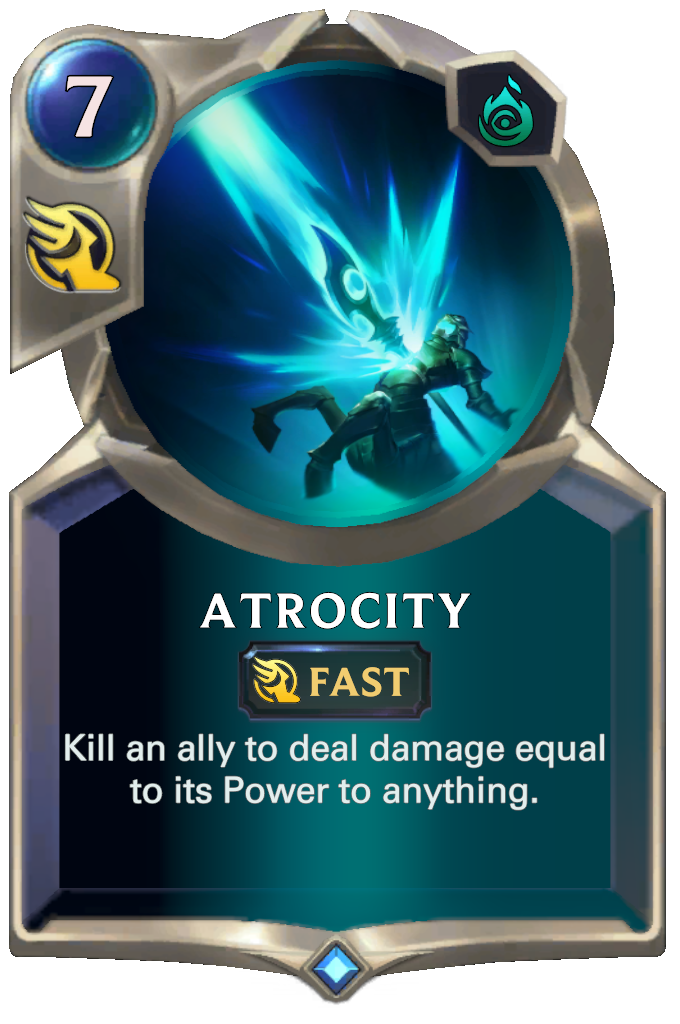
We’re going to want to select our unit, or units, that we are investing our resources in, get some solid equipment on them, and then use their power to either win the game outright or at least grab huge amounts of tempo. Plenty of games will end with an Atrocity pointed at the face, but it’s how you get there that ends up mattering.
Either of your champions’ leveling is always going to be a solid game plan. There aren’t many decks out there that survive long against a board full of Elusive units or a constant barrage of gunfire. Beyond that, though you’ve got six life steal units you can pump up, and at the top end is our piece de resistance.
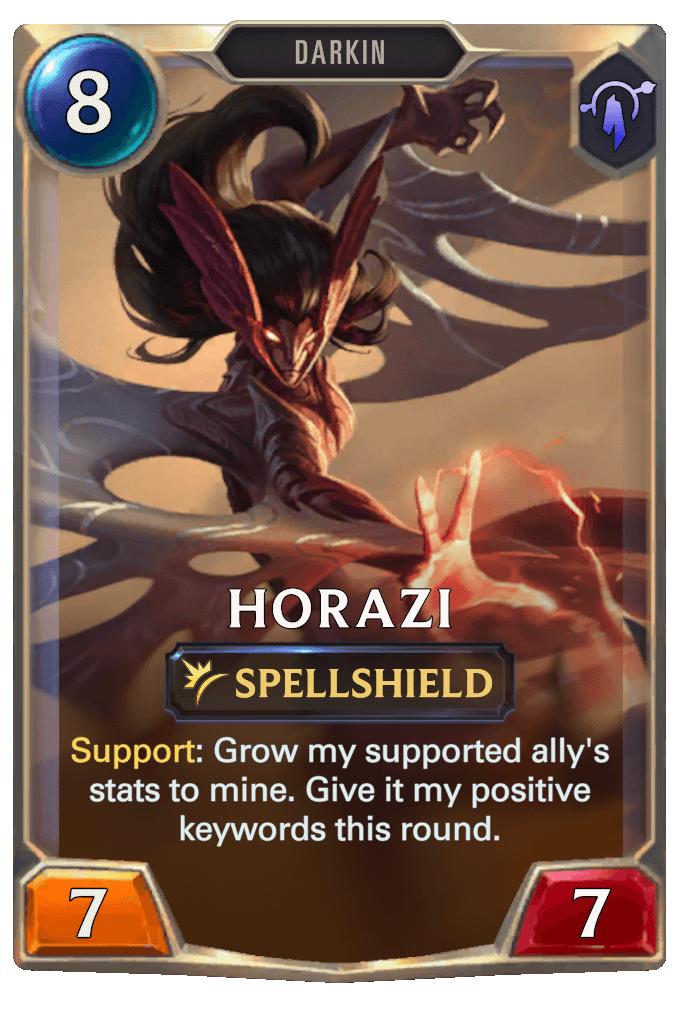
The card that makes this deck possible is Horazi. A piece of solid equipment in the early game and an absolute beating later. She can even come down on turn seven courtesy of Moonsilver, which will hold onto its cost de-buff though uses of your Darkin Lodestone.
Phase One: Making the Plan
Your game with this deck starts before your first turn. While mulligans are of course key for any deck in Legends of Runeterra, this is never truer than in an archetype with as diverse an array of potential win conditions as this one.
While your champions are basically always solid keeps, what else wants to stay in your hand varies wildly depending on the matchup and what your game plan needs to be.
Against a grindy control deck for instance, I might open keep Celestial Trifecta, even with potential plans to cast it on turn three.
Keeper of the Box and Sparklefly are your all-stars when it comes to more aggressive matchups. Looking to suit those up is your primary win condition. Don’t be afraid to block with an early Zoe or sometimes even Aphelios in these matchups.
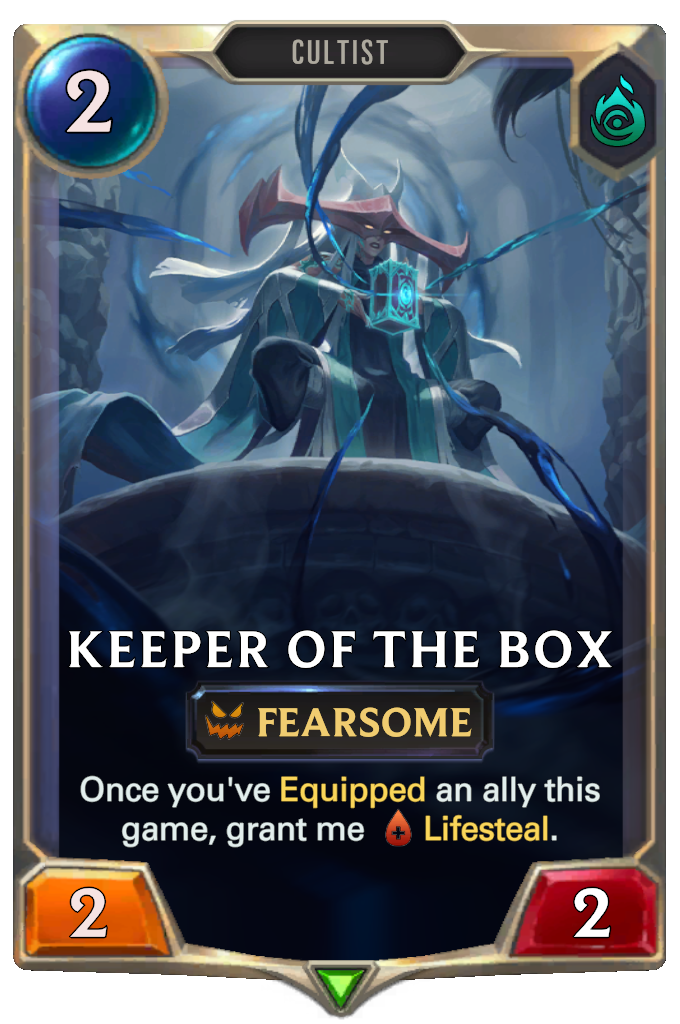
You out scale hard and if your opponent cannot answer an evasive life stealing threat then a win is not going to come there way. Even worse if you happen to spike a Draconic Bands onto it. Suddenly they can’t even attack without feeding your giant Sparklefly and making their situation even worse.
Phase Two: Control Cosplay
While we’re definitely not a hard-core control deck, we also don’t tend to actually win the game until turns seven to nine or so. That means that your mid game plan needs to involve a significant amount of interaction with your opponent’s game plan to ensure you get there.
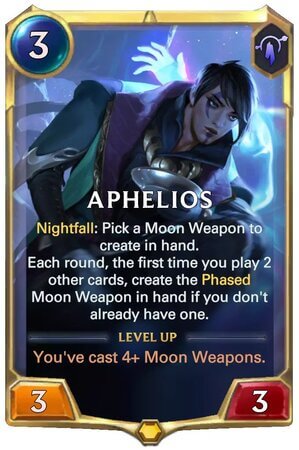
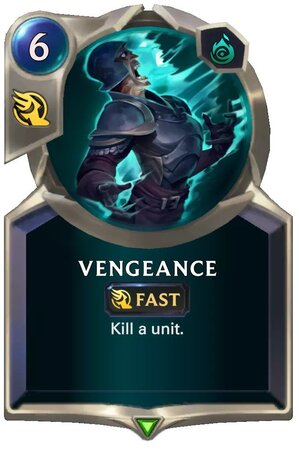
There are a couple of ways to handle that. The most obvious is Vengeance. Against any single tall threat, you can simply knock them out of the sky. Aphelios can also help out here quite a bit by cycling through Gravitum and Calibrum to keep your opponent’s board in check.
I will point out two other important paths to keep in mind though. First are the small celestials you can generate through Space Sketcher and Zoe. Because of how hugely over the top you go of most strategies, you can often afford to lose some mana tempo for a double stun to keep you alive.
Last but far from least are your six life steal threats. Sometimes you can simply let your opponent do most of what they are attempting. As long as you can keep your life total coming back enough to hold on for Horazi or Celestial Trifecta then that may simply be good enough.
Phase Three: The Kitchen Sink
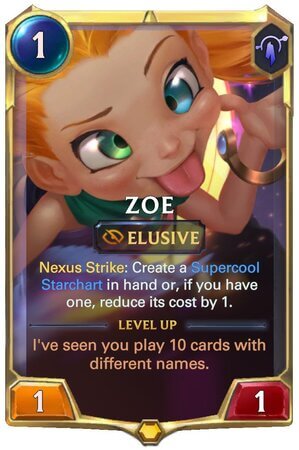
This deck has such a variety of ways to actually close out a game it is almost disgusting. Sometimes you’ll simply get there with a cadre of elusive units kept alive with equipment. Tricksters are often the front-runner of this plan, but sometimes Zoe and Sparklefly can get it done all on their own.
A leveled Zoe will let your entire board waltz by your opponent, which is always a nice sight. I think the most common victory condition though is Horazi.
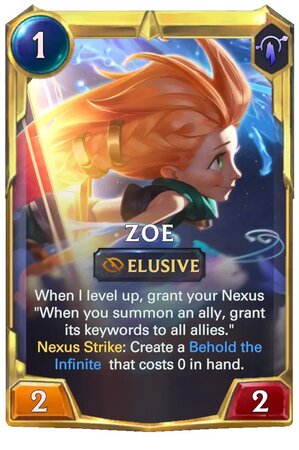
Give any number of broken equipment, an Infernum from Aphelios, or even just a random Elusive ally to buff up, and the game will close quite quickly.
Last but definitely not least is the card this deck is named after, Atrocity. When combined with Celestial Trifecta this will often be the one-two punch to any late-game situation. Summon a ten-power Elusive unit, bonk them with it once, and through it at their face to close the game out lickety-split.
The real trick with a deck like this is figuring out what you need to protect, what you need to commit to, and what you can let go to keep you safe along the way. My biggest piece of advice is to always be asking yourself “How and when am I winning this game,” and let that answer guide you as best as possible.
Key Choices
The first thing I usually get asked when people see this deck is “Where are the vile feasts and what are those random Soraka/Tahm Kench tools doing in our midrange Targon/Shadow Isles Deck?” It’s funny because I actually started with Vile Feast in this deck.
What I found though is that card is primarily an anti-aggro tool, and it wasn’t actually how I was winning most of my aggro matchups. No, basically every aggro game, was won by making a large life steal unit and then keeping it alive.
To that end, especially against the more midrangey pirate lists that have been plaguing ladder, it turned out that Guiding Touch and the slightly larger Astral Protection were the final pieces of the puzzle. Healing to keep you and your important units alive against pesky burn spells, tentacular or otherwise.
You might never get to physically see it, but imagining the look on your opponent’s face when they commit their six mana kill spell only for your giant life steal unit to miraculously heal to full is a wonderful time. This deck may be some of the most fun I have had playing Runeterra ever, and I wish you the best of it.
If you have any questions, feel free to ask WhatAmI during his streams (Tuesday-Thursday around 3PM PST and weekends for tournaments).
Subscribe to our newsletter:
Don’t miss out on all of the latest LoR content!