 League of Legends
 Teamfight Tactics
 Valorant
 Lost Ark
 Destiny 2
 Diablo 4
 Download APP
How to Play a Spellblade Build in Elden Ring
If you want to play an Elden Ring Spellblade build, this guide is for you. Spellblade has the perfect balance between sorcery and melee offense. There are multiple ways of playing this build, with a ton of variety, especially in spells. We’ll dive into the build’s pros and cons, recommended weapons, spells, and much more.
Explore our other Elden Ring build guides here.
Pros
- Amazing damage output.
- There is a good balance between ranged and melee attacks.
- Great variety of spells.
Cons
- There is a bad variety of weapons.
- Requires a specific staff for optimal setup.
- You cannot wield a shield with this setup, which makes it a riskier build.
Leveling and Stats
For this Elden Ring Spellblade build guide, we start as the Astrologer, which is the perfect start for any Mage character.
| Starting Stats | Level 25 | Level 50 | Level 100 | Level 150 | |
| Vigor | 9 | 9 | 20 | 31 | 40 |
| Endurance | 9 | 14 | 14 | 20 | 30 |
| Strength | 8 | 8 | 18 | 18 | 21 |
| Dexterity | 12 | 12 | 12 | 12 | 12 |
| Mind | 12 | 17 | 17 | 22 | 30 |
| Intelligence | 16 | 28 | 32 | 60 | 80 |
| Faith | 7 | 7 | 7 | 7 | 7 |
| Arcane | 9 | 9 | 9 | 9 | 9 |
As a mage, we mainly want to increase specific stats early on since Vigor is unnecessary now. We want to level Intelligence while putting some points into Mind and Endurance to simplify spellcasting.
After 25, we aim to be able to wield the Carian Knight’s Sword for this playthrough, which means we will increase our Strength a little bit to make that deal a bit more damage from the default. After doing this, we increase our vigor to 20. After this, we start investing heavily in intelligence again.
We aim to have 30 Vigor around level 100 at least, but a must is the 60 Intelligence since almost all our damage scales of that.
At our level cap of 150, we aim to hardcap Intelligence at 80, Vigor at 40, Endurance at 30, and the rest of the stats we put into Mind and Strength.
Best Weapons
As mentioned in the introduction, there aren’t a lot of weapons for this build, but the available weapons are perfect fits.
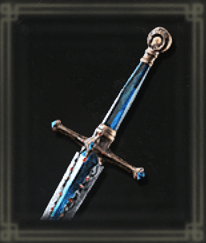
Glintstone Kris
Glintstone Kris is a good weapon specifically because of the high damage on its Ash of War. It shoots a very fast projectile with high damage making this a perfect fit for a Spellblade build.
Location: Reward for siding with Sellen in her quest.
Required Stats: 5 Strength, 12 Dexterity, 16 Intelligence.
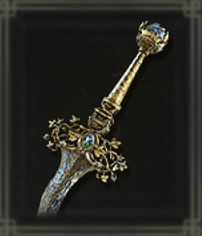
Carian Knight’s Sword
Probably the best weapon of the 2 you can choose, the Carian Knight’s Sword has an amazing Ash of War that fits this build perfectly.
Location: Liurnia of the Lakes, Found in a carriage being pulled in the north-west.
Required Stats: 10 Strength, 10 Dexterity, 18 Intelligence.
Carian Glintstone Staff

One of 2 options for our Staffs. This one boosts Carian Sword Sorceries, which are mostly used proactively. These can do insane damage if built with a lot of intelligence.
Location: Liurnia of the Lakes, found on a corpse in the Carian Study Hall.
Required Stats: 6 Strength, 8 Dexterity, 24 Intelligence.
Carian Glintblade Staff
The alternative to the Glintstone Staff is the Glintblade Staff, which boosts Glintblade Sorceries, which are mostly used before engaging in a fight. These can still do massive damage; however, they are perfect to complement you if you are running the Carian Knight’s Sword or the Glintstone Kris.
Location: Liurnia of the Lakes, found in the Highway Lookout Tower in the east.
Required Stats: 6 Strength, 12 Dexterity, 22 Intelligence.
Spells
Carian Slicer
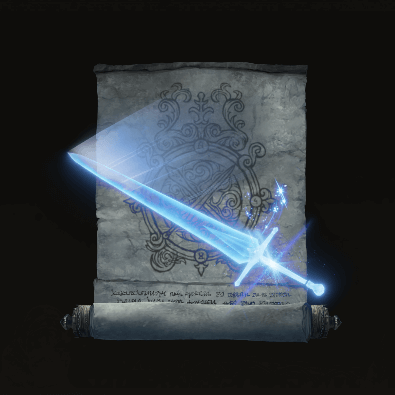
Considered the best melee spell in the game. It has Dagger speed of attacking and does absurd damage for only costing 4FP. It deletes anything in seconds because of this while not costing a lot to invest in. This spell becomes available early and never falls off, being able to carry you through the whole game.
Spellschool: Carian Sorceries.
Location: Bought from any sorcery merchant after giving the Royal House Scroll.
Required Stats: 14 Intelligence.
Carian Piercer
One of the most broken spells in Elden Ring as it destroys most enemies. Even though it says Piercer in the name, it does no piercing damage making it shit on Black Knife enemies, It completely obliterates Crucible Knights and to top it all off has a lingering hitbox which makes it super infuriating in PVP as well.
Spellschool: Carian Sorceries.
Location: Caria Manor in Liurnia of the Lakes, dropped by a Teardrop Scarab in an area behind the gardens.
Required Stats: 27 Intelligence.
Carian Phalanx
A very good preparation spell that fires a lot of Glintblades towards any opponent coming close to you. It deals very good damage, especially for its generally low FP cost.
Spellschool: Carian Sorceries.
Location: Liurnia, Sold by Seluvis at Seluvis’s Rise.
Required Stats: 34 Intelligence.
Greatblade Phalanx
Like the Carian Phalanx, this is a good preparation spell that fires 3 Greatblades that deal more damage than the small blades from the Carian Phalanx. This also means there are fewer blades to hit the target if they dodge 1.
Spellschool: Carian Sorceries.
Location: Liguria, dropped by defeating Bolls in the Cuckoo’s Evergaol.
Required Stats: 29 Intelligence.
Carian Retaliation
One of the best defensive spells especially against bosses like Renalla. It’s pretty much a parry but for spellsith gives you 3 Glintblades which deal massive damage.
Spellschool: Carian Sorceries.
Location: Liurnia, Sold by Seluvis at Seluvis’s Rise.
Required Stats: 17 Intelligence.
Armor
Like the standard mage, this build benefits heavily from running armor that increases the mage-specific stats.
Noble’s Set
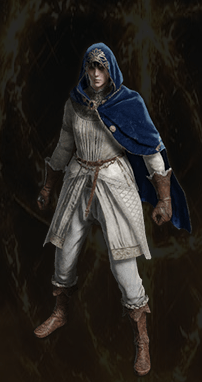
Buffs: Navy Hood increases Mind by 1, Crimson Hood increases Vigor by 1.
Location: Altus Plateau, East Windmill Pasture in the middle of the dancing Celebrants Circle.
Queen of the Full Moon Set
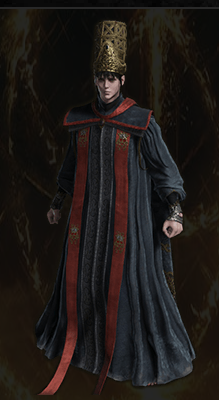
Buffs: Queen’s Crescent Crown increases your Intelligence by 3.
Location: Purchased from Enia after defeating Rennala, Queen of the Full Moon.
Battle Mage Set
Buffs: Hood Increases Strength and Intelligence by 2, but decreases your maximum FP by 10%.
Location: Dropped by a Battlemage east of West Windmill Pasture.
Azur’s Glintstone Set
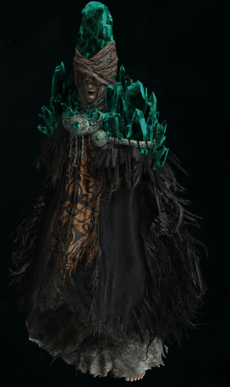
Buffs: Crown increases the damage of Comet Azur by 15%, the damage of Glintstone Cometshard and Comet by 10%, but also increases the FP cost of all Sorceries by 15%.
Location: After siding with Sorceress Sellen and completing her questline, go back to Primeval Sorcerer Azur’s location to find his armor.
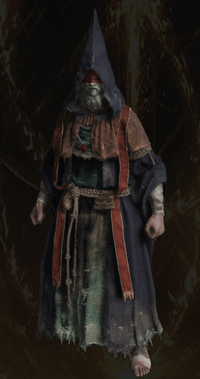
Preceptor’s Set
Buffs: Hood increases Mind by 3 but you suffer a detriment of -9% on your stamina.
Location: Looted of Seluvis’s corpse after finishing Ranni’s questline.
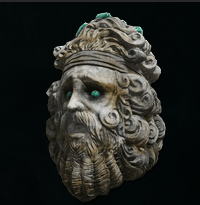
Every Glintstone Crown
Hierodas Glintstone Crown
Buffs: Increases Intelligence and Endurance by 2, but reduces your FP by 10%.
Location: Mt.Gelmir, Hermit Village, found on a corpse behind a house in the south.
Karalos Glintstone Crown
Buffs: Increases Intelligence by 3, but reduces Stamina by 9%.
Location: Raya Lucaria Academy, Looted of a Crystalized Crab near the Debate Parlor site of Grace.
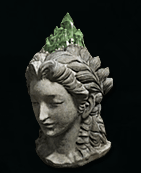
Lazuli Glintstone Crown
Buffs: Increases Intelligence and Dexterity by 3, but reduces HP by 18%.
Location: Raya Lucaria Academy, Found on the rooftops.
Olivinus Glintstone Crown
Buffs: Increases Intelligence by 3, but reduces HP by 10%.
Location: Raya Lucaria Academy, found behind an illusory wall near the Schoolhouse Classroom site of Grace.
Twinsage Glintstone Crown
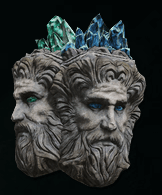
Buffs: Increases Intelligence by 6, but reduces HP and Stamina by 9%.
Location: Raya Lucaria Academy, found from a Crystallized Crab on the rooftops.
Witch’s Glintstone Crown
Buffs: Increases Intelligence and Arcane by 3, but reduces Stamina by 18%.
Location: Reward for completing Sorceress Sellen’s questline.
Best Talismans
Cerulean Amber Medallion
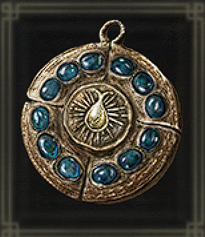
Buffs: Increases your FP.
Location: Lakeside Crystal Cave from the boss.
Location +1: Found on a Corpse inside Castle Sol.
Location +2: Inside the Lunar Estate Ruins in a treasure chest behind a Stonesword Key door.
Martika’s Soreseal

Buffs: Increases Mind, Intelligence, Faith, and Arcane, but also increases damage taken by 15%.
Location: Elphael, Brace of the Haligtree, found on an altar in a sealed room which requires a Stonesword Key.
Stargazer Heirloom
Buffs: Increases Intelligence by 5.
Location: Found on a body at the top of the Divine Tower of Liurnia.
Grraven-Mass Talisman

Buffs: Increases the potency of all sorceries by 8%.
Location: Found in a chest atop ALbinauric rise, in the east of Consecrated Snowfield.
Shard of Alexander
Buffs: Increases weapon skill damage by 15%.
Location: Drops upon completing Iron Fist Alexander’s questline.
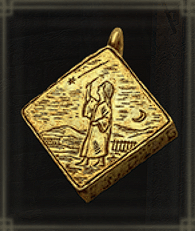
Radagon Icon
![]()
Buffs: Shortens the casting time of Spells.
Location: Raya Lucaria Academy, found on top of the Debate Parlor.
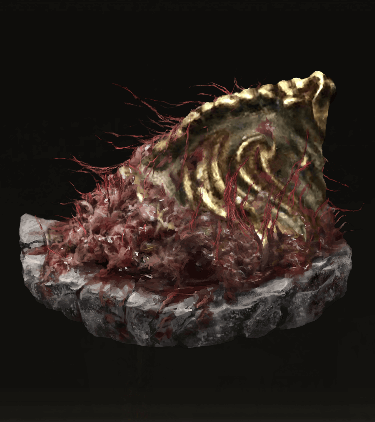
Godfrey Icon
![]()
Buffs: Raises the power of charged spells and skills by 15%.
Location: Drops from Godefroy the Grafted in the Golden Lineage Evergaol on Altus Plateau.
Old Lord’s Talisman
Buffs: Extend the duration of spells by 30%.
Location: Found behind Recusant Bernahl on Crumbling Farum Azula.
Flask Distribution
I recommend running either a 50/50 split of healing to FP Flasks, or a 30/70 split of healing to FP Flasks.
Best Summons
As a mage, you are the most vulnerable class. As such our recommended summons for this Elden Ring Spellblade guide needto be beefy and melee to keep the boss away from you.
Ancient Dragon Knight Kristoff
Kristoff is a defensive powerhouse who can tank the boss for a long time while dishing out some decent damage.
Location: Dropped by Ancient Hero of Zamor inside the Sainted Hero’s Grave west of Leyndell
Black Knife Tiche
He is unique in that he has the Deatflame weapon art. This is a max HP scaling burn that also lowers the enemy’s HP. Next to that, he is very aggressive with a decent amount of HP. He is considered the best summon in the game.
Location: Dropped from Alecto, Black Knife Ringleader upon defeating him inside the Ringleader Evergaol. This can only be accessed upon completing Ranni’s quest in the south of Liurnia.
Banished Knight Oleg
If you run a build that breaks guards easily, Oleg will only increase that strength. Oleg is a dual-wielding Banished Knight who can easily demolish any low-health boss.
Location: Found on a corpse inside the Fringe folk Hero’s Grave.
Lhutel the Headless
Lhutel is pretty unique due to the fact she can teleport around making her avoid large groups of enemies and easily dodge attacks. She also is a powerhouse in tanking due to her heavy armor and great shield. Overall a solid defensive option.
Location: Dropped by the Cemetery Shade at the Tombsward Catacombs.