Diablo IVGuides

Diablo 4 Rune Guide (New Season 6 Mechanic)

Table of contents

How Diablo 4 Runes Work

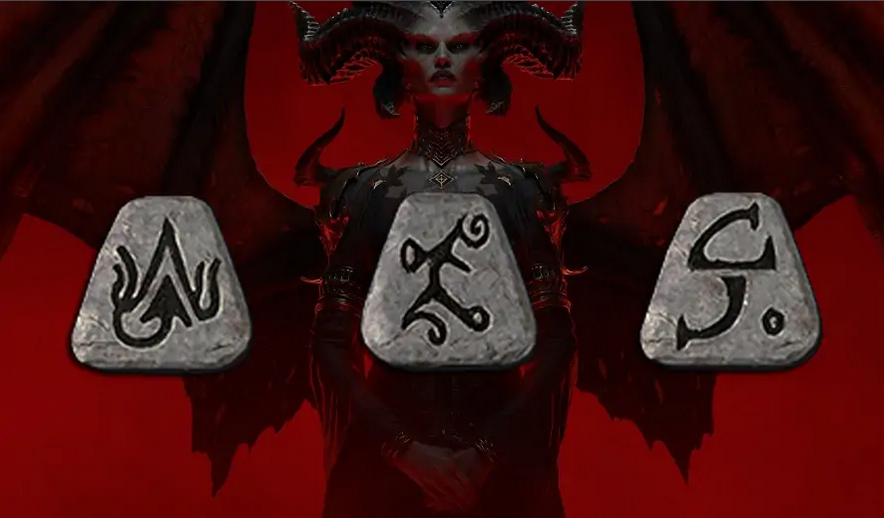
Runes are a new socketable item coming in Diablo 4 in Season 6 AKA the upcoming expansion, Vessel of Hatred. A socketable means that they will occupy the same slots in your gear that are currently exclusive to gems.

These powerful artifacts are paired off and placed into your gear to provide you with insane boosts in power! Give you access to skills from other classes! Or bolster your defenses making you much harder to kill!

Runes fit into one of two classes, generators (Ritual) or spenders (Invocation), and you will pair these together to create potent outcomes.

Due to how powerful Runes can be, you are limited to two pairs, and in this article, we’ll break down what they are, what they do, and talk about some of the most powerful combinations for all classes!

Season 6 not only introduces a new mechanic, but also a brand new class! Stay in the loop with the latest Diablo 4 Spiritborn builds!

D4 Runes

Generator Runes

Generators or Ritual Runes work by granting offering when certain conditions are met. Each spender or Invocation Rune will have an associated offering cost. The goal is to find the right Ritual Rune to activate your Invocation runes as frequently as possible. This is not always immediately obvious and will take careful consideration of your class, build, and intention for the Runes.

S-Tier

  • YUL
    • Cast a Skill with a Cooldown. (50 offering)
  • TAM
    • Cast a non-Channeled Core Skill. (25 offering)
  • LITH
    • Stand still for 0.3 seconds while in combat. (25 offering)
  • BAC
    • Travel 5 meters. (50 offering)

A-Tier

  • XOL
    • Evoke power from another Class. (150 offering)
  • CIR
    • Cast the same non-channeled Skill 3 times in a row. (25 offering)

B-Tier

  • ZAN
    • Cast an Ultimate Skill. (150 offering)
  • NOC
    • Inflict a Crowd Control that isn’t Slow or Chill. (5 offering)

C-Tier

  • AHU
    • Lucky Hit: Up to a 100% chance against Injured enemies. (10 offering)
  • NEO
    • Deal damage after not taking any within 5 seconds. (Resets if Invulnerable, 300 offering)
  • FEO
    • Become Injured or Crowd Controlled. (1000 offering)
  • CEM
    • Cast Evade. (50 offering)
  • UR
    • Your Minion or Companion kills an enemy or dies. (10 offering)
  • YAX
    • Drink a Healing Potion. (100 offering)
  • POC
    • Spend 5% of your Maximum Resource. (2 offering)
  • MONI
    • Cast a Skill after moving. (10 offering)
  • KAA
    • Lose 1% of your Maximum Life. (2 offering)

diablo 4 season 6 fast leveling splash

Spender Runes

Spender or Invocation runes will automatically cast or provide a number of interesting and powerful skills and buff to the character when their offering cost is met. When picking your Invocation rune you need to consider carefully which Ritual rune to pair it with, as ultimately this will dictate how often the effect is triggered.

Without a doubt, the new rune system will shake things quite a bit. So stay tuned with our Diablo 4 tier list to get a regular meta check!

S-Tier

  • EOM
    • Reduce your active Cooldowns by 0.25 seconds. (100 Offering, Overflow: Further Reduced Cooldowns, Cooldown: 1 Second)
  • VEX
    • +3 to all skills (1000 offering)
  • OHM
    • Evoke the Barbarian’s War Cry, increasing damage dealt. (600 Offering (Overflow: Increased Duration). Cooldown: 2 Seconds.)

A-Tier

  • GAR
    • Gain 2.0% Critical Strike Chance for 5 seconds, up to 20%. (25 Offering (Overflow: Gain Multiple Stacks). Cooldown: 1 Second.)
  • JAH
    • Replace your next Evade with the Sorcerer’s Teleport, blinking further, dealing damage, and becoming Unstoppable. (400 Offering Cooldown: 2 Seconds.)
  • KRY
    • Evoke the Spiritborn’s Vortex, dealing damage and Pulling In enemies. (400 Offering
      Cooldown: 3 Seconds.)
  • TEC
    • Evoke the Barbarian’s Earthquake, dealing damage to enemies within. (100 Offering (Overflow: Increased Size) Cooldown: 1 Second.)
  • ZEC
    • Reduce your active Ultimate Cooldown by 4 seconds. (200 Offering (Overflow: Further Reduced Cooldown) Cooldown: 2 Seconds.)
  • QUE
    • Evoke the Druid’s Earthen Bulwark, granting yourself a Barrier. (300 Offering (Overflow: Increased Duration) Cooldown: 1 second.)

B-Tier

  • CEH
    • Summon a Spirit Wolf to attack enemies for 8 seconds. (100 Offering (Overflow: Summon Multiple Wolves Cooldown: 1 Second.)
  • LAC
    • Evoke the Barbarian’s Challenging Shout, reducing your damage taken. (400 Offering (Overflow: Increased Duration). Cooldown: 1 Second.)
  • LUM
    • Restore 1 Primary Resource. (5 Offering (Overflow: Increased Resource Restored) Cooldown: 1 Second.)
  • MOT
    • Gain a shadow from the Rogue’s Dark Shroud, reducing damage taken per shadow. (150 Offering (Overflow: Gain Multiple Shadows) Cooldown: 1 Second.
  • NER
    • Evoke the Rogue’s Countering Concealment, gaining Dodge Chance, Movement Speed, Unstoppable, and Stealth. (600 Offering (Overflow: Increased Duration)
      Cooldown: 6 Seconds.)
  • QAX
    • Your next non-Basic Skill cast spends all of your Primary Resource to deal up to 100% increased damage. (400 Offering (Overflow: Further Increased Damage) Cooldown: 1 Second.)
  • THUL
    • Evoke the Sorcerer’s Mystical Frost Nova, inflicting Freeze and Vulnerable onto enemies. (400 Offering (Overflow: Increased Size) Cooldown: 1 Second.)
  • TON
    • Evoke the Sorcerer’s Meteorites, dealing damage to enemies. (25 Offering (Overflow: Increased Meteorites Spawned) Cooldown: 1 Second.)
  • TUN
    • Evoke the Rogue’s Stun Grenades, Stunning and dealing damage to enemies. (100 Offering (Overflow: Increased Grenades Spawned) Cooldown: 1 Second.)
  • TZIC
    • Evoke the Spiritborn’s Concussive Stomp, dealing damage and Knocking Down enemies (250 Offering Cooldown: 1 Second.)
  • WAT
    • Evoke the Necromancer’s Horrid Decrepify, Slowing enemies, reducing their damage, and letting you Execute them. (100 Offering Cooldown: 1 Second.)
  • XAN
    • Your next Skill cast will be a guaranteed Critical Strike and Overpower. (900 Offering
      Cooldown: 1 Second.)

C-Tier

  • QUA
    • Restore an Evade charge and gain 6% Movement Speed for 5 seconds, up to 30%. (50 Offering (Overflow: Increased Duration) Cooldown: 1 Second.)
  • TAL
    • Evoke the Spiritborn’s Pestilent Swarm, dealing damage to enemies. (100 Offering (Overflow: Increased Swarms Spawned) Cooldown: 1 Second.)
  • TEB
    • Evoke the Necromancer’s Abhorrent Iron Maiden, counterattacking damage from enemies and Healing you when they die. (100 Offering Cooldown: 1 Second.)
  • XAL
    • Gain 20% Maximum Life for 4 seconds. (200 Offering (Overflow: Increased Duration)
      Cooldown: 1 Second.)
  • YOM
    • Evoke the Druid’s Petrify, Stunning enemies and gain 100 resource (500 Offering Cooldown: 5 Seconds.)

Pick Recommendations

Picking the right runes can seem pretty daunting, especially after going through that massive list just above but hopefully, the rankings can help you narrow down the options for your build, that being said in certain situations a rune that might otherwise be bad becomes very powerful, so It is important to somewhat refer to the list or do your best to memorize these so that you can always pick the best ones for your current build.

Below are some examples of generally strong combinations you can work into almost any build, you can use these as a plug-and-play solution while you plan your own custom combinations!

  • YUL + VEX
    • With this combination roughly every 10 skills with a cooldown you cast will grant you +3 to all of your skills for 5 seconds. With most builds currently, this is quite an easy loop to maintain a near 100% uptime on. It’s basically a second Harlequin Crest!
  • BAC + TEC
    • For every 10 metres you travel you will create an Earthquake, this combination is extremely potent for many Barbrian builds!
  • YUL + OHM
    • For every 10 skills you cast you’ll trigger the Barbarians Enhanced Warcry increasing your damage and movement speed by ALOT!
  • LITH + TEC
    • This one is really fun for the Barbarian, by simply standing still you’ll create an Earthquake every 1.2 seconds!
  • BAC + EOM
    • A Great pic for highly mobile classes like the Rogue and Sorcerer, for every 10 meters you travel you reduce all of your cooldowns by 0.1 seconds. Using movement skills to cover large distances and turning that into cooldown reductions is a recipe for pure chaos!

Ultimately, the best thing you can do is study these runes closely and think about what would fit most into your builds. You can consider if you move a lot, cast a lot, what kind of skills you cast frequently, are trying to improve your boss kill time, or perhaps your general clear time in dungeons against many enemies.

Experimenting with the new systems is one of the most engaging aspects of the game, And lucky for us there isn’t much to lose by trying out tons of Rune combinations!
Advanced Rune Tech

diablo 4 runes guide splash

One very important thing to know about runes is that for those that cast a skill from a class, take YOM, which casts Petrify, and you’re playing Druid uses the version of that skill that you have.

This means if you Max out Petrify in your skill tree you benefit from all the additional power that comes when the rune is triggered!

The same goes for the Barbarian Warcry, Sorcerer Teleport, and so on. Though you might already have the skill, it might still be worth considering for all the potential extra uptime you could have.

In Conclusion

And that just about wraps us up for Runes, I hope this article helps set your foundations for understanding runes, if you have any questions we have many wonderful content creators on YouTube and Twitch that would be more than happy to help, myself included.

Best of luck and happy experimenting!

0