 League of Legends
 Teamfight Tactics
 Valorant
 Lost Ark
 Destiny 2
 Diablo 4
 Download APP
 Collapse
Liminality Grandmaster Nightfall Guide (The Final Shape)
Welcome to our Liminality Grandmaster Nightfall guide for Destiny 2.
Whether this is the hardest Grandmaster Nightfall in rotation during Episode I is yet to be determined.
What we do know is that it can prove quite difficult for almost any fire team.
In this guide, we’ll give you all the details for the Strike, including strategies, its mechanics, recommended builds, and more.
Strike Details

- Strike: Liminality
- Champions: Barrier & Unstoppable
- Surges: Arc & Void (25% bonus to outgoing damage)
- Overcharged Weapon: Machine Gun (25% bonus to outgoing damage)
- Threat: Void (25% increase to incoming damage)
- Weapon Reward: The Slammer (Adept)
Strike Section Breakdowns
Opening Portion
Upon loading into the Nightfall, a cave will almost be in front of you. Run into it. Make your way through the opening caves, and you’ll find yourself staring down some Hive enemies. You have two options. I, personally, like to slide past them on the left side and skip them entirely (no champs here). However, if you’d like to mow them down, you obviously can choose to go that route, too.
Moving forward, you’ll have some Hive corruption that you’ll need to clear off of a cave entrance to proceed.
The next room isn’t much to write home about, just a few taken enemies to deal with. Be mindful that an Unstoppable Taken Phalanx will greet you in this room!
Once you clear this room, shoot the Hive stuff off of the tunnel entrance that’s directly across from where you entered. Head on in and keep moving forward!
Barrier Knights & Shriekers
When you enter the room, you’ll see two paths: one to the left and one straight ahead that veers right.
Your first Barrier Knight is on the right side. Have one or more teammates with Outbreak Perfected use the left path to get a safe angle and take out the Knight from a distance.
After defeating the Knight, everyone should move up the right path. You’ll encounter two major threats alongside a few Acolytes:
- Second Barrier Knight: Off to the left below you.
- Yellow-Bar Shrieker: Ahead and slightly to the left.
The second Barrier Knight isn’t necessary for achieving Platinum in this Grandmaster Nightfall, but it can be dangerous if left unchecked. Based on your team’s strategy, decide whether to remove it.
Annihilate the Shrieker ahead of you. Moving forward, you’ll face another yellow-bar Shrieker and several Acolytes above you to the right.
Use a well-placed grenade to handle the Acolytes. Then, jump past them to the right to the next section. The second Shrieker can be skipped if your fire team moves quickly.
Look for a tunnel opening above where the Acolytes were after the first Barrier Knight. That’s your next destination!
Between now and the next big segment is a few Acolytes and another Barrier Knight. They will be right in front of you after you leave this room, so be careful! Throw grenades, use some heavy ammo, and keep Outbreak Perfected on the Barrier to get rid of it quickly!
Seal-Keeper Room
Before you even enter this room, do yourself a favor and make sure the 3 yellow-bar Cursed Thralls are present.
This room can prove to be quite annoying, but luckily, I’ve dealt with it enough to know what makes it easy!
Your main objective is to kill two Seal-Keeper Knights and a Hive Guardian (it’s the Knight, yay) to unlock the next area. Keep an eye on the back of the room where you came in, as occasionally more Cursed Thralls will spawn! Watch the Wizards, as they hurt tremendously!
Take out the first Seal-Keeper- be careful, it has a sword! Go ahead and take out the first Barrier Knight as well. More enemies will spawn, along with another Seal-Keeper and another Barrier Knight. If possible, take out the Barrier Knight first.
After defeating the 2nd Seal-Keeper, more adds, along with the final Barrier Knight and Lightbearer Knight, will spawn.
Now is the time to pop Supers and use heavy ammo. Once the Lightbearer Knight’s Ghost is crushed, all other enemies will despawn, with the sole exception being the Barrier Knight. Remember, if you use Shadowshot: Deadfall, it will Suppress the Hive Guardian and stop his Super in its tracks! Take out the final Barrier Knight and press forward.
Some Light Traversal
After dealing with the Seal-Keepers, you’ll have some traversal to do, but nothing difficult.
You will eventually see a Hive Lightbearer Wizard, whom you will have to face later. Start doing damage and weakening the Wizard, but do not kill it! Whatever health it has when it leaves is the same health it will have when you fight it later!
You will come across a dark room, and a few adds will spawn alongside another Unstoppable Taken Phalanx.
Nothing crazy. Deal with them however you please!
Ahamkara Skull Room
When you reach this room, you must deposit two Taken Energy balls into the Ahamkara skulls at the back of the room. On the right side, you must grab a Taken Energy at the end of the corridor and immediately start going up. 3 sets of 3 Acolyte’s Eyes will spawn. These must be destroyed to open the exit!
The path to the top is different every time! Once you reach the main room, deposit your Taken Energy into the Ahamkara skull on the right! If you choose to go into the left side room, you just have an obstacle course!
Run and slide with the Taken Energy until you’re back in the main room. Watch the Taken blasts if you’re on the left side- they come when you least expect them!
Once the first Taken Energy is deposited, an Unstoppable Taken Phalanx will spawn. No big deal, just be aware! The Taken Energies do have timers, so try to shoot as you ascend on the right side!
More Traversal
Once you’ve deposited the last Taken Energy, the center of the room will become open. Drop down and continue on. Moving forward, you will just have to deal with three more Unstoppable Champions.
When you have eyes on the 3rd Unstoppable Taken Phalanx, you’re almost to the next area. This may sound crazy, but jump down and past him. There will be a few Taken Centurions, and their ranged attacks have trouble reaching you in the room past the Unstoppable champ.
Deal with the Phalanx and activate the Darkness node to proceed to the most fun part of Grandmaster Nightfall!
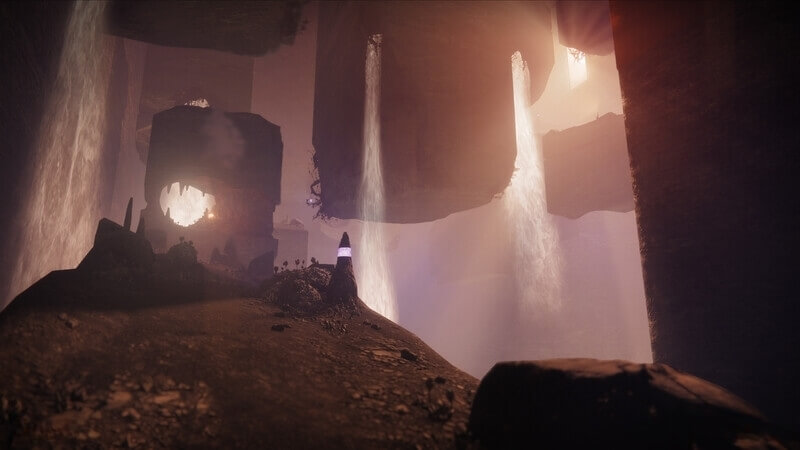
City / Ruins Area
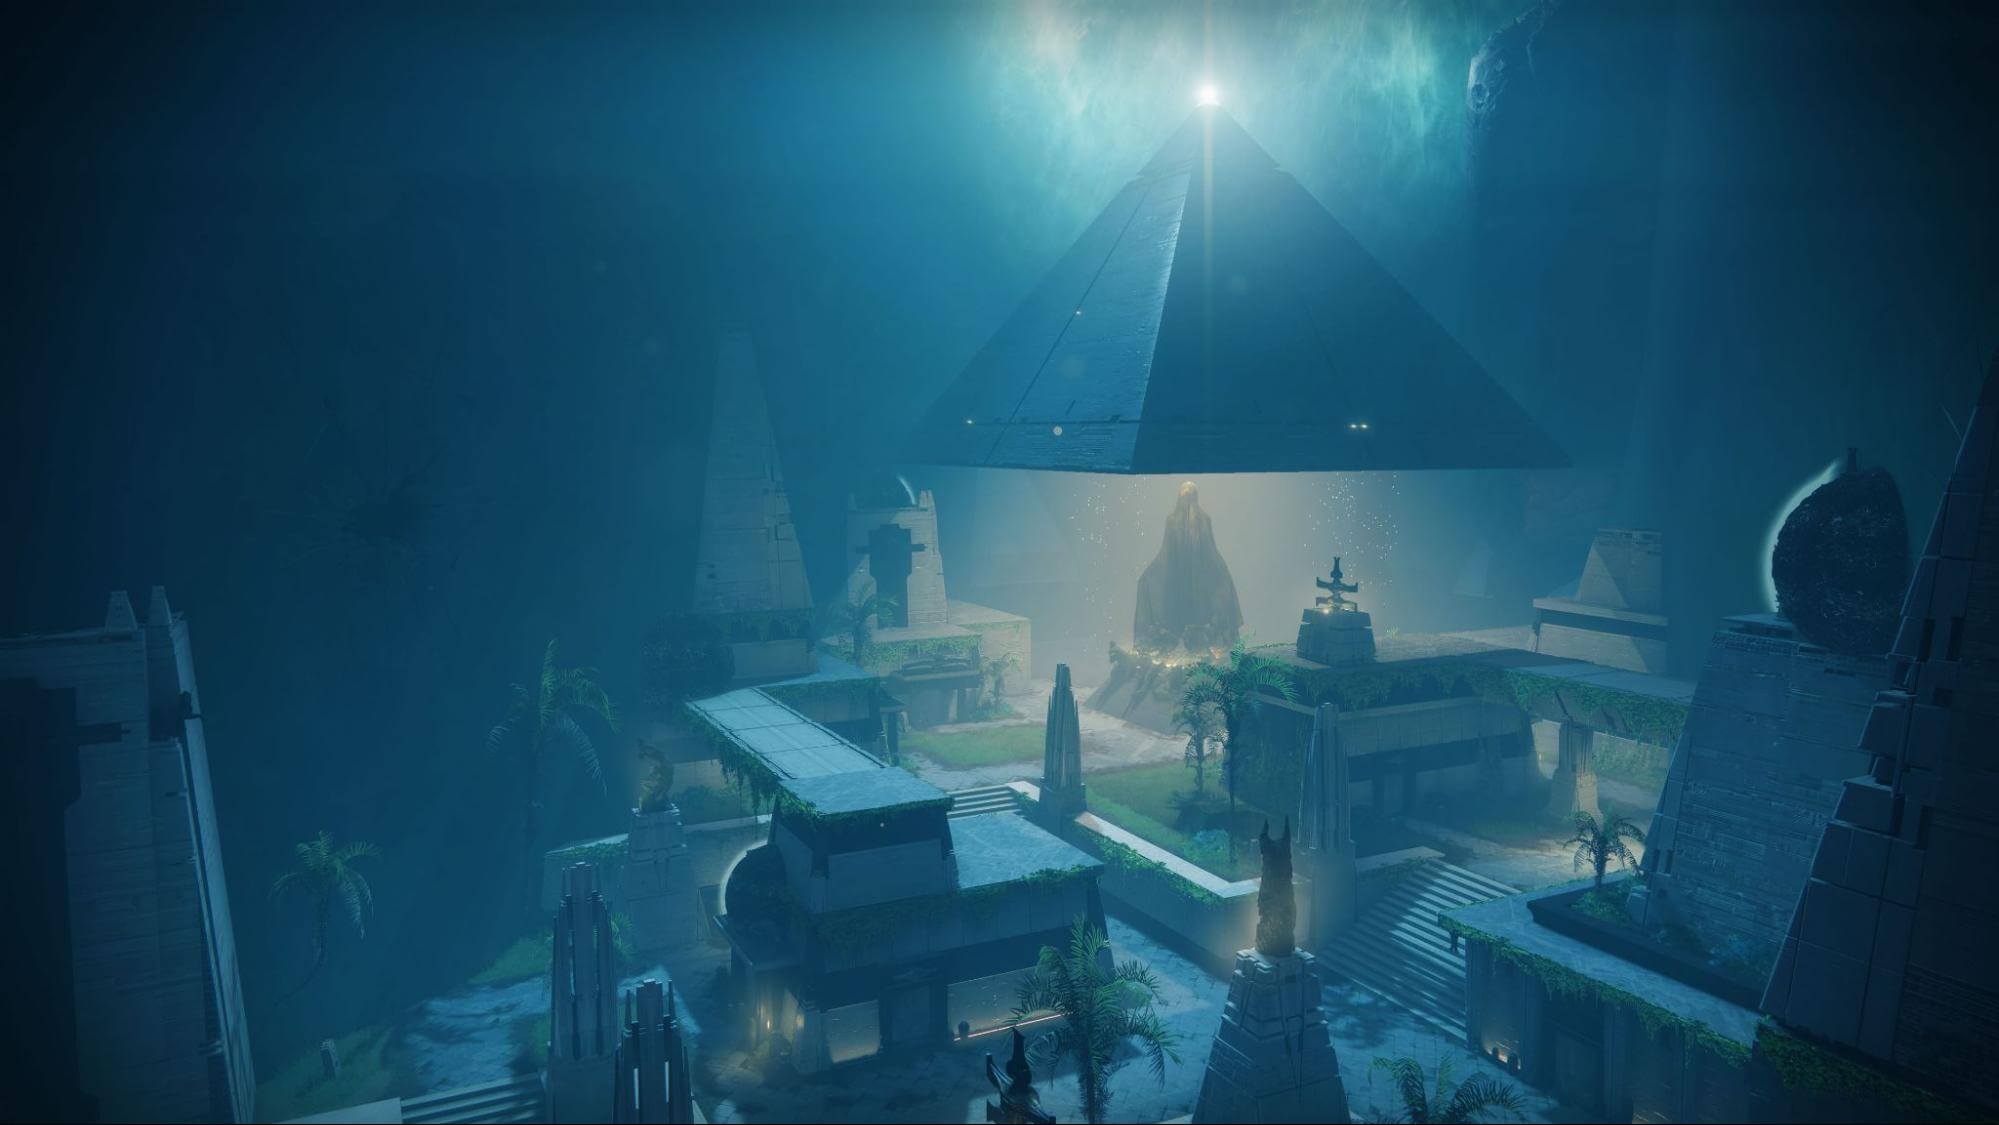
At this point, you only have one objective, and that is to survive. As a team, coordinate Transcendence, Tether, Song of Flame, and anything else to deal with the immense amount of adds as quickly as possible.
Be very mindful of the Taken Hobgoblin snipers that sit atop rooftops! Multiple Unstoppable Taken Phalanxes will spawn in this room periodically. Watch out for the Taken Centurions, as their ranged attacks can usually kill you in one hit.
As you progress through this survival segment, lava will begin to rise. It will kill you Very quickly, so try and stay away from lower sections of the area.
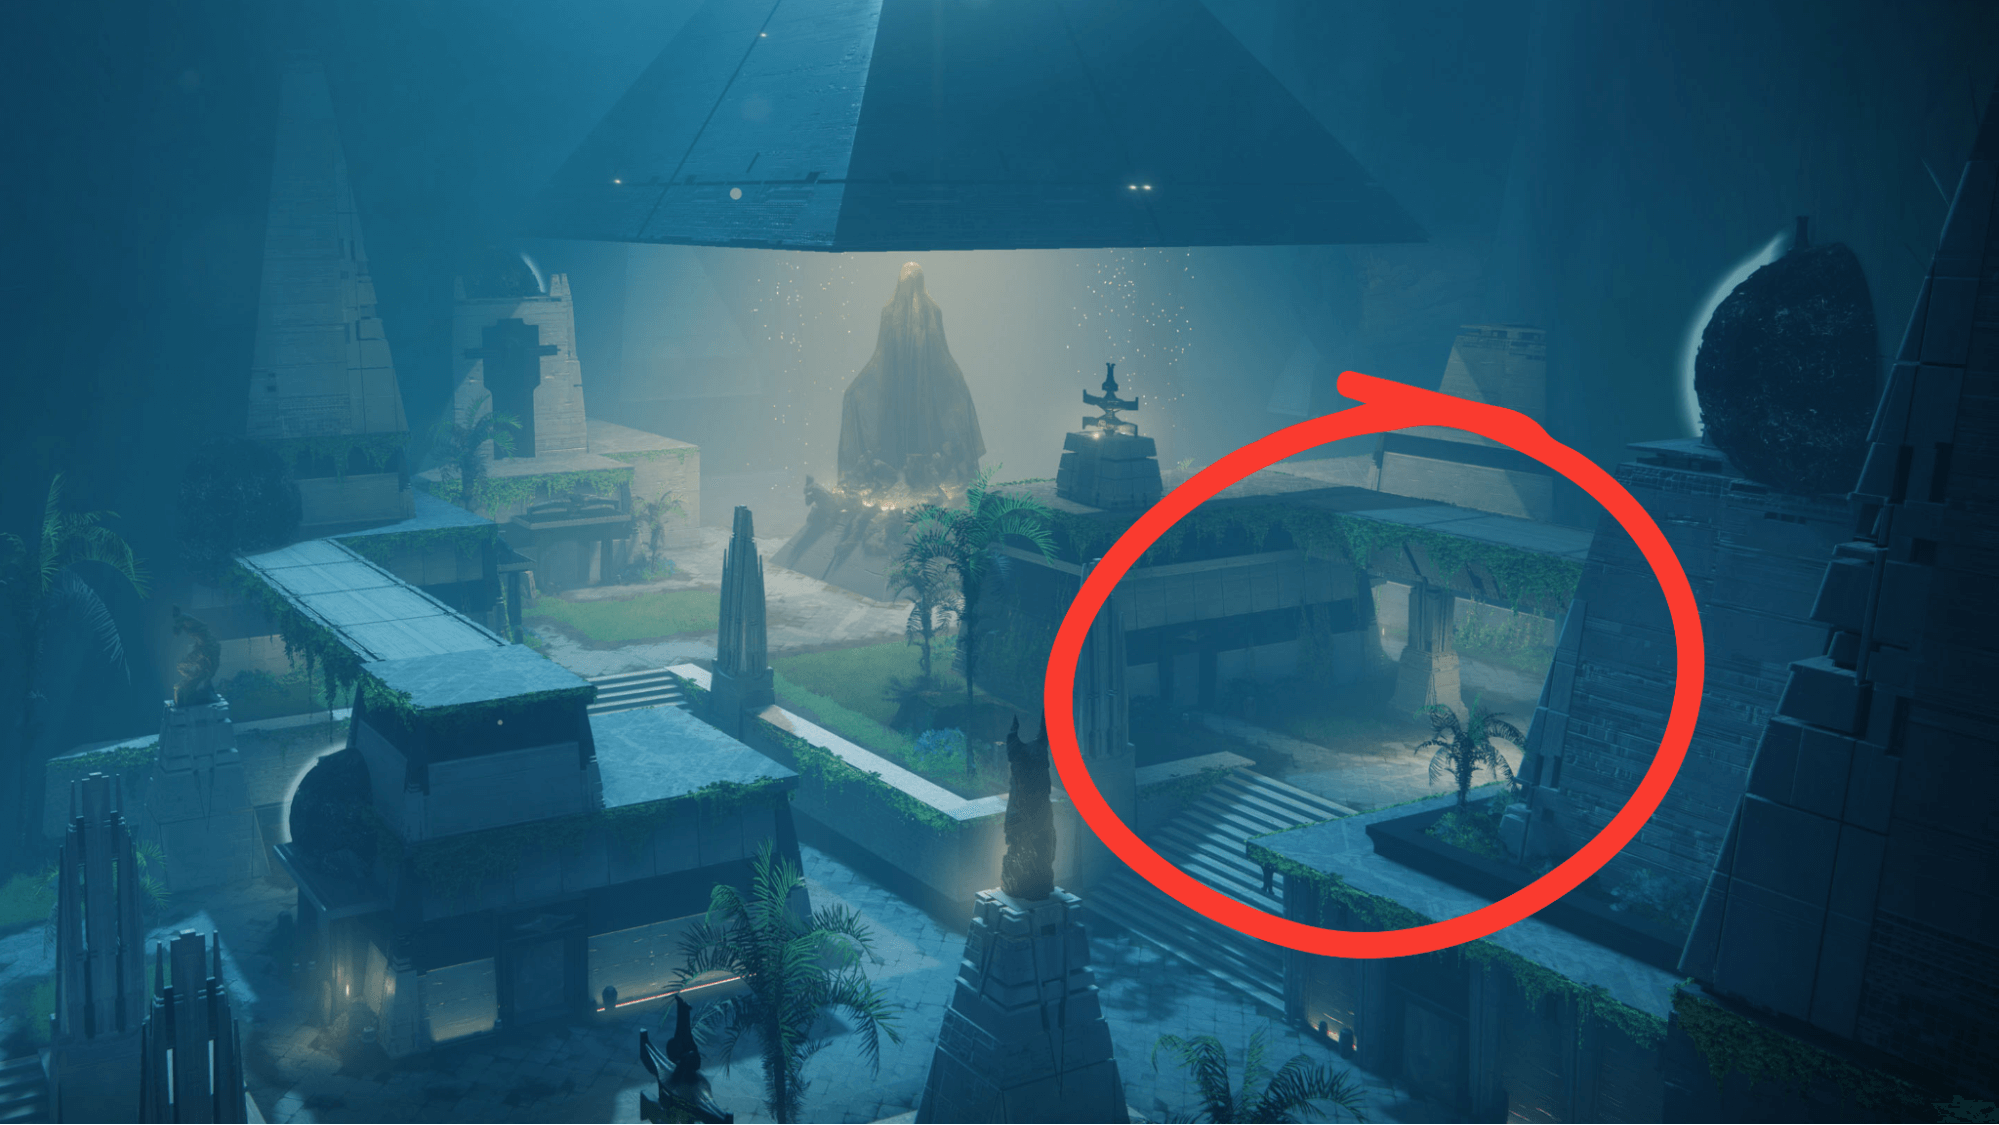
The circled section above is a good place to make your stand. Use Devour, Song of Flame, and Invisibility to secure your survival.
Once you’ve taken out enough enemies, a Harbinger boss will spawn. Watch for his Suspending attacks. If you get strung up, you’re probably going to die. Once your fireteam gets the Harbinger down to ⅓ of his health, he will despawn. Activate the veiled statue to clear the lava and open the door to the next area.
Traversal to the Boss Room
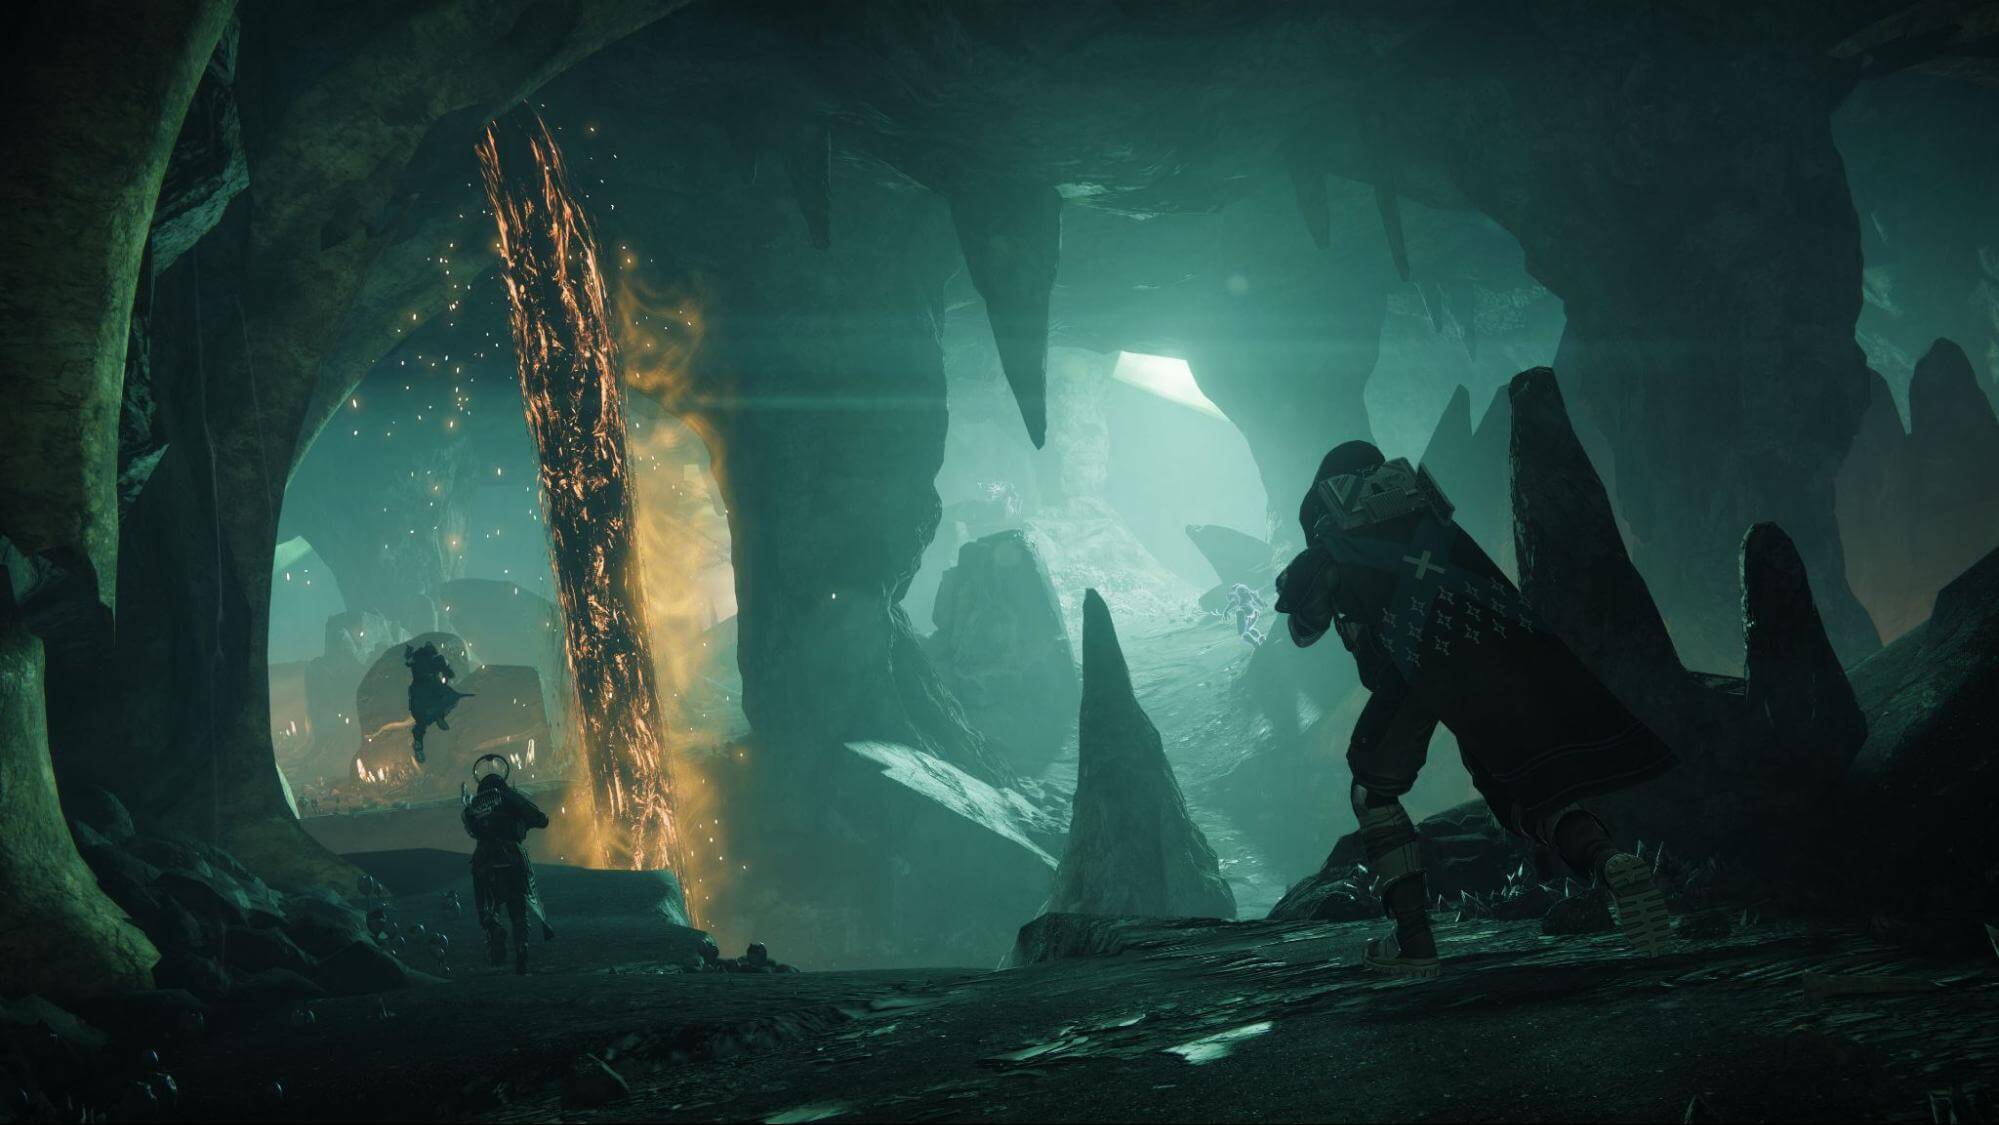
Along the way, you’ll stumble into an open outdoor area that slightly resembles a canyon. Immediately remove all the Grim flying around.
After the Grim are gone, remove all of the Weavers on the left side of the area. Creep up along the left-hand wall in the left area. You will be able to take out the Barrier Knight across from you very easily from the back left side of this area!
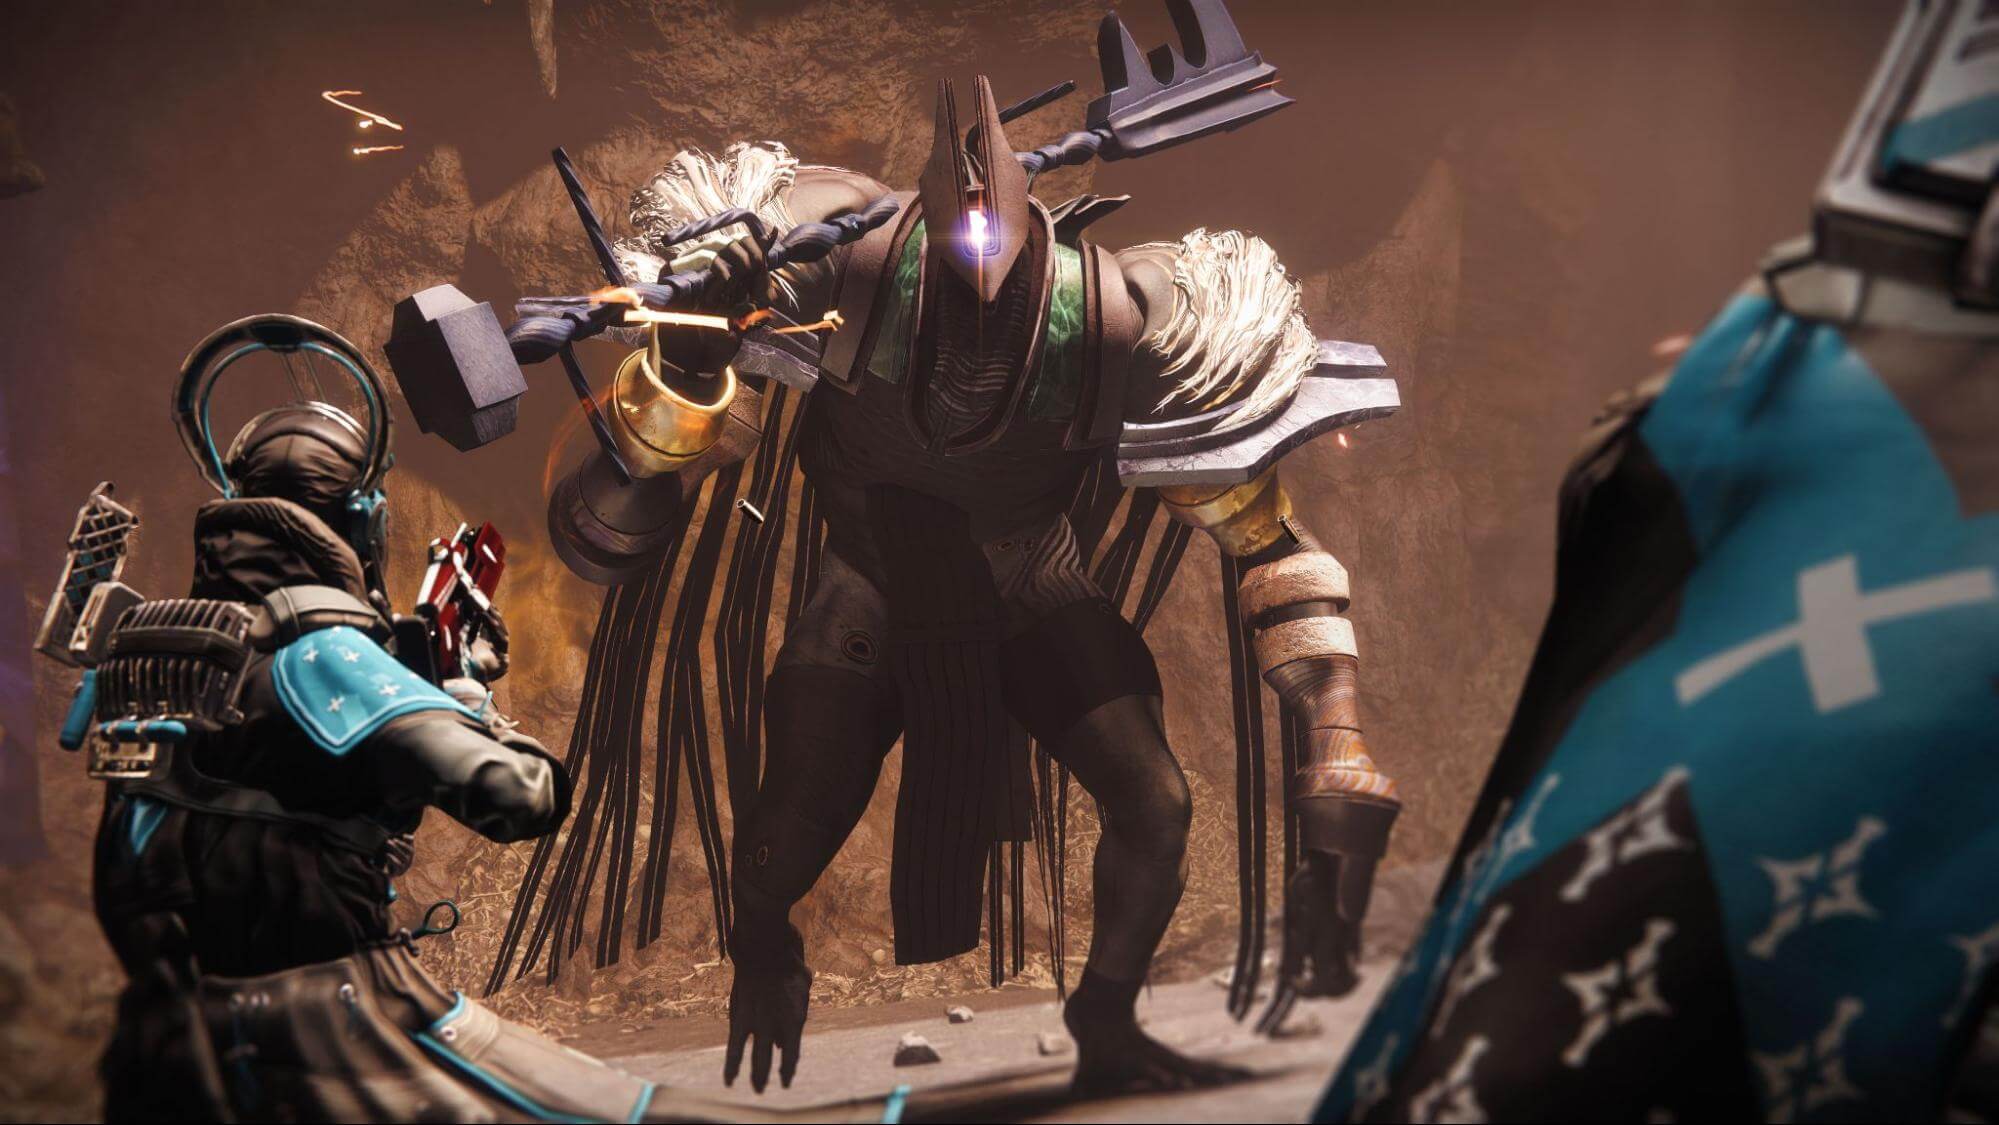
The Boss Room
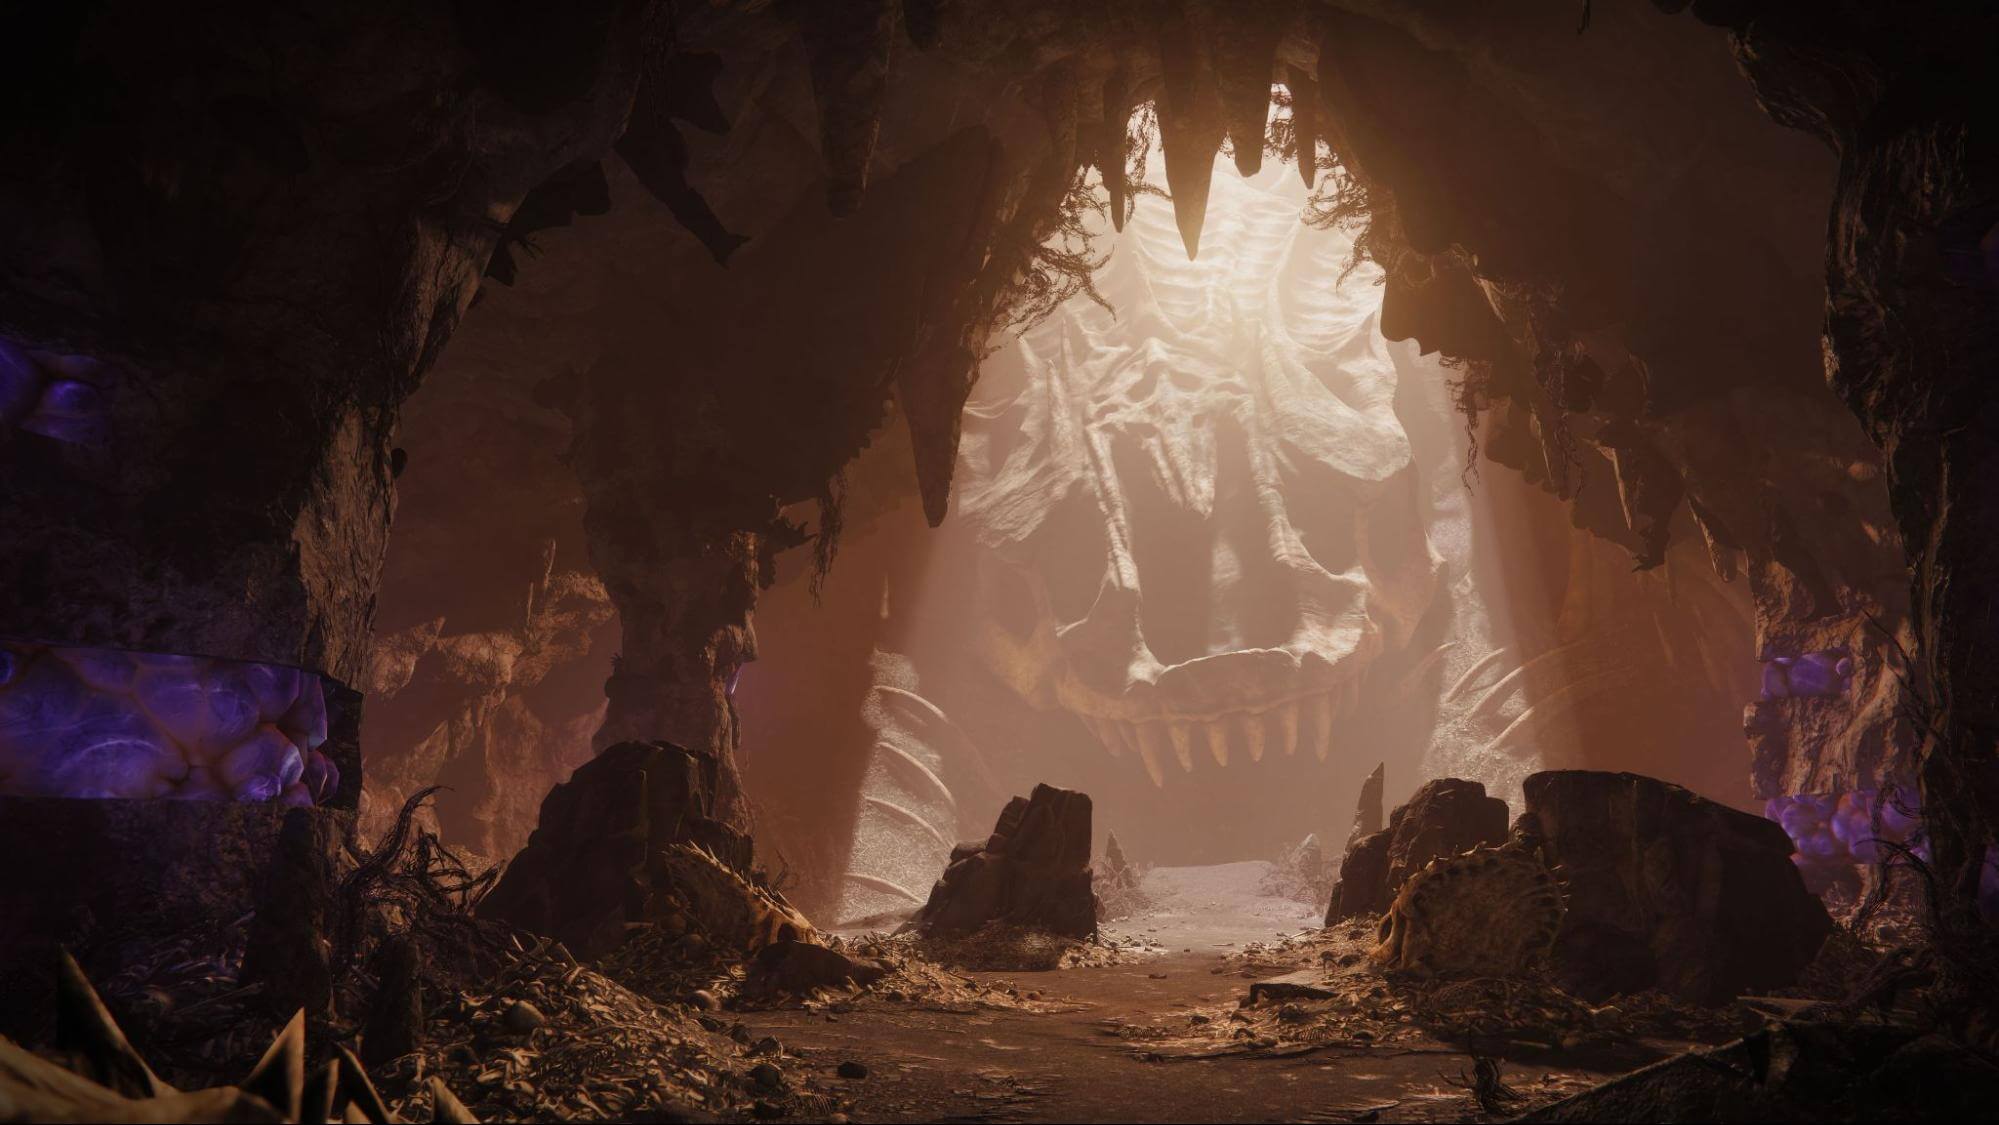
Once you reach the boss room, the Tormentor boss will enter the arena. Avoid his attacks and keep killing waves of adds until they quit spawning.
Damage the Tormentor until the first third of its health is gone, and the phase ends. More adds will spawn; deal with them first.
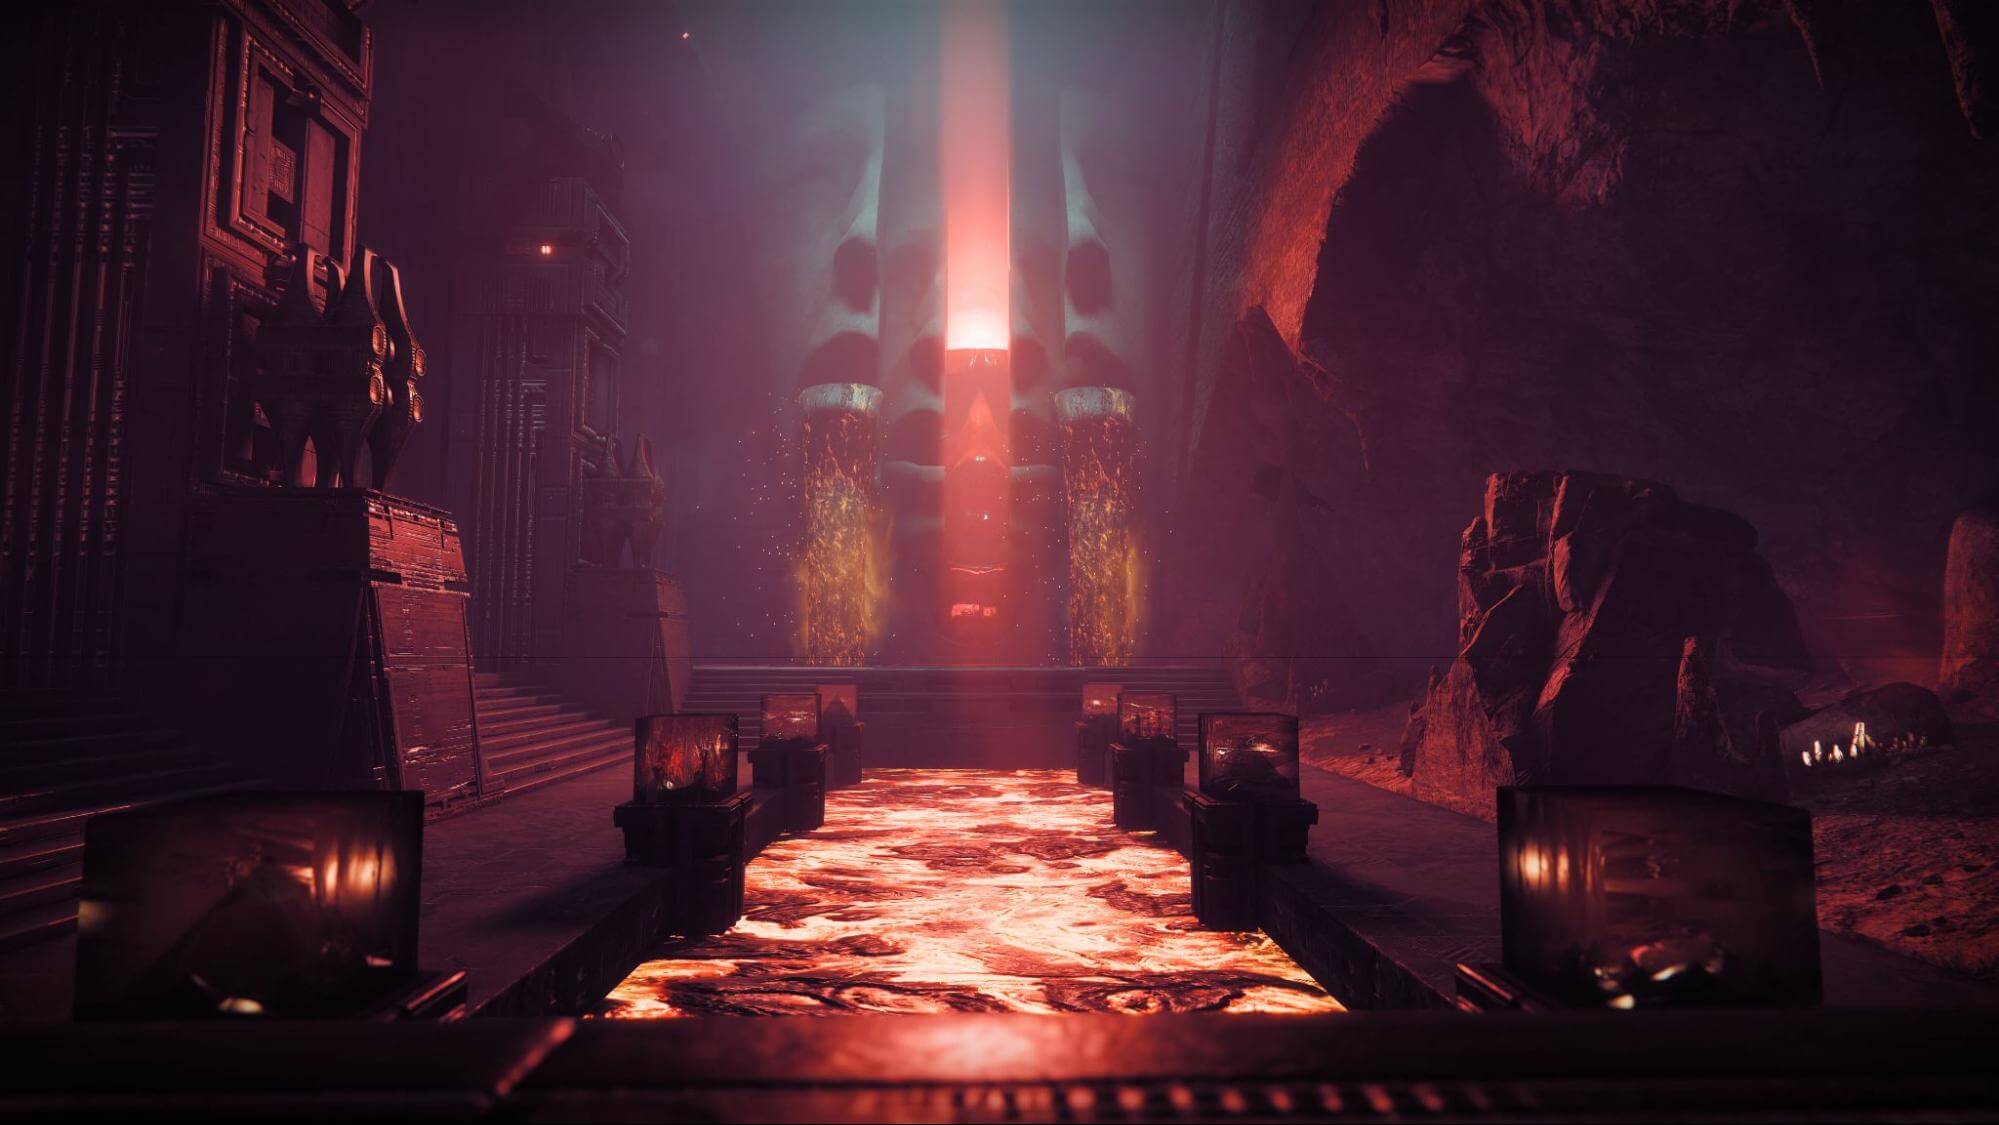
Watch out for lava! Whenever the Tormentor is immune and leaves the arena, there will be lava on the outskirts of the arena!
You need 2 more Taken Energies. The challenges are basically the same as before, just harder!
The right side will once again require you to shoot Acolyte’s Eyes with Taken Energy. This time, you will have to shoot five at a time, three times. The room is much smaller, and the lava can fill it up quickly!
Shoot the eyes, escape, and deposit your Taken Energy.
On the left side, it’s just another obstacle course. This time, there’s just lava- a lovely addition, right? Once the first energy is deposited, an Unstoppable Taken Phalanx will spawn. Handle it before the second energy is deposited!
After you get the Tormentor’s shoulders broken, the real fun begins. The Lightbearer Wizard from earlier will spawn in (with however much health you left it with) alongside Barrier Knights. Tether is great here!
Then when the Wizard is defeated, the Harbinger from earlier will also make an appearance. This Subjugator will drop the final Taken Essence. Deposit it and prepare to run! Once deposited, the Tormentor boss will jump back down. This time, it will be enraged.
Adds will occasionally spawn as will one last Unstoppable Champion. Do the same thing as every other phase and deal with the adds and Champion first! Stay split up and use everything you have on the Tormentor to get your clear and one of the best Eager Edge swords in the game!
Best Builds for the Liminality Grandmaster Nightfall
Warlock Build – Transcendent Buddies
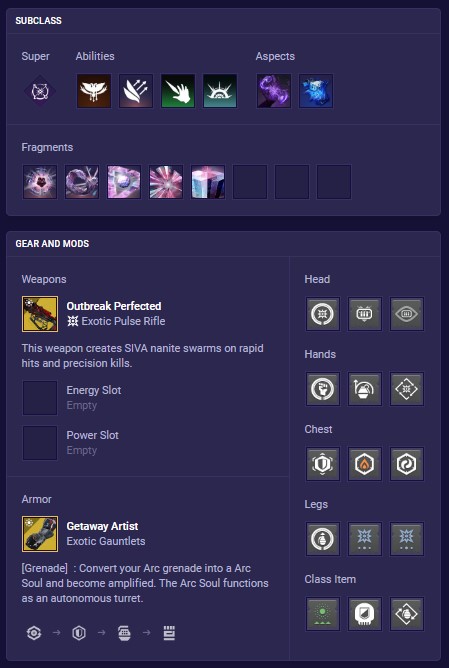
[See full Transcendent Buddies build]
This build is very similar to the one I’ve been using in all my Grandmaster runs on Warlock. Once you get Devour going, it’s incredibly easy to stay alive. The Stasis turrets are absolutely huge in the Seal-Bearer room, the Ruins, and the boss room. Feel free to swap to Song of Flame on this build.
The damage resistance Song of Flame gives can keep you alive in the worst situations if you need to get a quick revive on a teammate, and it demolishes the Unstoppable champs. Outbreak Perfected is going to demolish Barrier Knights, as well as ensure your Transcendence and Super are almost always full!
Hunter Build – Grandmaster Liminality Farm Build
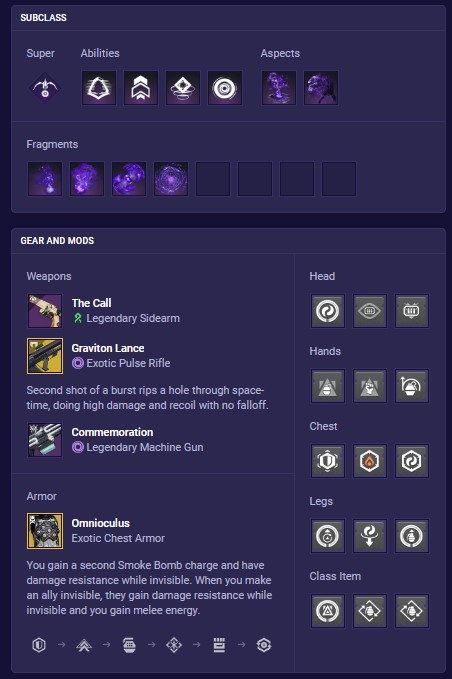
[See full Grandmaster Liminality Farm build]
Luckily, Mactics happened to release a Hunter build made entirely for Liminality! Making your whole fire team Invisible on command can completely save GM runs. Deadfall tether is also going to make add-clear easier than ever and Suppress the Lightbearing Hive out of their Supers!
A lot of enemies in this Nightfall have Void shields, so Graviton Lance is really going to shine! It deletes adds and can stun Barrier Champs!
Titan Build – Spam-Heavy Consecration/Suspend
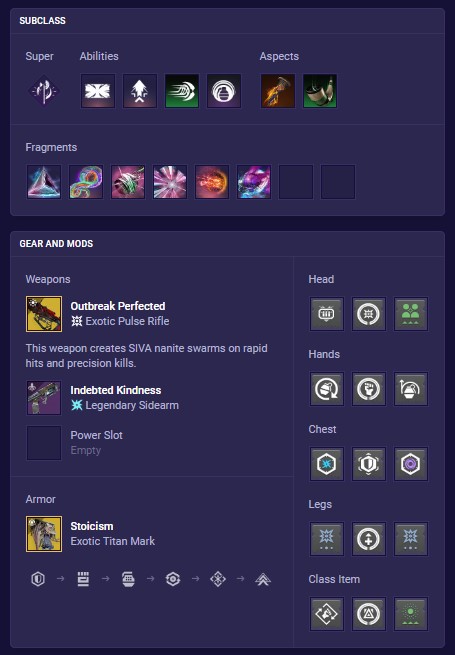
[See full Spam-Heavy Consecration/Suspend GM build]
If you’re lucky to have a Spirit of the Abeyant and Spirit of Contact Titan Class Item, then you’ll get to utilize it here! Like the Warlock build, Outbreak will keep your Transcendence and Supercharged.
You have Weakening Suppressor Grenades that can make your Consecration Slams even stronger and knock the Lightbearers out of their Supers. Pop Transcendence, throw your grenade into a group of enemies, and start slamming! The Jolting Consecration slams are incredible for any activity!
In Conclusion
This Grandmaster Nightfall was definitely one of the harder ones I’ve done. The real issue is getting into a groove. Once you learn the Nightfall a little bit, it suddenly isn’t as intimidating anymore. Stick with it, and you’ll come out on top!
After a handful of clears, I would say it’s not nearly as bad as it was when I first completed it! Stay patient, and make sure the Hunter stays alive to pick up revives!