Boothill: Guide, Skills, Builds, Teams & More
Boothill is a physical Hunt break DPS, and the first true break DPS that launched the break meta. Boothill boasts immense single target nukes when he breaks the enemy, but requires some time to ramp up before he can unleash his full potential. He can implant weakness when using his Ultimate, and does the highest toughness damage out of all units in the game to one target. However Boothill is strictly ST, true to his path as a Hunt unit. Boothill has a learning curve and requires manual play, but is one of the most satisfying to play when you see him obliterate the enemy’s HP.
Boothill performs great in Memory of Chaos, but very poorly in Pure Fiction or against multiple enemies, heavily gimped by his ST. Boothill is also one of the best units in Apocalyptic Shadow, being able to brute force even when off-element very well.
HSR Boothill Release Date
Boothill’s banner will rerun in the second half of Version 3.0 releasing on February 4th, 2025 and wil run until February 25th, 2025.
Boothill HSR Kit Overview (Trace Level 10)
Pocket Trickshot & Standoff:
Boothill can deal some incredible damage. However, he needs some time to warm up. Pocket Trickshot is a stacking mechanism of Boothill, indicated by the 3 star-like badges under his character icon in-game. Boothill gains 1 stack of Pocket Trickshot for every enemy he defeats or breaks in his Standoff, which is activated by his Skill. He can gain multiple stacks in one turn if he satisfies the requirements. For example, Fugue’s Cloudflame Luster can proc break twice along with a kill, giving him 3 stacks max.
In the Standoff state, Boothill’s Basic ATK becomes enhanced. The enemy and Boothill take 30%/15% more DMG respectively. The Standoff will last for 2 turns of Boothill, or if Boothill defeats/breaks the enemy. For the latter, Boothill will dispel the Standoff instead and get 1 Pocket Trickshot stack for enemies being defeated/broken. Boothill’s Skill cannot give Energy. In addition, the Standoff locks you into one target, taunting them and will not recover SP when using the Enhanced Basic ATK.
Boothill’s Talent increases his Enhanced Basic ATK’s Toughness Reduction by 50% for every Pocket Trickshot stack he has, up to 3. In addition, depending on the Pocket Trickshot stacks, Boothill deals Break DMG equal to 70%/120%/170% of his Physical Break DMG on Weakness Broken targets. This is similar to Superbreak, where you can still deal damage even if the enemy is already broken.
Boothill’s Ultimate implants Physical weakness on the enemy, delays their action by 40%, and does 400% Physical DMG equal to Boothill’s ATK. Boothill can target any enemy with his Ultimate, even if he is locked in Standoff, so you can start work on another enemy.
Boothill’s Technique can also implant Physical Weakness when casting Skill for the first time in-battle, just like his Ultimate.
Traces:
A quick rundown on his traces. For his first trace, Boothill gains Pocket Trickshot in Standoff, he gains 10 Energy, even if the stacks are maxed out. Boothill’s 2nd trace gives him 30% reduced DMG when he takes damage from targets that he is not in a Standoff with. His A6 gives Boothill CRIT Rate/CRIT DMG, equal to 10%/50% of his Break Effect, up to a max of 30%/150%. You need 300 BE to max this effect out. It’s not a bad trace, but Boothill’s damage profile is heavily skewed towards break damage; neglecting CRIT is still perfectly fine and won’t affect his damage that much. If anything it’s not worth chasing CRIT substats in your relics when you could be getting more Break Effect or Speed.
Summary:
Boothill wants to get 3 stacks of Pocket Trickshots as soon as possible, to get the maximum Toughness Reduction on his enemies when he enters Standoff. Boothill will have a slow time initially, but quickly become a powerhouse when he’s fully ramped out. You want smaller mobs with lower toughness to get multiple Pocket Trickshots in one action. Boothill’s two turns in Standoff make him great to use with an Action Advancer that’s right behind him, where he can break the enemy on his first turn, then deal Break DMG again thanks to his talent on the second turn. When played properly, Boothill should delete elites with just one or two Standoffs, boasting some of the highest ST damage in the game.
Boothill HSR Core Skills

Basic Attack – Skullcrush Spurs: Deals Physical DMG equal to 100% of Boothill’s ATK to a single target enemy.

Basic Attack – Fanning the Hammer: Deals Physical DMG equal to 220% of Boothill’s ATK to a single target enemy. The Enhanced Basic Attack cannot recover Skill Points and can only target the enemy that is in the Standoff.

Skill – Sizzlin’ Tango: Forces Boothill and a single target enemy into the Standoff state. Boothill’s Basic ATK gets Enhanced, and he cannot use his Skill, lasting for 2 turn(s). This duration decreases by 1 at the start of Boothill’s every turn.
The enemy target in the Standoff becomes Taunted. When this enemy target/Boothill gets attacked by the other party in the Standoff, the DMG they receive increases by 30%/15%.
After this target is defeated or becomes Weakness Broken, Boothill gains 1 stack of Pocket Trickshot, then dispels the Standoff.
This Skill cannot regenerate Energy. After using this Skill, the current turn does not end.

Ultimate – Dust Devil’s Sunset Rodeo (115 Energy): Applies Physical Weakness to a single target enemy, lasting for 2 turn(s). Deals Physical DMG equal to 400% of Boothill’s ATK to the target and delays their action by 40%.

Talent – Five Peas in a Pod: Each stack of Pocket Trickshot increases the Enhanced Basic Attack’s Toughness Reduction by 50%, stacking up to 3 time(s).
If the target is Weakness Broken while the Enhanced Basic ATK is being used, based on the number of Pocket Trickshot stacks, deals Break DMG to this target equal to 70%/120%/170% of Boothill’s Physical Break DMG. The max Toughness taken into account for this DMG cannot exceed 16 times the base Toughness Reduction of the Basic Attack “Skullcrush Spurs.”
After winning the battle, Boothill can retain Pocket Trickshot for the next battle.

Technique – 3-9× Smile: After the Technique is used, when casting the Skill for the first time in the next battle, applies the same Physical Weakness to the target as the one induced by the Ultimate, lasting for 2 turn(s).
Boothill HSR Traces

Ghost Load: Increase this character’s CRIT Rate/CRIT DMG, by an amount equal to 10%/50% of Break Effect, up to a max increase of 30%/150%.

Above Snakes: While Boothill is in the Standoff, reduces the DMG he receives from targets that are not in the Standoff by 30%.

Point Blank: When in Standoff and gaining Pocket Trickshot, regenerates 10 Energy. Can also trigger this effect when gaining Pocket Trickshot stacks that exceed the max limit.
Boothill HSR Eidolons
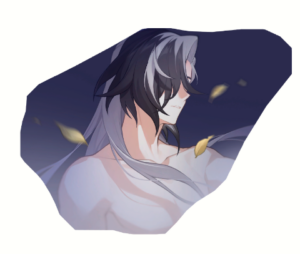
- Dusty Trail’s Lone Star: At the start of battle, obtain 1 stack of Pocket Trickshot, allowing Boothill to deal DMG that ignores 16.0% of enemy target’s DEF.
- Milestonemonger: When obtaining Pocket Trickshot in Standoff, recovers 1.0 Skill Point(s) and increases Break Effect by 30.0%, lasting for 2.0 turn(s). This effect cannot be triggered repeatedly in one turn, and will also be triggered when obtaining Pocket Trickshot stacks that exceed the max.
- Marble Orchard’s Guard: Ultimate Lv. +2, up to a maximum of Lv. 15. Basic ATK Lv. +1, up to a maximum of Lv. 10.
- Cold Cuts Chief: When the enemy target in Standoff is attacked by Boothill, the DMG they receive increases by 12.0%. When Boothill is attacked by the enemy target in Standoff, the effect of receiving more DMG is reduced by 12.0% on him.
- Stump Speech: Skill Lv. +2, up to a maximum of Lv. 15. Talent Lv. +2, up to maximum of Lv. 15.
- Crowbar Hotel’s Raccoon: When triggering the Talent’s Break DMG, additionally deals Break DMG to the target equal to 40.0% of the original DMG multiplier and deals Break DMG to adjacent targets equal to 70.0% of the original DMG multiplier.
Boothill’s first and second Eidolon provide great QoL and smoothens his gameplay. Boothill’s E1 lets him start out with one stack of Pocket Trickshot, and gives 16% DEF shred. E2 makes him SP neutral, refunding him whenever he gets Pocket Trickshot along with 30% Break Effect. E4 is a mediocre Eidolon like most of them. Boothill’s E6 makes his ST nuke absurdly stronger, but also makes him a destruction unit, where he deals break DMG to adjacent units as well.
Boothill’s E1 and E2 are great eidolons, but getting his Signature is recommended before Eidolons, as the Light Cone situation is VERY limited for Boothill. In addition, newer units such as Sunday and Fugue make some of the QoLs less impactful compared to when he was first released.
Eidolon Priority
- Eidolon 1: High
- Eidolon 2: High
- Eidolon 4: Low
- Eidolon 6: Very High
Boothill HSR Build Guide Overview
Light Cones
- Sailing Towards a Second Life
- Shadowed by Night
- River Flows in Spring
- Adversarial
- Cruising in the Stellar Sea
Main Stats
- Body: CRIT Rate / HP
- Feet: Speed
- Orb: Physical DMG % / Attack %
- Rope: Break Effect
Relics
- Iron Cavalry Against the Scourge
- Thief of Shooting Meteor
- Eagle of Twilight Line
Planar Set
- Talia: Kingdom of Banditry
- Forge of the Kalpagni Lantern
HSR Boothill Light Cones
Boothill’s Light Cone options at his release were very limited, and only recently alleviated due to Moze’s Light Cone, a LC that gives Break Effect. Since most of the Hunt LCs give CRIT, something Boothill cannot use effectively, there is a big gap between his premium options and F2P ones.
Premium Options
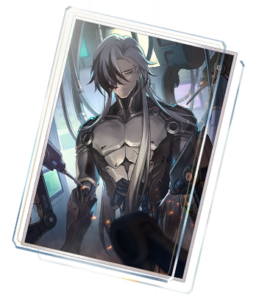
Sailing Towards a Second Life: Increases the wearer’s Break Effect by 60.0% / 70.0% / 80.0% / 90.0% / 100.0% and Break DMG dealt by the wearer ignores 20.0% / 23.0% / 26.0% / 29.0% / 32.0% of the target’s DEF. When the wearer’s Break Effect in battle is at 150.0% or greater, increase their SPD by 12.0% / 14.0% / 16.0% / 18.0% / 20.0%.
Boothill’s Signature provides a huge boost compared to the alternatives, mainly because other than Moze’s LC, they don’t give any benefits for a break DPS. Boothill should always have over 150% Break Effect, so the speed boost should be permanent. DEF Shred of 20% is awesome on a LC, along with the 60% Break Effect.
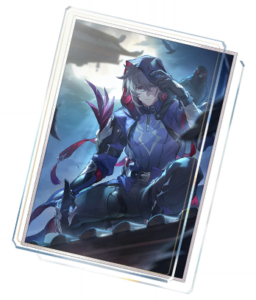
Shadowed by Night: Increases the wearer’s Break Effect by 28% / 35% / 42% / 49% / 56%. When entering battle or after dealing Break DMG, increases SPD by 8% / 9% / 10% / 11% / 12%, lasting for 2 turn(s). This effect can only trigger once per turn.
A godsend for Boothill owners who weren’t able to get his Signature. This LC is basically Boothill’s Signature minus the DEF shred. It is also the only Hunt LC that is not crit based other than Boothill’s Signature of course. The 2nd best choice by far for Boothill.
F2P Options
These F2P options for Boothill are a last resort, but then again if you don’t own either one copy of the two premium LCs, your options are stretched thin.

River Flows in Spring: After entering battle, increases the wearer’s SPD by 8% / 9% / 10% / 11% / 12% and DMG by 12% / 15% / 18% / 21% / 24%. When the wearer takes DMG, this effect will disappear. This effect will resume after the end of the wearer’s next turn.
Since Boothill barely benefits from CRIT, SPD boosts are his next best option. Like YQ though, the speed boost along with the DMG buff falls off if you take damage.
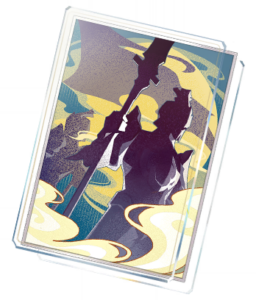
Adversarial: When the wearer defeats an enemy, increases SPD by 10% / 12% / 14% / 16% / 18% for 2 turn(s).
A 3 star LC? Yes. This LC provides a speed boost, something Boothill can benefit from.. He should also be getting the boost quickly, since Boothill needs to either defeat enemies or break them to get Pocket Trickshot.
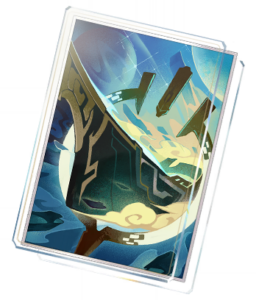
Cruising in the Stellar Sea: Increases the wearer’s CRIT rate by 8% / 10% / 12% / 14% / 16%, and increases their CRIT rate against enemies with HP percentage less than or equal to 50% by an extra 8% / 10% / 12% / 14% / 16%. When the wearer defeats an enemy, their ATK is increased by 20% / 25% / 30% / 35% / 40% for 2 turn(s).
Boothill does not really gain too much from the CRIT Rate or ATK, but this is a 5 star LC so has better base stats than the other two above.
HSR Boothill Main Stats
- Body: CRIT Rate / HP / ANY
- Feet: Speed
- Orb: Physical Damage% / Attack% / ANY
- Rope: Break Effect
Boothill, unlike Firefly and Rappa, can benefit from some CRIT stats. He’s also not completely reliant on breaking the enemies to do damage. That’s not to say the vast majority of his damage comes from Break though. You can think of the split of Break/CRIT damage as 80/20, or 90/10 with Fugue. A CRIT Rate body will make your Ultimate’s non-break damage crit more often. Of course you can completely forgo this and opt for a defensive body too, since Boothill loves sustainless teams and takes more damage when in Standoff.
Boothill wants Speed boots, since he wants to take as many turns as he can.
For His Orb u can equip anything with the most substats in Break. The Physical Damage% will not help his break damage! The rope should be a Break Rope, which should be self-explanatory.
HSR Boothill Sub Stats
- Speed
- Break Effect
- CRIT Rate / CRIT DMG / Attack
Speed and Break Effect are Boothill’s priorities and give him the biggest increase in combat. CRIT or Attack stats are a low secondary, as the vast majority of Boothill’s damage is from his Break DMG.
Boothill’s Break to CRIT conversion caps out at 300 BE, which is only somewhat feasible if you have a Break LC, otherwise requires an absurd amount of BE subs.
Speedtuning:
Boothill benefits greatly from being fast. The more times Boothill can enter Standoff and use his Basic Enhanced ATK, the more damage he can dish out. Boothill should aim for around ~160 Speed to get 2 turns in the first cycle.
If you have Boothill’s Signature, make sure to factor in the 12% speed boost it gives. Since Boothill’s base Speed is 107, you would get an extra 12.84 Speed from his Light Cone. The speed boost is not implemented or shown until you enter battle, so make sure to factor that in when speedtuning with say another Action Advancer on the loadout page.
HSR Boothill Relics

Iron Cavalry Against the Scourge
- 2-Pc: Increases Break Effect by 16%.
- 4-Pc: If the wearer’s Break Effect is 150% or higher, the Break DMG dealt to the enemy target ignores 10% of their DEF. If the wearer’s Break Effect is 250% or higher, the Super Break DMG dealt to the enemy target additionally ignores 15% of their DEF.
Boothill does not have any innate Superbreak in his kit. However, due to the 10% DEF shred on top of the 20% from his Signature, Cavalry is still his best relic dmg wise, even when played without HMC.

Thief of Shooting Meteor
- 2 Pc: Increases Break Effect by 16%.
- 4-Pc: Increases the wearer’s Break Effect by 16%. After the wearer inflicts Weakness Break on an enemy, regenerates 3 Energy.
With that being said, Boothill is not lacking in damage. Thief is a 2nd close alternative to Iron Cavalry, where you trade a bit of damage for extra Energy. Extra energy can matter for Boothill to get another Ultimate, which is his way of implanting Physical weakness.

Eagle of Twilight
- 2 Pc: Increases Wind DMG by 10%.
- 4-Pc: When the wearer uses their Ultimate, their action is Advanced Forward by 25%.
When Eagle can give Boothill another turn, it can prove to be useful and make up for the damage loss. Since Boothill aims for a high speed, he can reach some of those notoriously difficult breakpoints, compared to crit DPS since Boothill only builds Break and Speed. Not recommended for normal use, but can come in clutch when going for low cycle clears or no sustain runs.
HSR Boothill Planar Sets

Talia: Kingdom of Banditry
- 2-Pc: Increases the wearer’s Break Effect by 16%. When the wearer’s SPD reaches 145 or higher, the wearer’s Break Effect increases by an extra 20%.
Best general planar set for Boothill. Boothill will gain an extra 36% Break Effect with ease, since he will easily be faster than 145.

Forge of the Kalpagni Lantern
- 2-Pc: Increases the wearer’s SPD by 6%. When the wearer hits an enemy target that has Fire Weakness, the wearer’s Break Effect increases by 40%, lasting for 1 turn(s).
Good Planar for Boothill, with a catch: need to be facing Fire weak enemies. When facing Fire enemies, this planar is stronger than Talia, but provides no help other than the increased speed against non-Fire weak enemies.
HSR Boothill Teammates
Boothill is a Break DPS, but does not have Superbreak within his kit. He has a wide variety of supports available to him, due to not being tied to Harmony Trailblazer like Firefly. He is often played with an Action Advancer to maximize the number of turns he can be put into a Standoff with the enemies. Sustainless teams are common with Boothill, as the enemies get delayed and barely get to move since they’re broken so quickly.
Harmony/Nihility

Fugue: Fugue has everything Boothill wants. Fugue’s colorless Ult and 50% toughness ignore from her Skill helps Boothill be less reliant on doing toughness when he doesn’t have his Ultimate to implant. Let’s not forget the biggest thing Fugue brings, her “CloudFlame Luster”, which gives Boothill 2 Break bars he can nuke. Boothill on low toughness enemies can also get up to 3 stacks of Pocket Trickshot off from the 2 breaks he procs and the kill, significantly reducing his ramp up time, one of his biggest issues.

Ruan Mei: Ruan Mei offers Weakness Break Efficiency, delay, RES PEN, speed, etc. Boothill’s toughness damage is already high, thanks to his talent. Combined with Ruan Mei he shreds toughness like no business. Her passive presence in the team and SP positivity is of great help to Boothill.

Sunday: Boothill consumes 1 Skill Point every 2 turns, making his economy better than most DPS. However when paired with Bronya, you can quickly find yourself running out of SP. Enter Sunday, who refunds the SP if the Beatified target is Action Advanced. Sunday brings 100% AV in his kit, making a -1 setup with Boothill easy to play, and be less worried about not having skill points. Sunday also gives Energy to Boothill, letting him get his Ultimate off more frequently. Boothill cannot benefit from Sunday’s CRIT amplifications, but is still a great choice.

Bronya: A less potent Sunday. However Boothill players enjoyed using him with Bronya before Sunday’s release, as the 100% AV is too valuable for Boothill. The SP economy is rough especially without Bronya’s E1, but is another option if Sunday is busy on another team.

Harmony Trailblazer: Boothill does not have Superbreak within his kit; however that doesn’t mean he can’t use our good old Trailblazer. Boothill does incredible toughness damage, something Superbreak scales heavily with. Harmony MC is also one of the best Dance Dance Dance LC holders, gaining Energy when enemies become broken. Boothill loves Action Advancing, if that means he can squeeze in another Standoff with the enemy.
Sub DPS

Acheron: Not a normal-use case, but Boothill’s Standoff state is considered a debuff, and guess which DPS loves getting more debuffs? That’s right our Lightning Nihility DPS who is prone to forgetting stuff easily.
Sustain
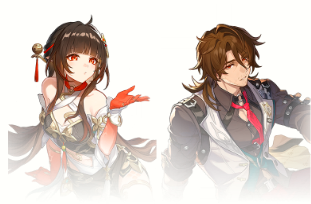
There are really only two Break DPS sustains, which are Lingsha and Gallagher. Lingsha performs much better than Gallagher in AoE situations, but both do great toughness to enemies, IF they’re fire weak. However Boothill is one of the worst characters to take when facing AoE enemies. Even with Lingsha’s help it’s hard to overcome.
Boothill is one of those DPS that works better when played without a sustain, as the delay from his Ultimate and quick breaking capabilities lets his team take less damage, provided the enemies aren’t already dead when he breaks them.
HSR Boothill Teams

Boothill w/ Sustain
Pretty standard break teams, however Boothill has many options for support. With IMC not being required, his options are less restricted. Fugue’s team will bring a bigger punch, while Sunday’s team will provide more actions to use his Enhanced Basic ATK.

One Man Army Boothill
If the team can survive without a sustain, then why do I need one? That is sound logic and the ideal Boothill team. The objective is to kill the enemy before they get to you. Boothill’s potential is much higher in a sustainless team, and is quite safe as long as you break them quickly. Thankfully with 3 supports, he is able to quickly get his 3 Pocket Trickshots, then start blasting enemies. Ruan Mei and Fugue’s delays will also prevent the enemy from moving once they’re broken, giving Boothill free reign.
HSR Boothill Pull Value and Conclusion
Boothill is a fun DPS, and also a powerful one, especially against single target enemies. Boothill is a character that has clear strengths and weaknesses. One of the drawbacks of Boothill is that his performance is abysmal in AoE situations. If you are looking for a DPS that can do it all, then Boothill is sadly bottlenecked by his Hunt path.
That being said, DPS on rerun is always a difficult choice to make. Boothill is excellent in MoC and AS, yet one of the worst in PF. He is also not as restrictive as say Rappa or Firefly in teammates, working well with most supports. If you are looking for a physical DPS unit and already have other solutions for AoE enemies, Boothill is not a bad choice. With an upcoming AoE meta though starting from 3.0, Boothill may become more niche compared to other DPS, making his rerun timing rather unfortunate.
Thanks for Reading! For more resources, check out our other Honkai Star Rail Guides.
 Download APP