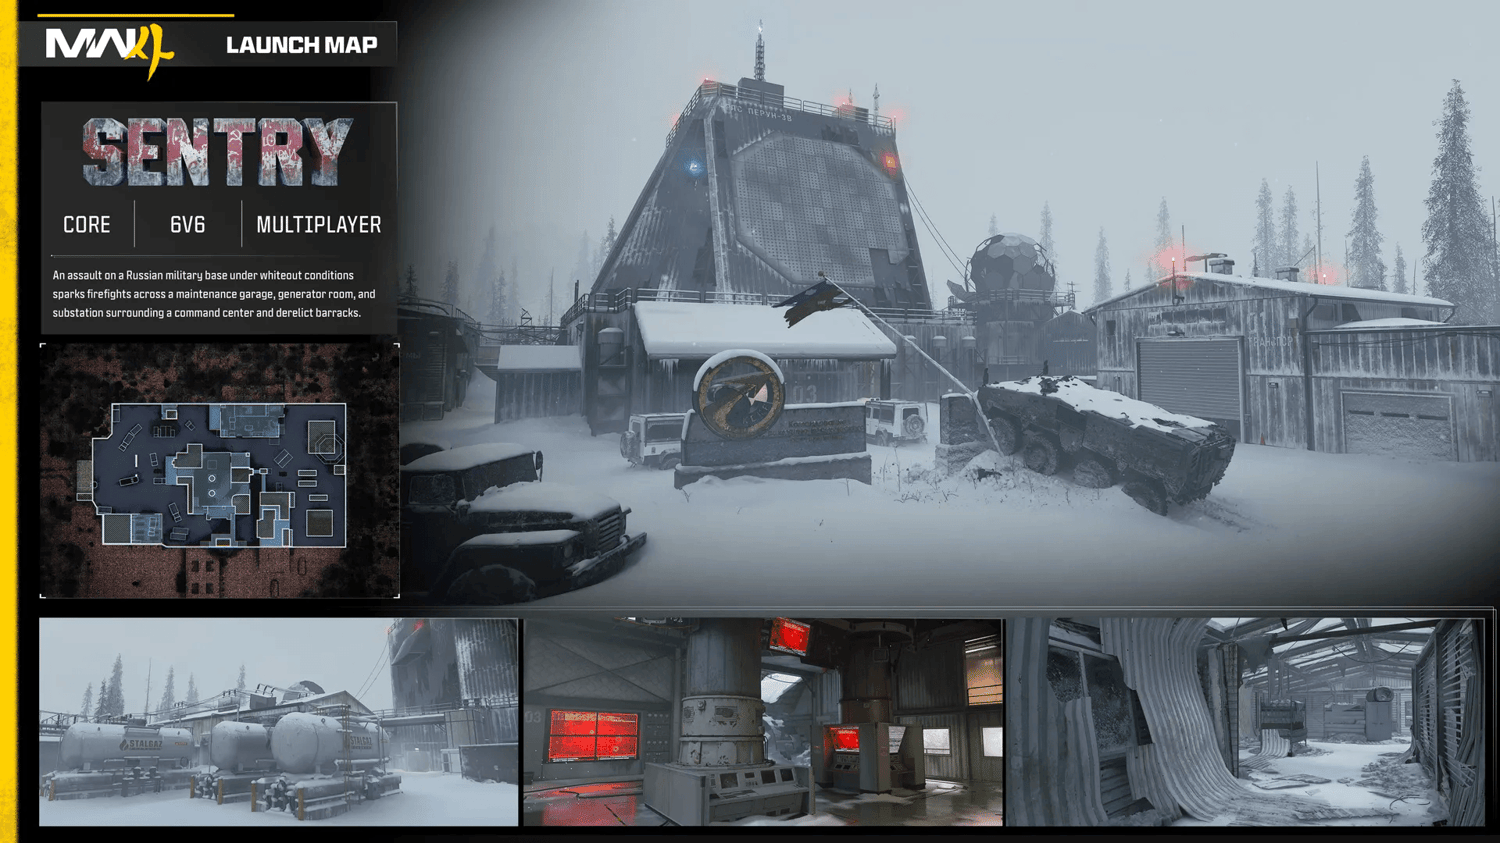
Welcome to our Call of Duty: Modern Warfare 4 Sentry Map Guide, where we break down the map's layout, important objectives, strategic positions, and advanced tips to help you improve your map awareness and win more gunfights.
Using our detailed Tac Map and in-game examples, we'll highlight key areas to control, powerful head glitches, useful sightlines, jump spots, flanking routes, and other tricks that can give you an advantage over your opponents.
Whether you're playing Hardpoint, Domination, or Search & Destroy, this guide will help you better understand how to navigate Sentry, anticipate enemy movements, and take control of the map.
"An assault on a Russian military base under whiteout conditions sparks firefights across the maintenance garage, generator room, and substation surrounding a central command center and partly destroyed barracks."
Sentry is a 6v6 multiplayer map set at a Russian military base during a heavy snowstorm. The snow map Sentry has some of the longest sight lines in the launch roster of maps in MW4. As with all maps, there are indoor objectives and rooms that favor close range guns, but even the inside rooms on this map are much more open and spread out than the typical map.
Snipers, marksman, assault, and LMG's are the go-to weapon classes as they all perform well shooting across the map, holding down lanes, and contesting objectives. Given most players will be using mid to long range builds, we've also seen success with the counter strategy of going full on rush-down close range SMG/shogtun build then sneaking up and forcing close range gunfights where you'll have the advantage.
General Strategy
Strategic Areas to Control
Below we will breakdown key areas to control and0 spots to set up around the objectives. Wherever Hardpoint, S&D, and Domination objectives overlap, we'll make a note of it because the same strategies can apply to all game modes.
Search and Destroy Objectives
B Site Spawn 2 PoV / Hardpoint 3
When playing Search and Destroy, there are a few key spots surrounding the B site that are crucial to control. First strong position is the far edge of the building we are standing in pictured above. You can mount the corner and be protected from any crossfire. The only thing to watch for here is flankers using the back entrance.
Here you have LoS on the bridge above the bomb which is another very important position. Both sides of the stairs and bridge, and the doorway coming from the B Flag area are where you should look to rotate, and where you should expect the enemies to come from.
Under the truck B Site Spawn 1 PoV /Hardpoint 3
On the opposite side, there is a truck you can prone underneath. From behind you can shoot through, or you can literally climb underneath and become extremely difficult to spot. As you can se here, you also get full LoS onto the B site, and partial of the bridge and stairs.
One note of caution is if you go fully under the truck you can only crawl out from one of 2 entrances, both of which can be seen from across the B site.
S&D A Site / Hardpoint 2 / Donimation A Flag
At the A site, the main area you'll want to control is this spot where you have sight of both floors simultaneously. Additionally, you get a bit of cover on the right, and can quickly drop down or jump up onto either floor if the enemy pressure gets too much.
Outside S&D A Site / Hardpoint 2 / Donimation A Flag
When you are approaching A, be sure to make use of all 5 entrances. There is a side entrance, and a top floor and bottom floor entrance on the front and back. On the side we are facing here, you can mantle onto the blocks then get onto the 2nd floor. On the opposite side you take the stairs. Either way, be sure to use cover move between containers as you approach. Crossing the open snow areas is very dangerous.
Domination and Hardpoint Objectives
Hardpoint 1 / B Flag
One of the most contested areas lies directly in the middle of the map. This inside room is vitally important in Domination as it contains the B Flag. It's also the site of Hardpoint 1, but even in S&D or non-objective game modes, controlling the center of the map gives you a major advantage to control and rotate between spawns.
The high ground we are positioned on in the above picture is the main spot you'll want to take over. Taking the room is very difficult if the enemy team controls this area. You can enter the room and directly contest or use the bridge/stairs coming from the S&D A site.
Tunnel into B Flag / Hardpoint 1
Another entrance to take advantage of is the small opening directly below the center room 2nd floor. You can slide on your back through it, and get a surprise angle on defenders not watching this door.
Hardpoint 4
At Hardpoint 4 there are two trucks and multiple short walls you can use as cover when defending or approaching. The truck we are positioned on here we have found especially use because it gives you a strong head glitch you can easily drop back to cover from, and depending on how you position and angle, you can be protected from either the left or right angle.
Hardpoint 4 Near C Flag
On the far right side of Hardpoint 4, you'll find a garage with a parked truck. This can be used as cover and if you prone you get a nice LoS into the objective area. A great sneaky way to get a few long range kills before going in.
Hardpoint 5
One important mechanic in every Hardpoint of Sentry is that standing on any of the structures takes you out of the Hardpoint and stops you from holding/contesting. Remember if you want points, and can give you some insight if attacking and the Hardpoint suddenly goes neutral, that may mean the enemy left the area entirely, or they might be set up on top waiting for you.