Welcome to our Call of Duty: Modern Warfare 4 Nautical Map Guide, where we break down the map's layout, important objectives, strategic positions, and advanced tips to help you improve your map awareness and win more gunfights.
Using our detailed Tac Map and in-game examples, we'll highlight key areas to control, powerful head glitches, useful sightlines, jump spots, flanking routes, and other tricks that can give you an advantage over your opponents.
Whether you're playing Hardpoint, Domination, or Search & Destroy, this guide will help you better understand how to navigate Nautical, anticipate enemy movements, and take control of the map.
"An overgrown central parking lot in western India packed with brightly colored buses in various states of dereliction, flanked by a repair shop and small gas station and surrounded by construction projects and high-rise tenement blocks."
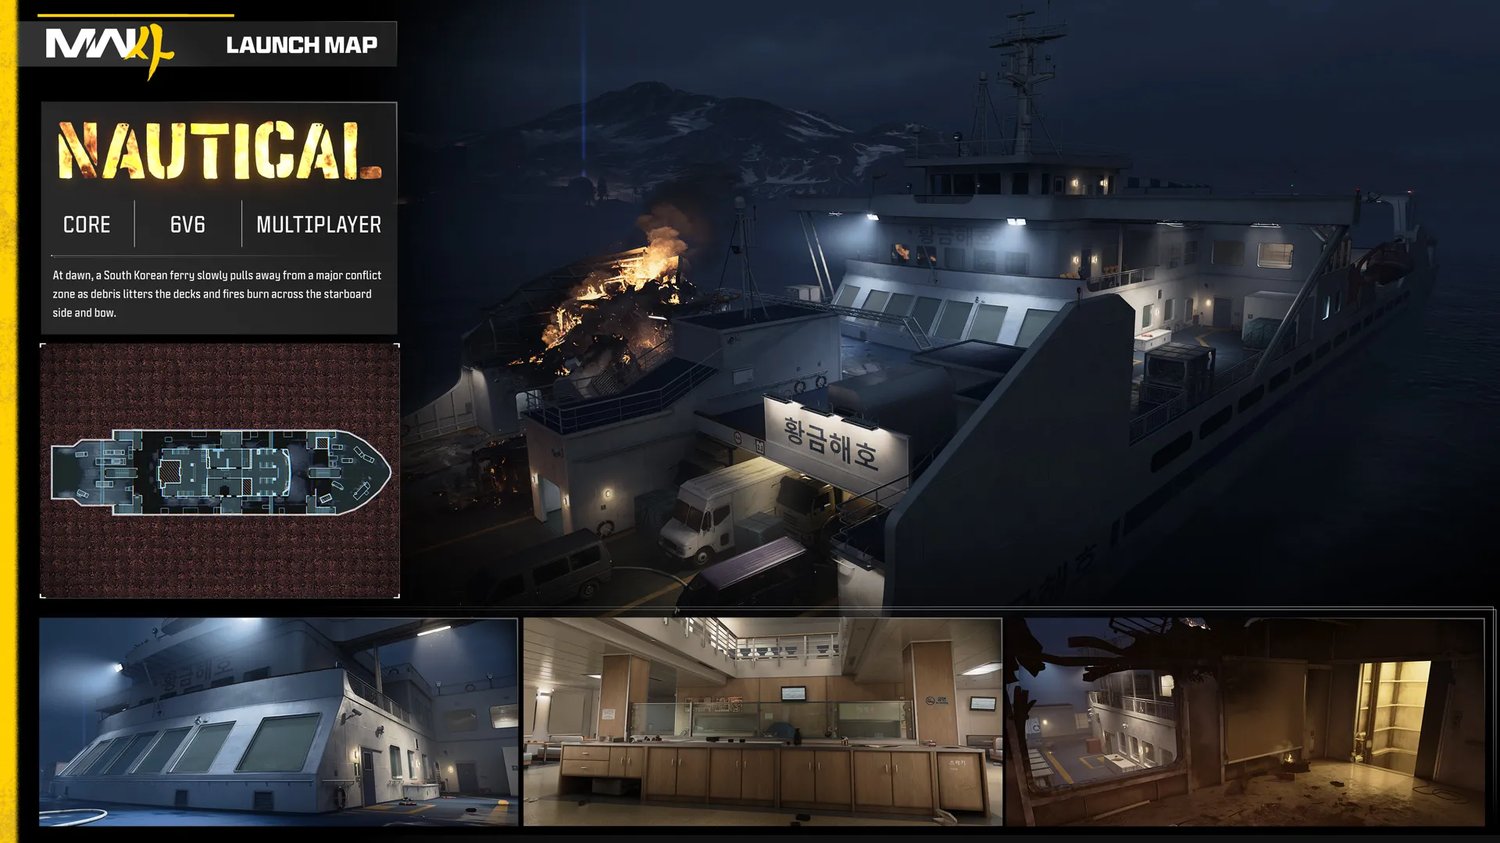
Most of Nautical is long and narrow sight lines. Both the port and starboard sides are straight lines of sight from the center rooms to the back/front of the ship. Map center is a long narrow hallway from Hardpoint 4 to Hardpoint 3. The inside side rooms are the only truly small areas on the Map. Mostly the map favors medium to long range weapon loadouts, but when contesting the inside rooms, mobility and CQC builds are very strong.
General Strategy
Secret Jump Spot
Jump Spot From Observation Room into Storage Room
We're starting out with the slimiest trick in Nautical. No one camping inside the Storage room is going to expect you to jump in through the outside window. To perform this one, you'll need to dive into the window (careful not to go through), then crawl backwards until you fall, then immeditately hold forward and tap crouch to walk through the window.
Storage Room is a crucial area to control because it gives you safe LoS into the B Flag / Hardpoint 1 / S&D A Site. Also the doors can be used contrl the side lanes from both sides. This jump spot gives you a sneaky way to take over the room when the enemy is already set up.
Strategic Areas to Control
Inside
Nautical main
The bulk of the combat that occurs inside is determined by the team with superior control over the main lane down center of map. You or your teammates cannot safely cross to contest the objectives or side rooms if the other team is set up and watching the middle lane. If you do not have the loadout or confidence to contest this sightline, it's best to use a flank route and punish the campers for fixating their aim in one direction.
B Flag / S&D A / Hardpoint 1
Another import spot to set up or counter, is the counter inside this objective area. When defending inside, this counter is the best place to be positioned, even if the enemy likely suspects you to be set up here. The L-shape gives flexibility of exact position to mix up the enemies pre-aim and pre-fire.
Storage Room PoV into B Flag / S&D A / Hardpoint 1
When you are the one approaching, try using equipment to check the enemy before entering, or jiggle peek one of the three entrances. Storage Room is particularly good for contesting this area.
Corridor
On the opposite side you'll find the Corridor with two entrances into the first floor and a pipe to climb into Burning Room. The pipe is especially useful for flanking either floor. From above you can drop down, and from below you can climb up.
Outside
Front Deck / Hardpoint 2
When defending Hardpoint 2, you can make use of the mantle spots and mount for the head glitch and steady aim. Also, you can slide to the right to and get LoS into the 2nd floor Observation Room. The window can be quite difficult to contest, so having this extra option for a different angles comes in handy.
Rear Starboard Mantle Mount
When contesting either the front or back of the ship, you can partial mantle and mount onto the structures on either side. Once Mounted you can also lean to get better vision. Even if you don't plan to fire your secondary, this is great for gathering information on enemy positions.
Additionally, you can even run across the raily behind each of these structures, and to get a surprise jump shot back into the combat area.
Stern Spawn Trucks
Another good spot to know about is from the Stern side near the A Flag and Hardpoint 5. Unlike the front side of the ship, the back doesn't have a mantle spot you can mount. What you can do, however, is hop onto the small truck, to the left, then run and jump onto the tall truck in front.
Tall Truck Sightline
From the front truck you have LoS into hardpoint 5, and as shown here, you also have a clear shot at enemies head glitching the Observation Room window.