menu
MobalyticsUse your favourite features in-game with our Desktop App
Gamebase Guide

Kill Block Gunfight Map Guide: Combo Layouts & Strategies

Guides
By Mobalytics
Updated on Nov 2, 2026
Nov 2, 2026

Kill Block Overview

Welcome to our Call of Duty: Modern Warfare 4 Kill Block Map Guide, where we break down the unique mechanics of this ever-changing Gunfight arena, its different map layouts, and strategies to help you win more rounds.

Unlike traditional multiplayer maps, Kill Block features hundreds of possible configurations that change throughout each match, forcing players to constantly adapt their positioning, sightlines, and strategies.

In this guide, we'll explain how Kill Block works, what to expect from its different environments, and provide tips to help you navigate the shifting battlefield, outplay your opponents, and secure more victories in Gunfight.
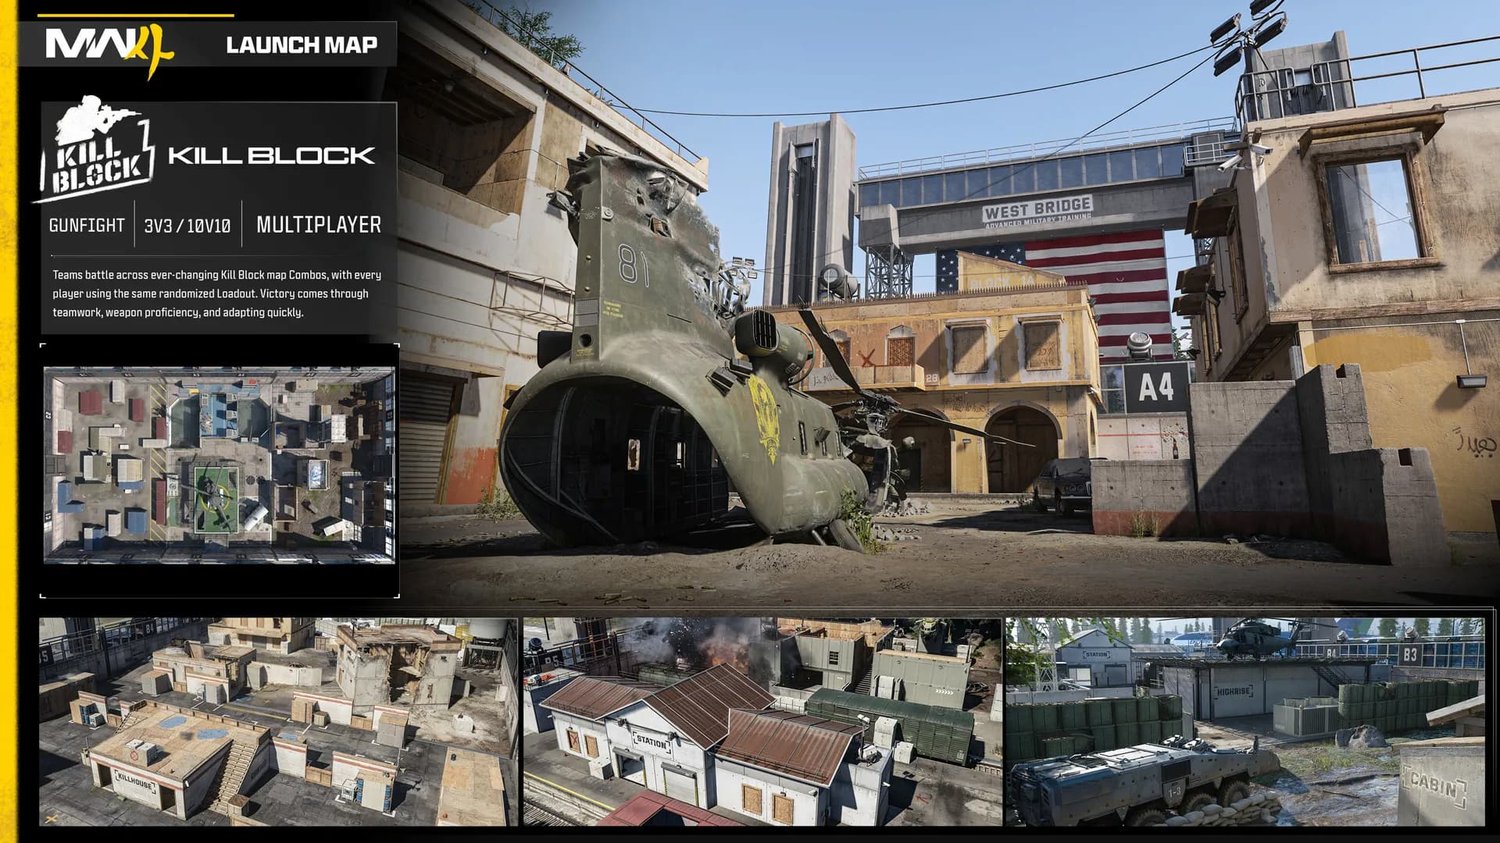
Kill Block Overview

Kill Block is a dynamic multiplayer map set inside the Westbridge Training Facility, a massive military training complex capable of rearranging its entire battlefield between rounds. Designed primarily for the 3v3 and 10v10 Gunfight modes, Kill Block features over 500 possible map configurations, making it one of the most unpredictable environments in Modern Warfare 4.

Each map configuration, known as a Combo, consists of three modular sections called Slabs: two End Slabs connected to a Central Slab. Together, they form a battlefield roughly the size of Shoot House from Modern Warfare (2019). These sections feature a wide variety of environments, including military compounds, trenches, shipping containers, buildings, and familiar locations inspired by classic Call of Duty maps.

In Gunfight, both teams start with identical randomized weapons and equipment, with no custom loadouts or respawns. After two rounds, the Slabs rearrange into a new Combo, changing the map's layout, sightlines, cover, and available routes.

Because the battlefield is constantly changing, adaptability and map awareness are especially important on Kill Block. Familiarizing yourself with the different Slabs, identifying advantageous positions, and coordinating with your teammates will help you make the most of each new layout.

General Strategy

Example Kill Block Map Layouts

Given the vast combination of map types and layouts in Kill Block, it'd be impossible to cover every single one individually. Here we'll go over a few examples and cover strategies and positions that can be applied universally no matter the map or loadout you get each round.

Kill Block Overview Example

Kill Block Overview Example

Kill Block Overview Example

Kill Block Overview Example

Kill Block Overview Example

Positioning and Strategy

In Gunfight, rounds are decided by killing all members of the enemy team, capturing the flag in overtime, or draws are determined by total health remaining between the two teams. Similar to Search and Destroy, this makes the pace of fights slower and more methodical compared to respawn multiplayer modes. You can either take space slowly by moving from one cover to the next as you check corners, or try to blitz across the map and catch the enemy with a surprise flank.

Overall, Gunfight is all about positioning, winning gunfights and teamwork (ideally). When possible, communicate enemy positions, coordinate your pushes, and look for opportunities to create crossfire. If a teammate is out in front of you, watch them and take down enemies trying to eliminate them or at least secure the kill trade.

Pay attention to your randomized loadout each round and adjust your strategy based on your weapons and equipment. Remember that you don't need to eliminate the entire enemy team to win. You can always try to get the win with the overtime flag or maintaining a health advantage.

Uniquely on Kill Block, you'll also need to adapt quickly to new map layouts. Your first objective should be to take note of important sightlines, cover, and flanking routes as each new Combo appears.

High Rise

At each team's spawn, there is almost always structures you can mantle on top of to get LoS across the map.

Remember to use all movement tools to your advantage. Here we are demonstrating holding JUMP as you mantle which keeps your sprint momentum by sliding across the top. Traversing open areas quickly is crucial to surviving in Gunfights.

Window

Anytime you see windows or 2nd floor areas with cover, you should prioritize holding control to keep the enemy from stealing the advantageous area.

Roof

Map Combos with slanted roofs are great for crouch/prone head glitches. You have good LoS and can drop backwards to hide if you start taking damage.

Water

Ambush has water you can swim in with multiple exit points. Make sure to watch these for enemies trying to get sneaky.

KB Tank

Get creative with your positioning. The element of surprise is extremely valuable in Gunfight. Especially as rounds go on, players will be noticing positioning and movement patterns if you don't mix it up. Here we are using the tank barrel as a ledge to walk up and get a look over the buildings or to jump onto the nearby roof.

Comments

0