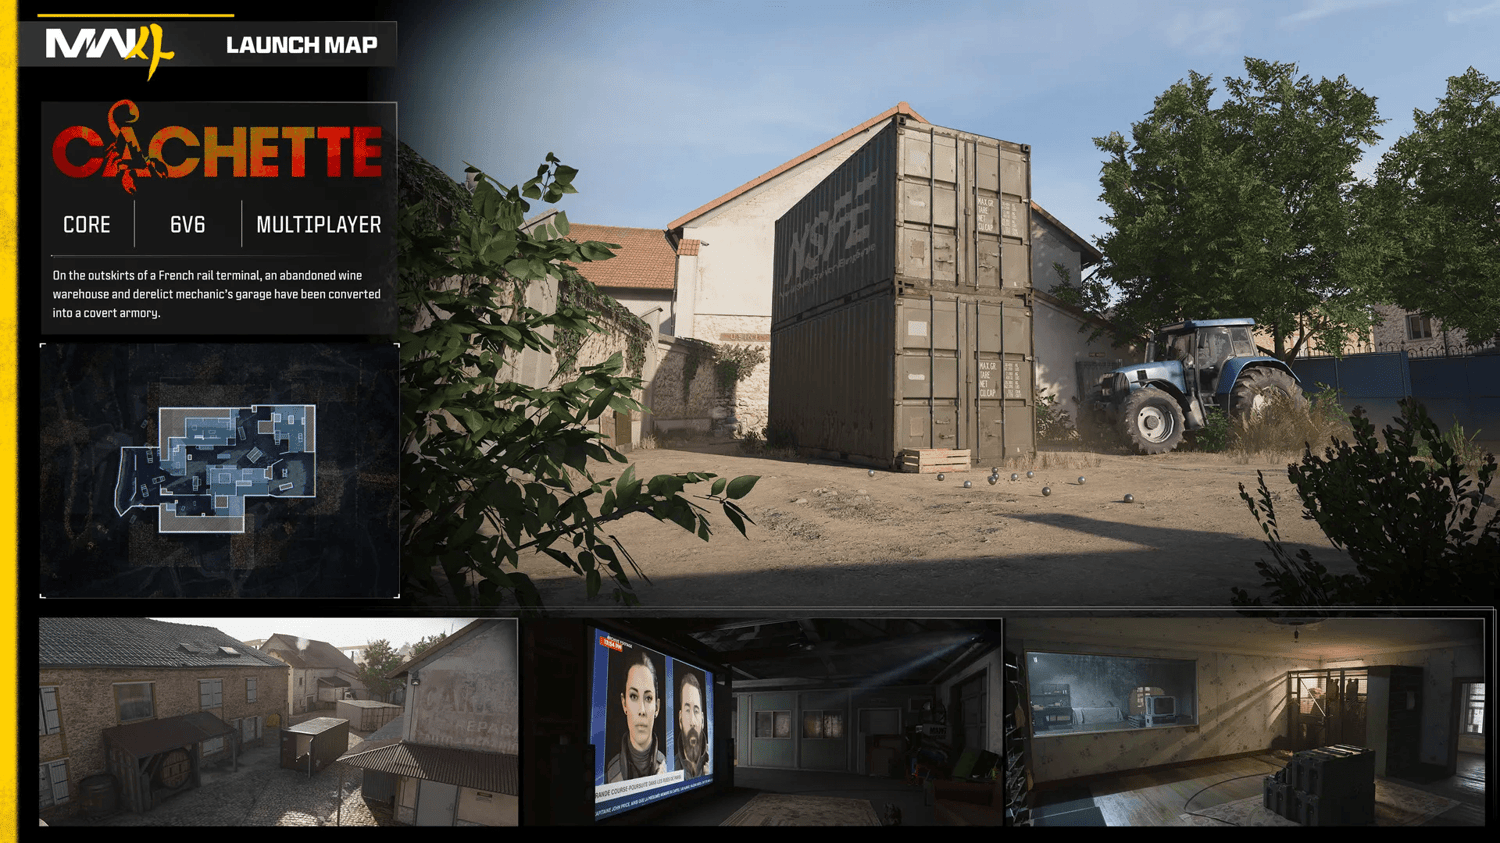
Welcome to our Call of Duty: Modern Warfare 4 Cachette Map Guide, where we break down the map's layout, important objectives, strategic positions, and advanced tips to help you improve your map awareness and win more gunfights.
Using our detailed Tac Map and in-game examples, we'll highlight key areas to control, powerful head glitches, useful sightlines, jump spots, flanking routes, and other tricks that can give you an advantage over your opponents.
Whether you're playing Hardpoint, Domination, or Search & Destroy, this guide will help you better understand how to navigate Cachette, anticipate enemy movements, and take control of the map.
"On the outskirts of a French rail terminal, an abandoned wine warehouse and derelict mechanic’s garage have been converted into a covert armory."
Cachette is a primarily close-quarters-combat map with two large buildings lining the long sides. In the middle you'll find a long a narrow length of open ground with a couple metal storage containers that offer cover. There are no extremely long sightlines on this map, making it an excellent place to use an SMG or shotgun loadout.
General Strategy
High-Value Areas
Given the maps overall small size, the top floors of both buildings are very important strong holds for your team control. They offer the only high ground vantage points that overlook the center of the map and inside objectives.
Top floor of the building on the Defender's Right (In front of A bomb)
Attacker POV B Bomb Sight
When Defending in S&D,Contesting B Flag or defending C flag in Domination, and during Hardpoint objectives 1 & 2, this spot on top of the shipping container is a good power position to control. Not only do you have direct LoS to the objectives we just mentioned, but you also have partial vison into S&D B bomb and Hardpoint 4.
Additionally, you can throw equipment through both the window directly in front to the right, or a long throw across the center to the either the first or 2nd floor of the B bomb building. If the enemy is pushing through the building on your right you have the option to attack path through the stairs or jump through the window.
If the enemy is using this spot against you, note that you can wallbang throgh the wood pallets in they attempt to prone for cover.
The Attacker side POV when looking towards the C Flag / A Bomb covered above
Map Center
Notice that only the clears windows can be broken and shot through, while the windows covered in newspaper or boarded up cannot be broken. The clear window on the left is still in tact, but can shot or climbed through just as the broken window on the right above the awning has been broken.
This is especially important when crossing through the center or contesting the B flag in Domination because you know you can use environmental cover to shield you from one window then you only have a single window to watch.
Also, make use of the fact that you can mantle onto the shipping containers and jump onto the awnings. Enemy players watching the long hall walls or looking down at the B bomb are often caught off guard by someone coming through the window.
Nade Spot
Stand inside the B Flag container, and aim to the top right of the white container in font of you (dark spot our crosshair below is centered on).
Throw a Frag Grenade directly at this spot and it will always richocet to blow up on the backside of the A bomb.
This comes in handy when you want to check the enemy attempting to diffuse the bomb, or check to see if there are enemies positioned in that corner. A sneaky way to stay hidden from the enemy and earn an elim or deal some damage.