League of Legends
 Teamfight Tactics
 Legends of Runeterra
 Valorant
 Lost Ark
 Destiny 2
 Diablo 4
 Download APP
 Collapse
Introduction: Valorant Flashes
Welcome to the second episode of your favorite Valorant tips & tricks series “How to Valorant”!
Within this series, you can learn all about the different existing kinds of mechanical and tactical gameplay mechanics that are crucial to the game.
As always, our primary goal is to help out everyone interested in becoming a better player and thus the focus of this particular series is on explaining the respective gameplay topics in great detail but still in an understandable and easy-to-learn way.
This specific article will be all about flashes!
What are they? How many different ones are there? How do they differ? And how are they used the most efficiently?
The answers to those and a few more questions related to the topic of flashes constitute the base and whole purpose of this episode. And we believe everyone, no matter the rank or skill-level, can take something away from it.
If you enjoy this article, be sure to also check out our first Episode on How to Crossfire.

Origin: What Are Flashes?
First off, we have to go on a short field trip and take a closer look on the real-life model for the popular video game flash: the military device commonly known as a “stun grenade”, “flash grenade”, or “flashbang”.
This device is used to temporarily disorient an enemy’s senses in combat by producing a blinding flash of light of around 7 megacandela (Mcd) and an intensely loud “bang” of greater than 170 decibels (dB).
In video games, especially in the sub-genre of shooters, flash grenades are often referred to with their shorter nickname “flash” and are always designed to disturb or even immobilize the player in-game.
Many different game titles adapted the basic principle of a flash over the years, for example, numerous AAA games of the Counter-Strike or Call of Duty series. Nowadays, almost every newly published tactical shooter has some form of it implemented.
Likewise, early on in the development process of Valorant, Riot decided to also equip various agents and therefore players with abilities that resemble the functionality of a flash.
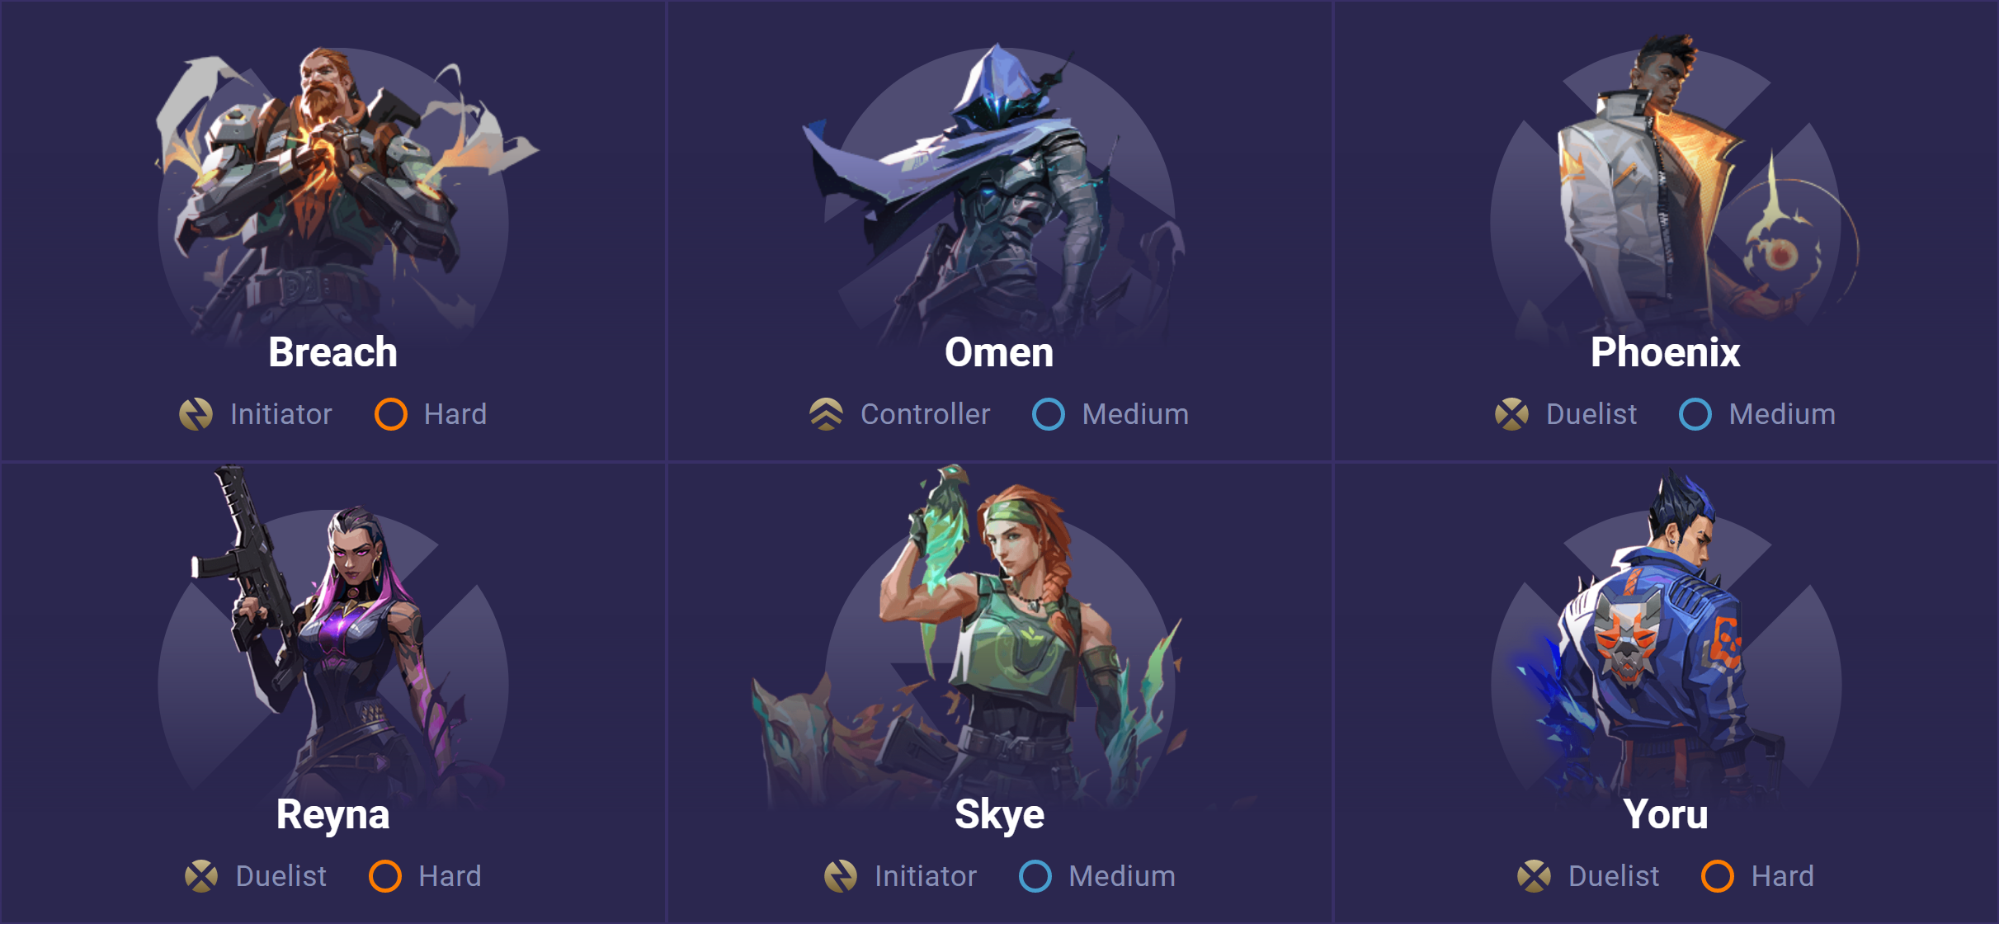
Today, Valorant already has six agents that are capable of flashing players with one of their abilities and the number is only going to go up with future agent releases each new Act.
Even though all the different flashes in Valorant follow one common principle, their characteristics are very unique and distinguishable.
Some have a longer blinding duration but are hard to handle, others are quick and easy to throw but aren’t really versatile in their application. Every flash in Valorant has its own special features and strengths and weaknesses that come with it.
In the following section, we are going to cover all these different features, the associated statistics and a summarising ranking in which the pros and cons of every flash are weighed up against each other.
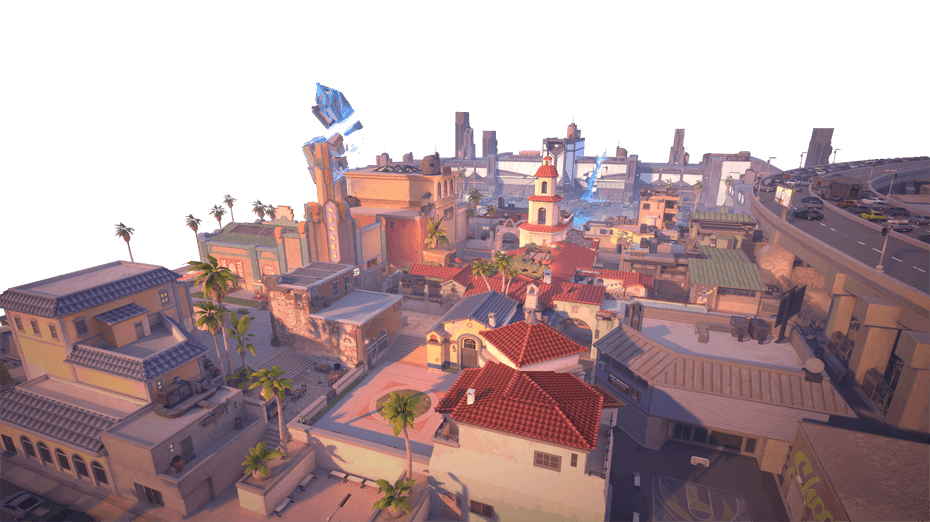
Comparison: All Valorant Flashes
As already mentioned above, in the current version of Valorant (Patch 2.01) an overall number of six agents possess an ability considered as a flash.
Now, we are taking a closer look at each and every one of these flashes, their respective agents, pros, and cons in both a teamplay context as well as a solo-player context.
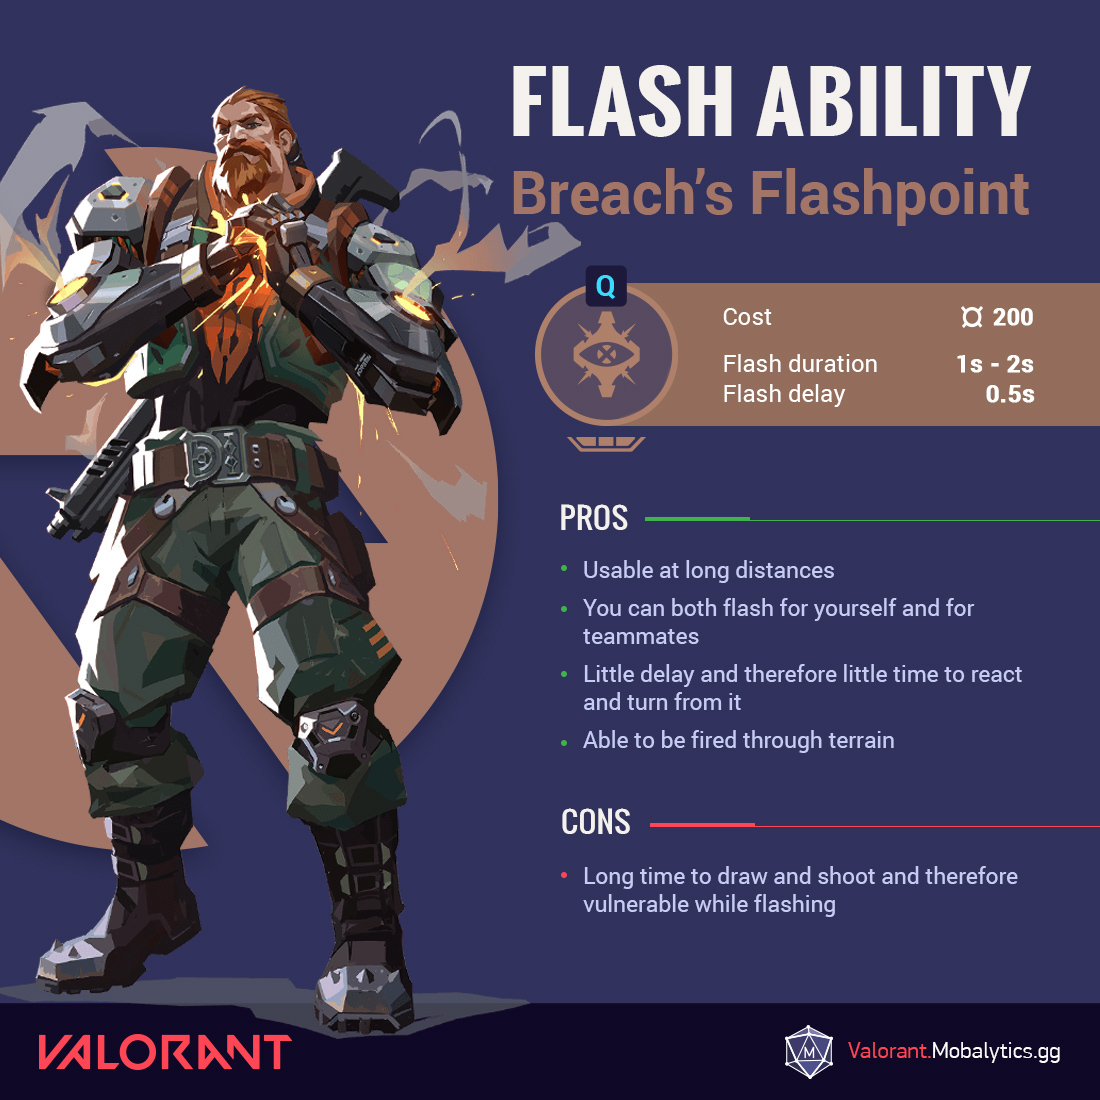
Breach’s Flashpoint
See Flashpoint in action:
Pros:
- Moderate flash duration but times three (max. three charges per round)
- Usable at long distances
- Very versatile, you can both flash for yourself and for teammates in many different situations
- AAA – almost always affordable (¤ 200 per charge)
- Little delay and therefore little time to react and turn from it
- Able to be fired through terrain
Cons:
- Not ideal for agile in-combat use since the time to draw and shoot the flash is noticeably high. You’ll need to choose safe spots to flash from
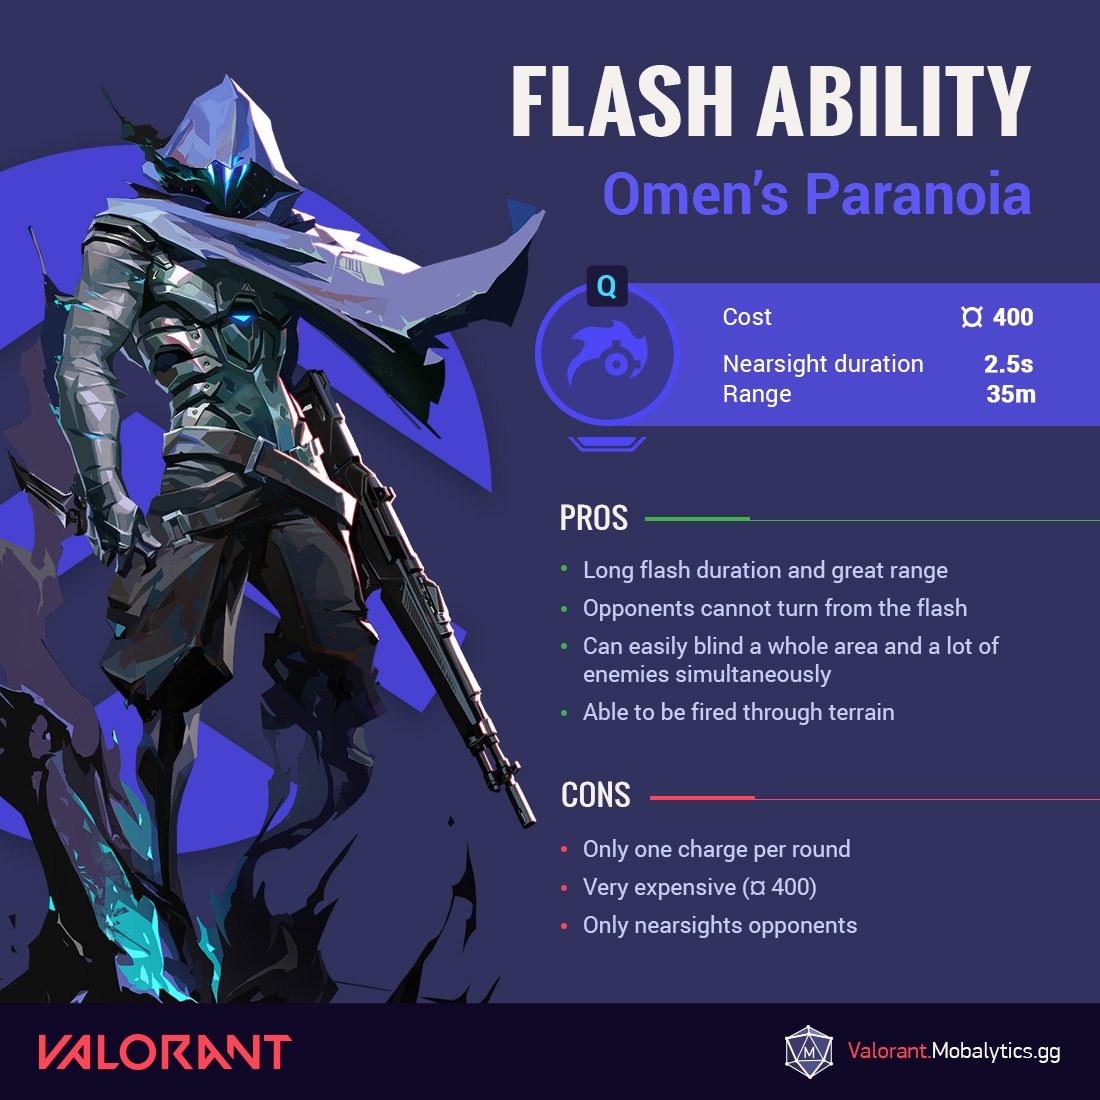
Omen’s Paranoia
See Paranoia in action:
Pros:
- Long flash duration and great range
- Cannot turn from the flash, i.e. no line of sight necessary
- Pretty versatile, it’s helpful both for yourself and in setups for teammates
- Can easily blind a whole area and a lot of enemies simultaneously
- Able to be fire through terrain
Cons:
- Only one charge per round
- Very expensive (¤ 400)
- Enemies very close by can still see you → not suitable for self-use in close quarters
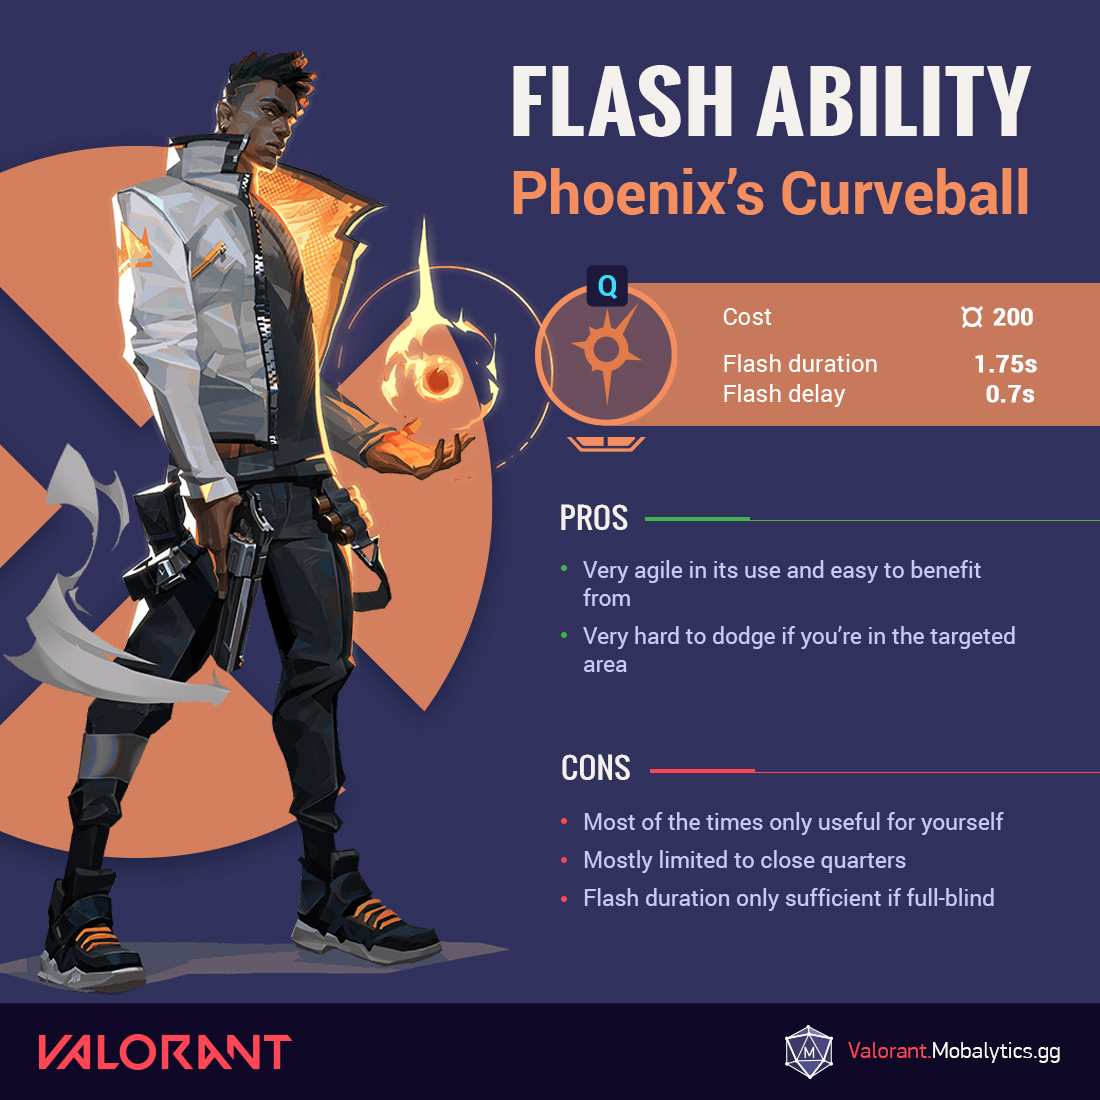
Phoenix’s Curveball
See Curveball in action:
Pros:
- Very agile in its use and easy to benefit from since there is basically no delay between the pop of the flash and you coming around the corner
- Very hard to dodge if you’re in the targeted area
- Two charges for a relatively low cost (¤ 200 per charge)
Cons:
- Pretty one-dimensional / not versatil, most of the times only useful for yourself
- Mostly limited to close quarters
- Flash duration only sufficient if full-blind
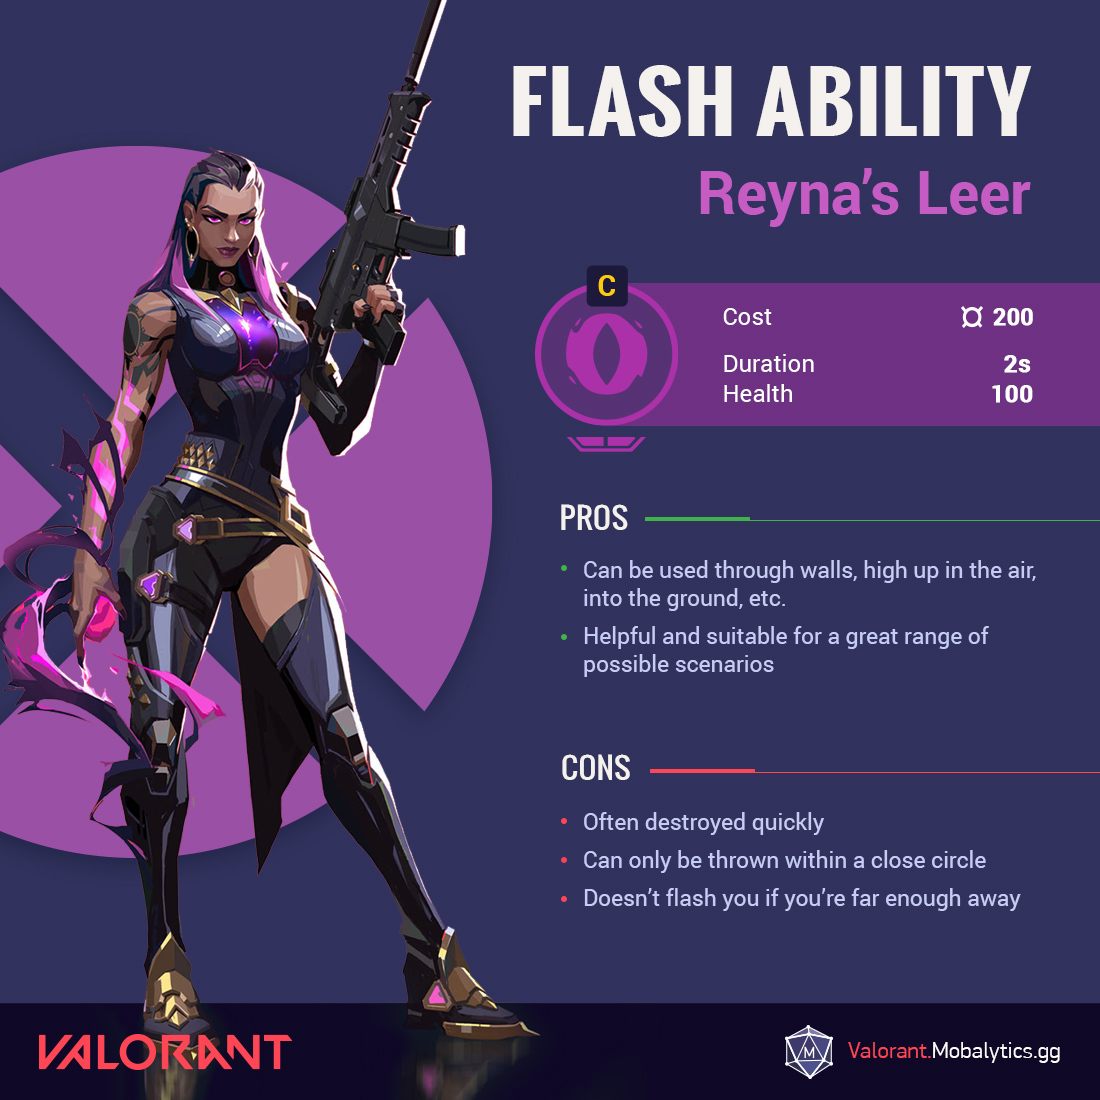
Reyna’s Leer
See Leer in action:
Pros:
- Very agile, can be used through walls, high up in the air, into the ground, etc.
- Helpful and suitable for a great range of possible scenarios
- Good flash duration for a fair price (¤ 200 per charge)
Cons:
- Often destroyed quickly, therefore shortens the overall flash duration
- Not really applicable over a long distance, only partially suitable for supporting teammates
- Doesn’t flash you if you’re far enough away (the case for some Operator angles)
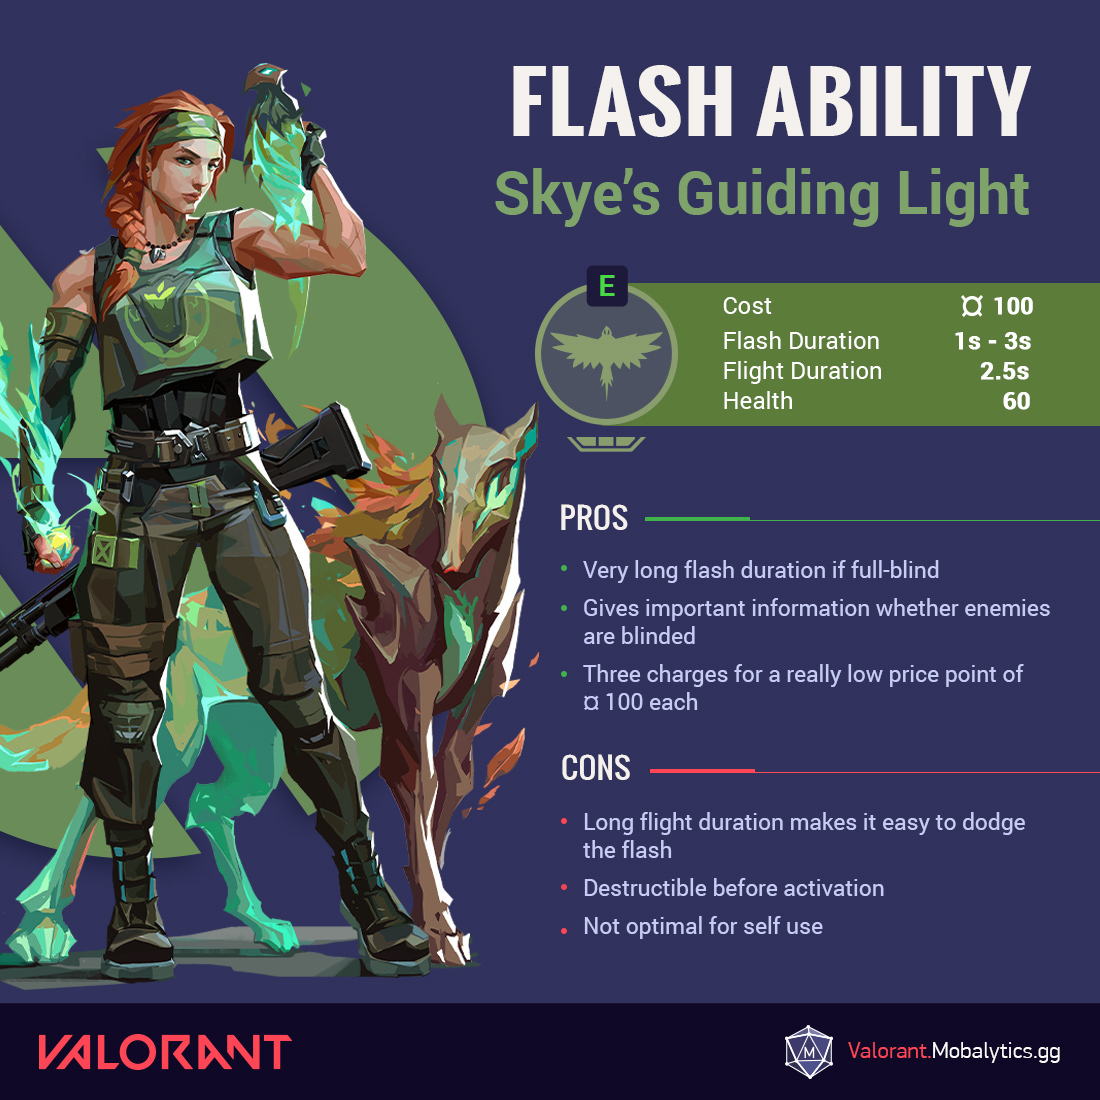
Skye’s Guiding Light
See Guiding Light in action:
Pros:
- Very long flash duration if full-blind
- Supplies important information whether enemies are blinded
- Three charges for a really low price point of ¤ 100 each, making it very affordable
Cons:
- Long flight duration enables enemies to dodge the flash since they know it’s coming
- Destroyable (but hard to hit mid-air to be fair)
- Not really versatile → self-use is tricky and very situational compared to supporting teammates with it
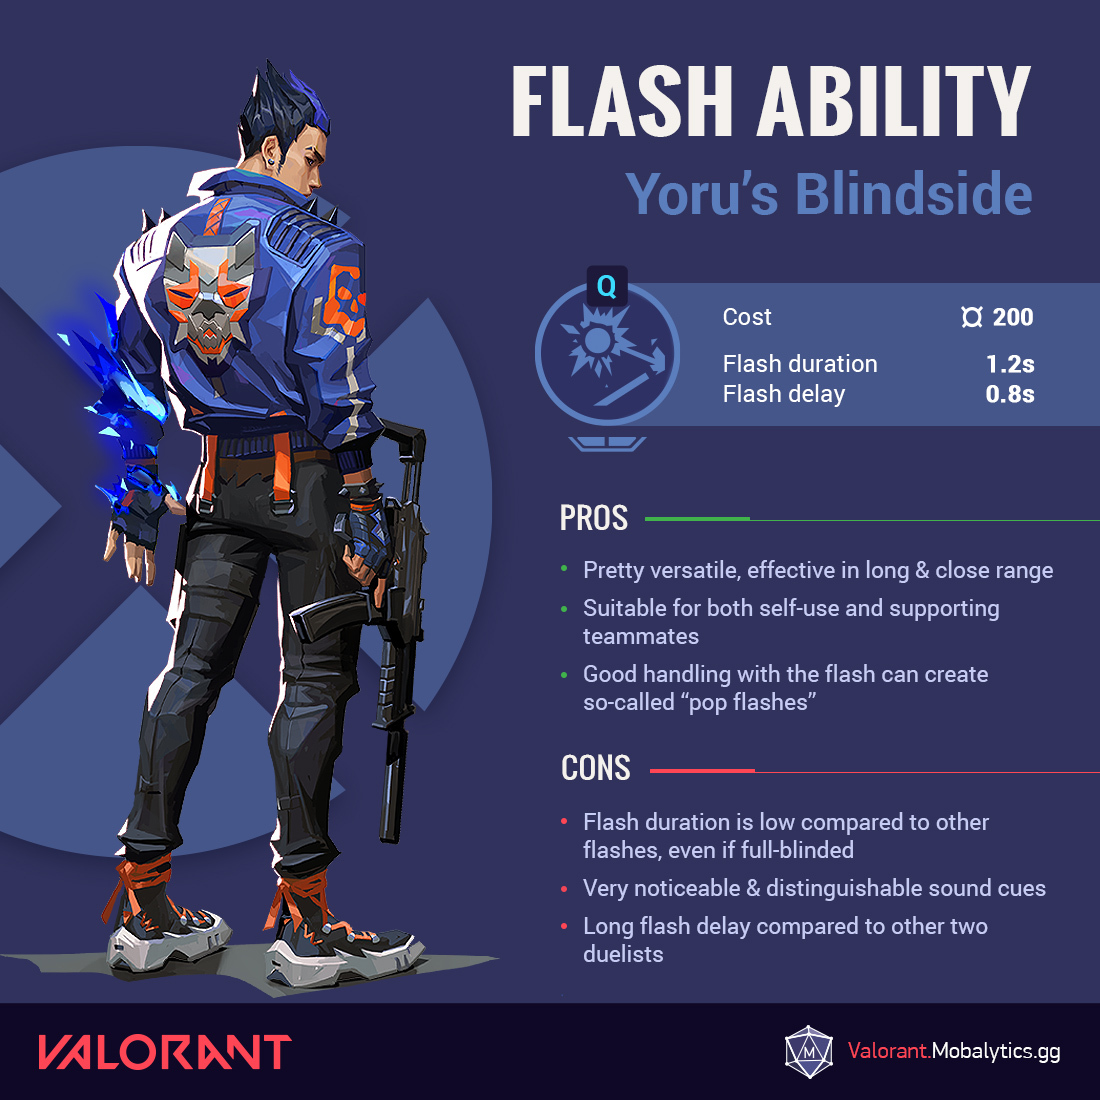
Yoru’s Blindside
See Blindside in action:
Pros:
- Pretty versatile, effective in long and close range, and therefore suitable for both self-use and supporting teammates
- Two charges for a relatively low cost (¤ 200 per charge)
- Good handling with the flash can create so-called “pop flashes” which are basically impossible to dodge and blind many positions at once
Cons:
- Flash duration is relatively low compared to other flashes, even if full-blind
- Very noticeable and distinguishable sound cues, therefore possible to react to
- Flash delay adds to the time-to-react factor mentioned above
Flashes Tier List (Self-Use vs Support)
Now that we’ve learned about all the flashes, it’s time to rank them!
We’ve created two separate lists, one that ranks flashes based on using them for yourself, and a second list that ranks them based on their ability to support teammates.
Best flashes for self-use:
- Reyna’s Leer
- Phoenix’s Curveball
- Breach’s Flashpoint
- Omen’s Paranoia
- Yoru’s Blindside
- Skye’s Guiding Light
Best flashes for supporting teammates:
- Breach’s Flashpoint
- Skye’s Guiding Light
- Omen’s Paranoia
- Yoru’s Blindside
- Reyna’s Leer
- Phoenix’s Curveball
We hope these lists not only help you build your comps, but also give you an idea of what you’re facing when you’re enemies are using these agents. See you next time.
Learn about all Valorant agent abilities and more at the Mobalytics Valorant site!