 League of Legends
 Teamfight Tactics
 Legends of Runeterra
 Valorant
 Lost Ark
 Destiny 2
 Diablo 4
 Download APP
How to Play Moon Rocks
What’s the good news folks?
I know for me, the hype from Shurima has still not worn off and I am crafting like mad trying to make all the disparate pieces fit together.
My name is Jordan “WhatAmI” Abronson and today I’ve got the lowdown on my newest brew.
Moon Rocks
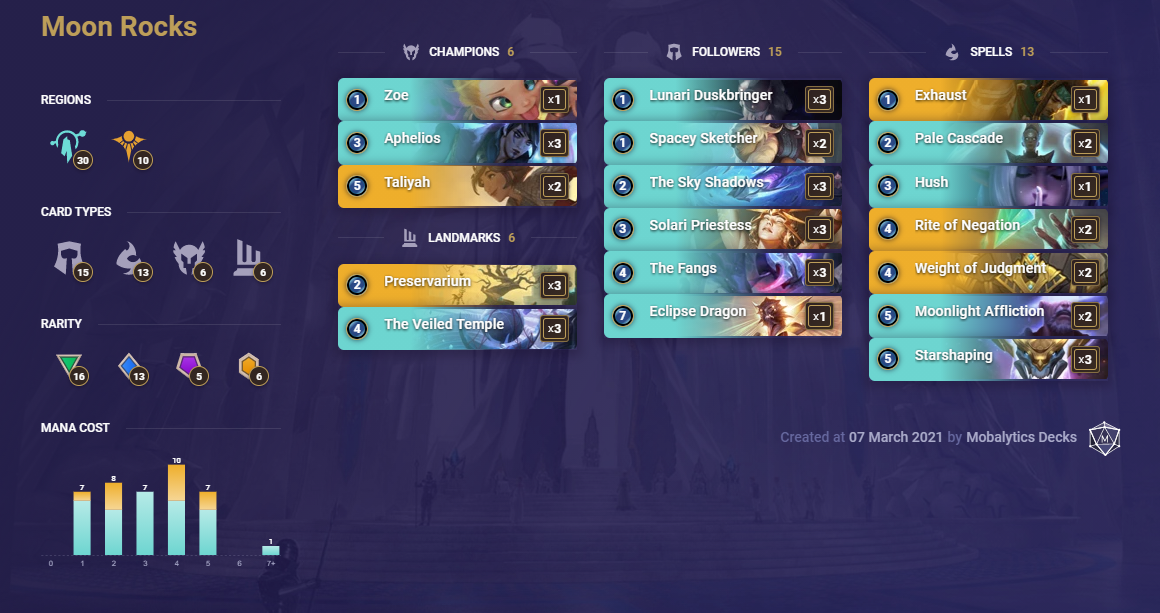
Deck Code: CMAQOAYJJFKGBWAB3EA5WAO5AEBAIAYJBURUWVQEAQDQIDJ3JEAQGAYJBFKWI
There are two universally shared traits of tier one decks.
One, they can easily adapt their flex slots to combat different and shifting metagames, and two they inhabit more than one quadrant of the “Aggro, Control, Midrange, Combo” diagram.
While not every deck that meets those two criteria will make the cut, any deck that does is most definitely worth a second look and some solid testing.
This deck gets to play as both a control deck and a combo deck.
Your base plan is to stall out the board and do Targon things while waiting for your invoke value to take over the game.
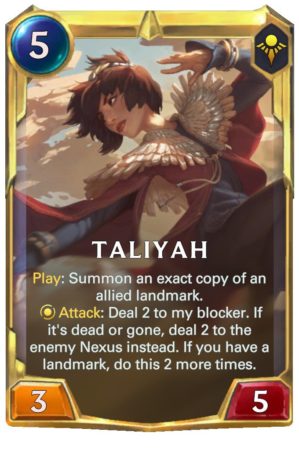
But occasionally you get to go Veiled Temple into Taliyah, and that’s when the fun really starts.
If you want to talk about flex slots this deck has nothing but.
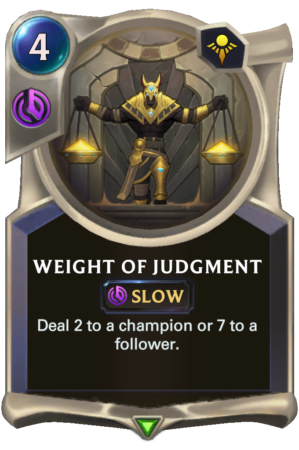
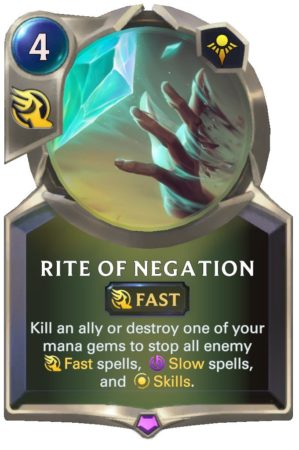
Need to deal with crazy over-the-top decks? Drop the Weight of Judgment and beef up on Rite of Negation.
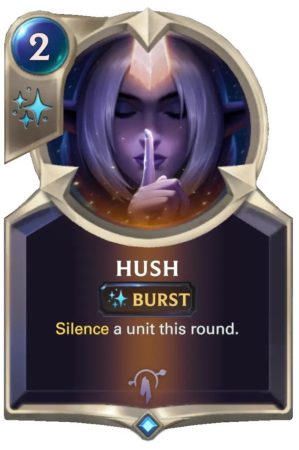
Fiora/Shen deck is scaring you? Time to ditch those Lunari Priestesses for some more Silence effects.
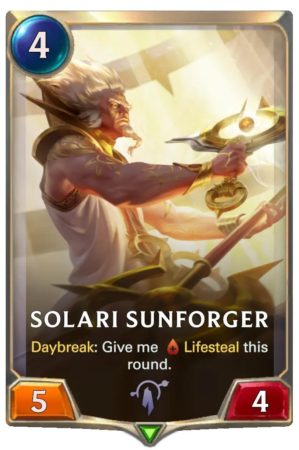
Aggro got you down? Why not trim some silence or that Eclipse Dragon for a few Solari Sunforgers.
This deck has so many interesting sequences, lines, and decision trees, and is an extremely complicated but very rewarding deck to pick up.
Let’s get into exactly how it all breaks down into phases of play.
Phase One: Early Trades/Pressure and Aphelios
Like any deck that defaults to control the early bits of the game can be rough.
We do have six one drops to help smooth things out against aggressive opponents though, which is nicer than many other decks whose curve starts on two or three.
On top of that our two drops will often cost net-zero mana, trading up and helping us retrieve some of that tempo.
If our opponent isn’t being aggressive then we got to be making the attacks instead and that 3/1 stat line might be flimsy, but it packs a punch.
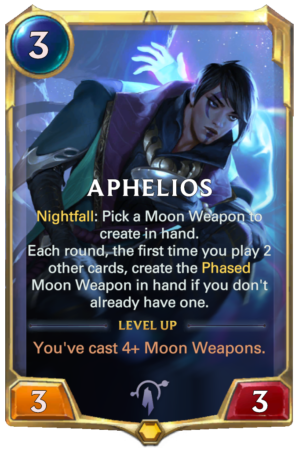
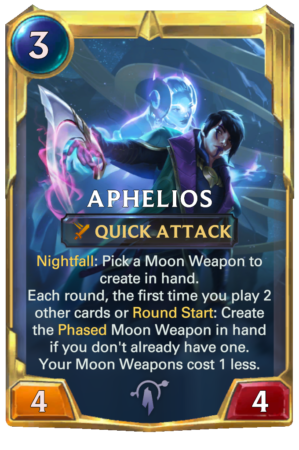
If we have Aphelios then he will often turn the corner on his own as early as turn three or four.
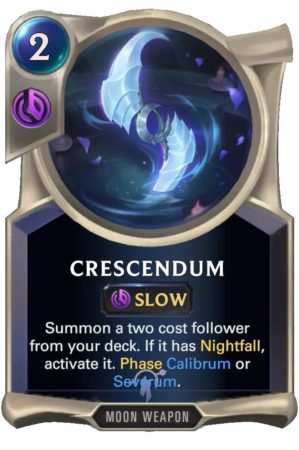
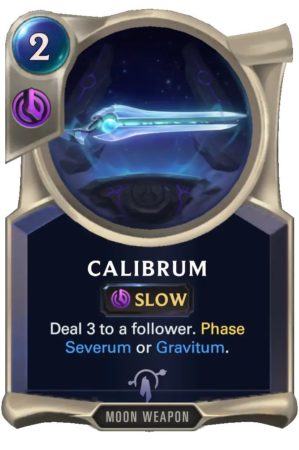
Crescendum costs you zero mana in this deck, so you can quite often Crescendum and Calibrum in the same sequence of plays, turning the tide of the battle distinctly in your favor.
Lacking an Aphelios is always a little bit rougher but the Priestesses, Fangs, or even occasionally a stray Zoe can help you out, providing necessary blockers, life gain, and paving the way to the oncoming value turns.
Phase Two: The Temple
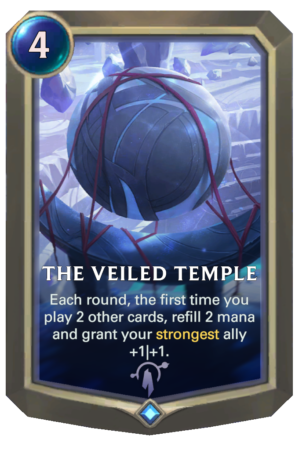
Here we are either playing our big value Invokes to try to turn the tide, or attempting to go off with Veiled Temple.
Y’all know how the invoking side of this works at this point so let me break down Temple for you.
One temple is a power play all on its own, slowly ramping up the power of your creatures while generating you extra mana each turn, two however is downright nasty.
Two temples that activate the turn they hit play are often game-breaking.
Because Taliyah makes an exact copy of the landmark she sees, she’ll make a Veiled temple that reads 1|2.
That means that any spell, an Aphelios Gun, Duskpetal Dust, Pale Cascade, Hush, or random Spacey Sketcher pull, will give you four mana and +2|+2.
That is a huge corner turn and combined with the fact that you will be getting four mana a turn and gigantic creatures for the entire rest of the game is often enough to put it away right there.
How do we actually win though? Let’s check out phase three.
Phase Three: Getting it Done
There are generally two ways you close a game out.
Either a Starshaping gives you a giant Celestial that you beat your opponent to death with, or your Temples have made a large threat that Aphelios confers Overwhelm upon.

Sometimes you can even just straight-up run your opponent out of value with the quality and quantity of engines that the Invoke half of this deck provides.
This deck lacks the Atrocity punch of its Shadow Isles cousins but can make up for that with the protection that Rite of Negation offers to key turns.
Instead of looking to end the game extremely quickly after one hit from a giant Celestial and a face-pointed Atrocity, we look to end in two turns with backup from what is effectively a Deny.
Last but not least, don’t forget the offensive power of your Moonlight Afflictions.
If a cocky opponent only leaves up a couple of blockers then you can find some very surprising lethal attacks out of absolutely nowhere.
Key Choices
Usually, this is where I would go into specific matchups tables, but with the drop of Shurima still, just a week ago we don’t really have a stable metagame to look at.
Instead, I’ll discuss some specific deck choices I made in the list I provided and how you might alter the deck to fit certain playstyles.
Weight of Judgment
The first question I get a lot is “What the sweet sun gods are Weight of Judgment doing in your deck?”
And the answer is, really a lot more than you think.
While four mana is a bit of a steep price, some things just NEED to come off the board that this card will help you deal with.
Early on it will hit Twisted Fate, Aphelios, Lucian, Zoe, and Leblanc, all dangerous threats in their own right.
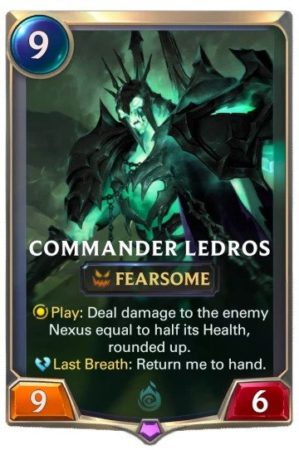
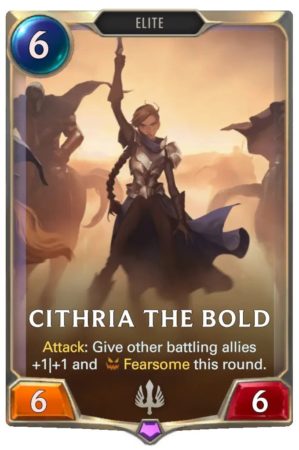
Later you can even target a Ledros or a Cithria with it quite nicely, and with one or even two temples in play, the mana cost won’t even bother you that much.
That said, the card is definitely negative tempo in a deck that really needs positive tempo cards.
If you think you can dodge the fishy menace is then you might be able to get away with cutting it and trying out the spicy tech of Zenith Blade for faster overwhelm kills.
Watch out for those turn five leveled Twisted Fates though, and don’t say I didn’t warn you.
Taliyah
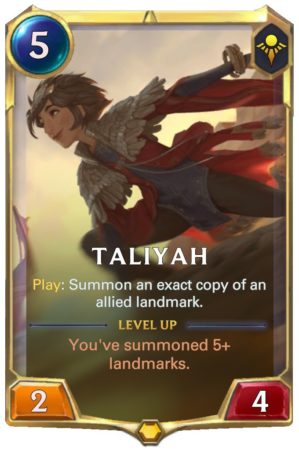
The two that pop up here are “Isn’t Taliyah only good with Veiled Temple?” and “Why are you only running two of her if that combo is such a huge part of the deck?”
They both connect and have an important grounding in deckbuilding theory so I’ll answer both at once.
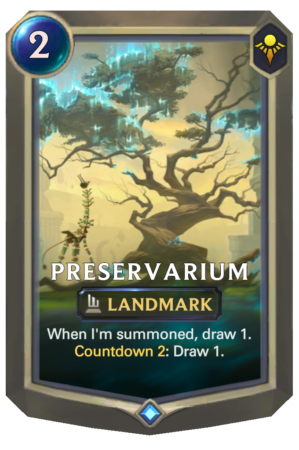
She is mostly only good with Temple, yes, though she can occasionally get a bunch of cards off of a Preservarium.
As to the second, when one card is ok, and another card is absolutely amazing, but only with the first one, a great way to make it much more likely you have either both at once or only the first one, is to play three copies of the first and two of the second.
This significantly cuts down on the times when you have a dead Taliyah in hand, let alone two and you’re never going to be too sad to see a lonely Veiled Temple.
We also coincidentally free up a champion slot to drop in a cute one of Zoe.
Conclusion
We’re still just at the beginning of this new meta, so any new spicy takes definitely come with the asterisk of *to be refined and improved, but this one helped get me to masters this season, and I think has earned its spot in the “to be looked at,” pile.
It’s also an enormous amount of fun to play.
So I like having four more mana than my opponent and taking ten different actions in the same turn, sue me.
If you do too then this is the deck for you. Good luck out there on the Shuriman ladder.
Thanks for reading! If you have any questions, feel free to ask WhatAmI during his streams (around 10AM PST basically every day).
WhatAmI streams at twitch.tv/xxwhatamixx around 10AM PST every day
Subscribe to our newsletter:
Don’t miss out on all of the latest LoR content!