 League of Legends
 Teamfight Tactics
 Legends of Runeterra
 Valorant
 Lost Ark
 Destiny 2
 Diablo 4
 Download APP
How to Play Bloodmoon (Diana + Draven)
No, not that Bloodmoon Magic the Gathering players.
We’ve done a bunch of interesting things lately in the Runeterra ‘verse but we haven’t felt silly enough to bring lands into the picture just yet.
Welcome everyone, I’m Jordan “WhatAmI” Abronson and today we’re going to talk about an interesting new take on an old concept in the form of Targon/Noxus midrange that uses Diana and Draven.
We’ve covered a ton of other decks recently so be sure to check out our previous deck guides!
Bloodmoon
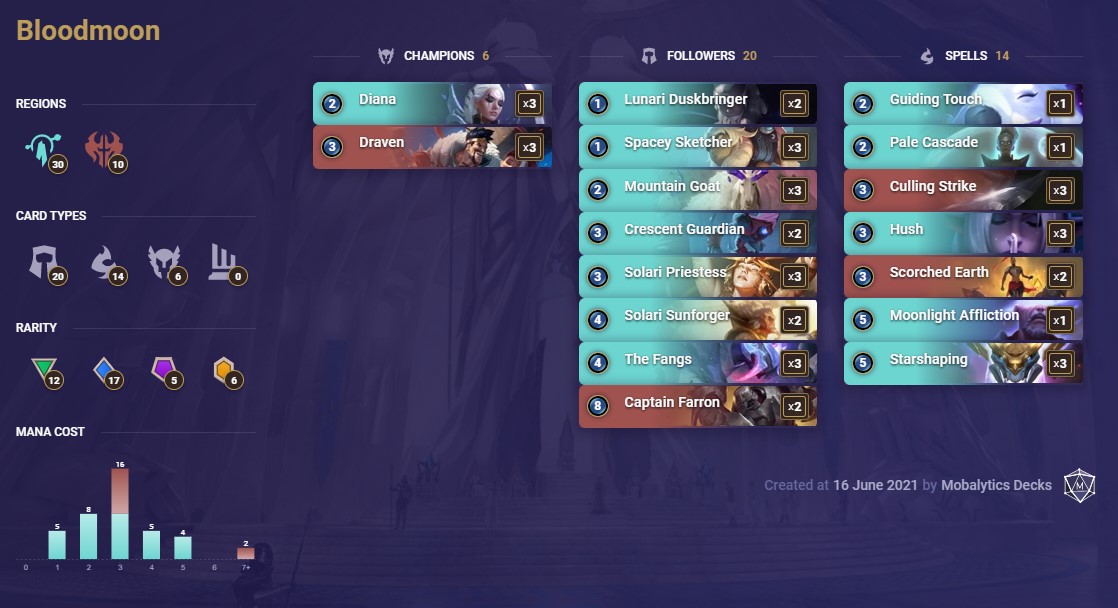
Deck Code: CEBAOAYJHBKFKVS4MDOQCAQBAMCBIAYDAMETSSKZAEBQGDIBAEBTGAIDAMEQ2IZT
Now you might quite fairly take your first glance at this and wonder “ok, what is this random pile of un-cohesive nonsense doing in a WhatAmI deck guide?” So instead of jumping right into our game plan, I’m going to talk about the deck choices for this one right at the top.
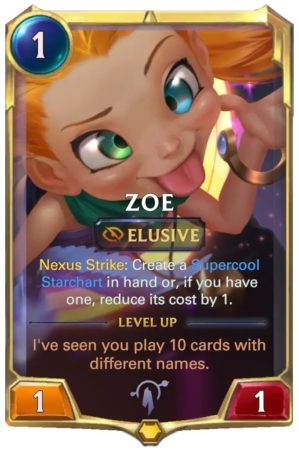
The first conspicuous absence is the friendly neighborhood star terror of Zoe. There are two main reasons behind this choice.
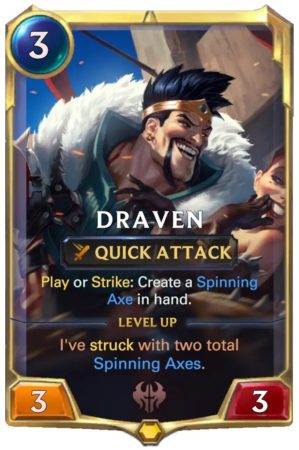
Firstly, both Diana and Draven are extremely powerful tools. They generate value, apply pressure, and clog the board. Not much more a midrange monster can ask for than that.

Secondly, this deck was originally constructed as part of a tournament lineup, though it does quite well on ladder as well. Being able to keep the option of Zoe open for decks that can make better use of her is quite worthwhile.
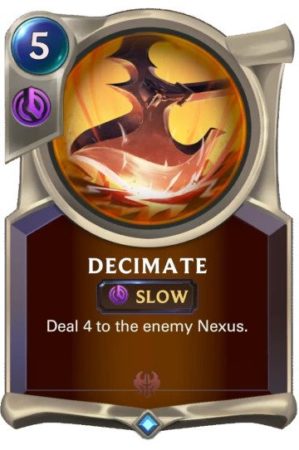
For the other eyebrow raisers here I will note that Overwhelm is a very worthwhile and betimes overlooked mechanic, having answers to landmarks is a big deal, and Decimate is a better card than most folks want to give credit for.
Phase One: Tempo Creation
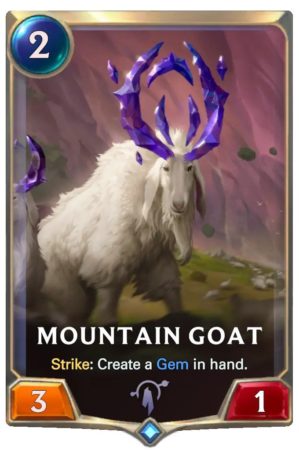
While we’re not exactly swarming the board with one drops the first three turns of our game can pack a surprising amount of punch. Both of our champions can come down and start trading up almost immediately while Mountain Goat and Crescent Guardian aren’t exactly slouches themselves.

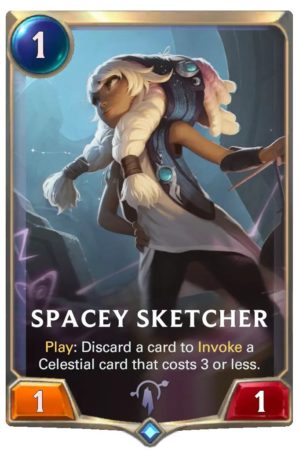
If you have a matchup where you think you can get extremely aggressive the simple curve of Lunari Duskbringer into Sketcher can yield a Charger and a seven point attack on turn two. That said I will caution folks to think through the timing of their one drops.
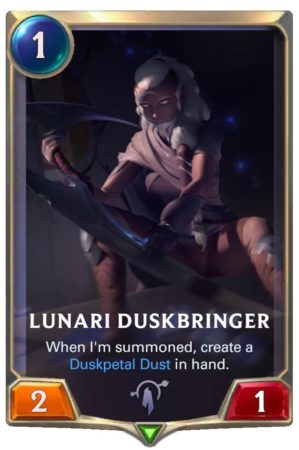
You only have so many easy ways to trigger Nightfall so you want to make sure you have your next set of turns planned out before you just play out your cards on the curve. Spacey Sketcher especially will always benefit from more information and one of your eight ways to make her create actual value instead of having to discard a card you want to play.
The last thing I’ll say about this phase is that while it is nice to be on the aggressive side, you have plenty of good follow up. Don’t be afraid to take a break and Culling Strike something to let yourself slide more comfortably into the powerful midgame plan you’ve got waiting.
Phase Two: Letting it Go
While it can be tempting to just slam your foot down on the gas the whole game that’s not really what we’re about here. We’d have a whole lot more one and two drops if that was the plan.
Instead, as we reach turns four to six we are generally expecting to fall behind on the board a bit.
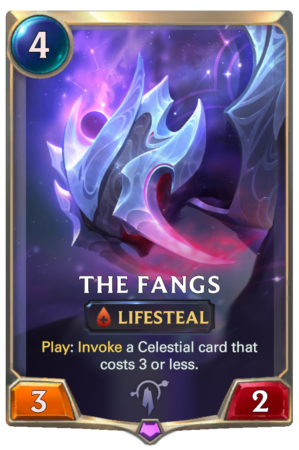
That is ok and perfectly expected. We’ve got an absolute boatload of life gain to back us up here with Starshaping, Fangs, and even Sunforger reporting for duty.
Here we are going to hold on to as much power as we can, but be ok if our opponent’s midgame plays start to outclass ours a little bit.
These are often also the turns where you will find yourself playing out your combat tricks and Solari Priestess cards.
If you make it through with the board even relatively stable you’ve probably done just fine.
One of my biggest notes on this phase is that you shouldn’t be afraid to drop Solari Sunforger on your opponent’s turn.
A four mana 5|4 that shuts down an attack step is pretty amazing whether it ends up gaining you life or not.
Phase Three: Dropping the Bombs
This deck has five solid win conditions other than just carrying a game on the back of early generated tempo. Three Starshapings and two copies of the beefy boy himself Captain Farron.
While anyone who has played decks I make will be an old hat at Starshaping based endgame plans, Farron is a bit new.
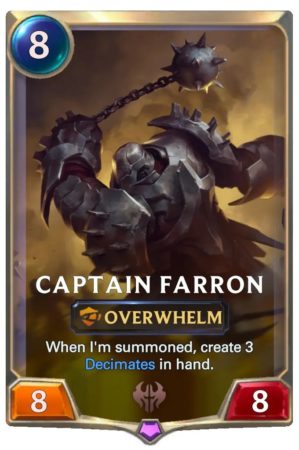
The reason that Farron is so good in this deck is twofold. First, just being able to get down an 8|8 Overwhelm can seriously swing board states.
Against a deck such as Turbo Thralls for example that is often trying to find victory off of one to three large threats, something that trades evenly with one of them can be a huge deal.
The second is that the presence of Farron in your deck will cause your opponent to have to play the entire game differently.
Without him there we are just a grindy midrange deck and if our opponent can answer a single Starshaping to stabilize and go over the top they win on the spot.

With the Captain, the entire game our opponent has to be keeping careful track of their life total. How low can they get before the Overwhelm swing turn backed by the Decimates will simply end it?
More than the power of the card itself, the way it constricts your opponent’s lines is a huge reason to bring him out to play.
Conclusion
Decks of this variety have always been my favorite kind of thing.
You have multiple different pathways to victory and are spending the entire game making decisions at each point trying to figure out which path you are on and maximize your chances of success.
On top of that, almost every card here is simply a solid tool in its own right so it’s very hard to completely brick with.
This is the type of deck that wins or loses if you are playing it and being objectively critical you will develop your skills not just with it in particular, but at Runeterra as a whole.
I might be speaking from personal bias on this last bit but I’d hazard you’ll have quite a bit of fun as well. Good luck out there y’all, and may you always invoke snake friends when you need them.
Thanks for reading! If you have any questions, feel free to ask WhatAmI during his streams (around 10AM PST basically every day).
WhatAmI streams at twitch.tv/xxwhatamixx around 10AM PST every day
Subscribe to our newsletter:
Don’t miss out on all of the latest LoR content!